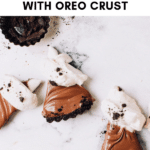
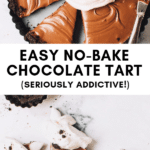
This easy no-bake chocolate tart recipe features a crumbly oreo cookie crust and a to-die-for creamy, no-bake ganache filling that’s as simple as boiling water.
Easy Chocolate Tart
I’ve been making this chocolate tart recipe on repeat since I did a variation with Baileys before Christmas. It is an incredibly simple recipe with minimal hands-on time.
Intrigued?!
What Makes THIS Chocolate Tart So Special
This isn’t just any chocolate tart; it’s the ultimate chocolate lover’s dream. It has a crumbly, chocolatey crust coupled with a creamy, rich ganache filling that will melt in your mouth. Not only is it decadently delicious, but it’s also incredibly easy to make!
Here’s what’s to love:
- No-Bake Filling: There’s no need to worry about over-baking or under-baking because the filling is no-bake. Just mix, pour, and chill.
- Simple Ingredients: The ingredients are basic and easy to find, which makes this recipe accessible for anyone.
- Gentle Melting Method for Chocolate: I use a failproof, gentle method of melting the chocolate with hot cream, making it nearly impossible to seize the chocolate, ensuring your ganache is smooth perfection every time.
With these foolproof features, even a beginner can make this tart successfully, while experienced bakers will appreciate its gourmet taste and texture.
What You Need for this Easy No-Bake Chocolate Tart Recipe
Before you get started on this mouthwatering dessert, you’ll want to gather all your ingredients, consider any variations, and make sure you’ve got the right tools on hand.
Chocolate Tart Ingredients
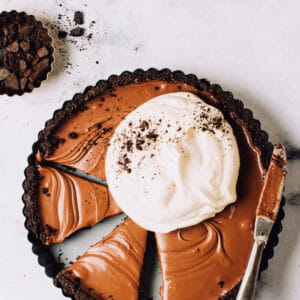
Rich chocolate ganache in an oreo crust. What could be better? Here’s what you’ll need:
Chocolate Tart Shell Ingredients:
- Chocolate Cookie Crumbs: The base of the crust, the dark chocolate oreo flavor provides a rich and chocolatey foundation. You can buy your own or process oreo cookies or chocolate wafers to fine crumbs using a food processor.
- Granulated Sugar: Adds sweetness to balance the cocoa in the cookie crumbs.
- Melted Butter: Binds the crust ingredients together.
Ganache Filling Ingredients:
- Dark Chocolate: The star of the show, providing deep chocolate flavors.
- Heavy Cream: Also called whipping cream or 35% m.f. cream, this adds creaminess and helps to melt the chocolate into a smooth texture.
- Softened Butter: Gives the ganache extra richness and a glossy finish.
What Chocolate Should I Use?
The ganache filling is luscious and creamy with a bit of chew like a really thick hot fudge. Using dark chocolate makes for a deep and rich flavour. One thing to consider is that with so few ingredients, the flavor of the chocolate itself really shines through.
I stock up on Lindt dark chocolate in bulk at Costco, but I’ve found massive 500g grocery-store-brand Swiss dark chocolate bars are also great and a fraction of the price.
Just choose chocolate you’d consider worth stealing a few nibbles of straight from the baking drawer. If that’s Chipits for you, great.
Variations and Substitutions
Want to add your own twist? Feel free to get creative with these ideas:
- Swap Out Tart Shell Flavor: Use graham cracker crumbs instead of chocolate for a different crust.
- Change the Flavor: Infuse the whipping cream with mint or orange zest for a unique flavor.
- Different Chocolate: Use milk chocolate or semi-sweet chocolate instead of dark for a different taste profile.
- Gluten-Free Crust: Swap out the standard cookie crumbs for a gluten-free variety, or use almond meal for a nutty, gluten-free base. Make sure to double-check all other ingredients for hidden gluten sources.
- Vegan or Dairy-Free Option: To make a dairy-free version, opt for coconut oil instead of butter and use coconut cream (not coconut milk). Be sure to choose vegan chocolate and cookies. There are no eggs in the recipe.
Grab These Tools
Before diving in, make sure you have the following kitchen tools to make the process a breeze:
- 9-inch Tart Pan: Ideally with a removable bottom for easy tart removal.
- Microwave-safe Bowl: For heating the whipping cream. (You can alternatively do this stovetop in a small saucepan).
- Whisk: For combining ingredients smoothly.
- Rubber Spatula: To scrape every last bit of your delicious ganache.
Now, you’re all set to create this irresistible No-Bake Chocolate Tart with Ganache. Let’s get started!
How to Make No-Bake Chocolate Tart: An Easy Guide
Once you realize how easy it is to make a crazy-delicious chocolate tart, you’ll be making it all. the. time.
Here’s a quick peek at how to make this no-bake chocolate tart:
- Combine Oreo crumbs and butter. Press into a tart pan and freeze.
- Heat cream to a simmer and pour it over chopped chocolate and cover bowl; let stand 5 minutes. Uncover and whisk to finish melting. Whisk in butter.
- Pour into prepared chocolate tart crust and chill until set.
Now here’s a bit more detail:
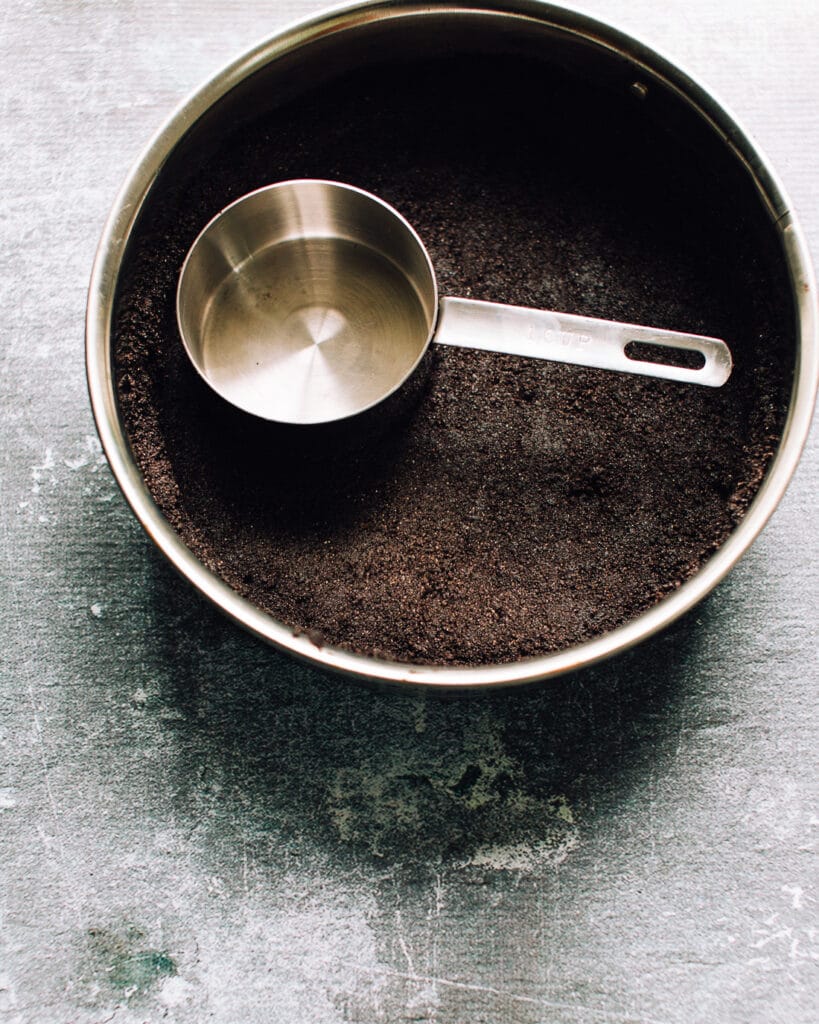
How to Make the No-Bake Chocolate Cookie Crust
- Start by gathering your tart pan and set it aside. There’s no need to preheat the oven since this is a no-bake recipe.
- In a large mixing bowl, combine the chocolate cookie crumbs, granulated sugar, and melted butter. The goal is to achieve a moist, crumbly texture.
- Press this mixture into your 9-inch tart pan, making sure to press firmly so it adheres to the bottom and sides of the pan. Use the flat bottom of a cup to help with this.
- Place the crust in the freezer for about 15 minutes to set.
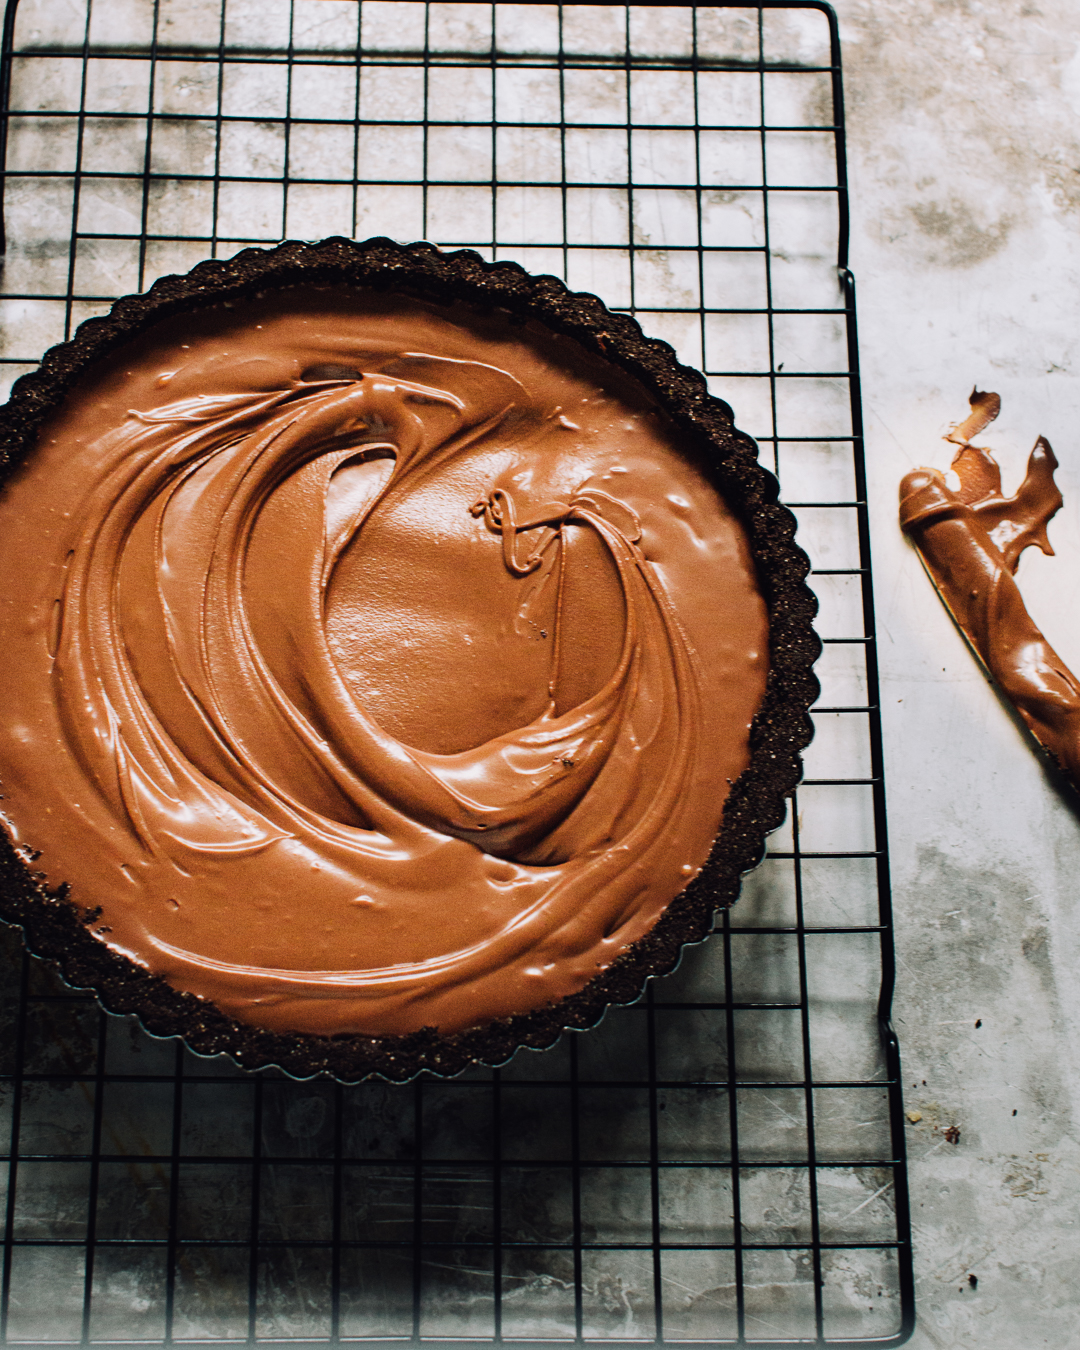
How to Make the Chocolate Ganache Filling
- While your crust is setting, place the dark chocolate in a large, heat-safe bowl.
- Heat the whipping cream in a microwave-safe bowl until steaming hot—usually between 1 ½ to 2 minutes should do it.
- Immediately pour the hot cream over the dark chocolate and cover the bowl with a large plate or baking sheet. Let it sit for about 5 minutes to melt the chocolate.
- Remove the cover and add the softened butter. Whisk the mixture until it’s smooth. If there are still some unmelted chocolate bits, microwave at 50% power in 30-second intervals, stirring between each interval until smooth.
How to Assemble Your Chocolate Tart
- Take your crust out of the freezer and make sure it’s nicely set.
- Pour the ganache filling into the crust, smoothing it out with a spatula if needed.
- Place the tart in the fridge and allow it to chill for at least 4 hours to let the ganache firm up.
And voila! Your No-Bake Chocolate Tart with Ganache is ready to be sliced and savored. Enjoy!
Chocolate Tart Make Ahead and Storage
Keeping your No-Bake Chocolate Tart with Ganache fresh and delicious is simple with these tips.
- Make Ahead: You can prepare the crust and the ganache up to two days in advance. Store the crust in the freezer and the ganache in the fridge. When you’re ready, simply assemble and chill.
- Refrigeration: Once assembled, this tart should be stored in the refrigerator. It will stay fresh for up to 5 days.
- Freezing: If you’d like to extend its life, you can freeze the tart for up to a month. Make sure it’s tightly wrapped in plastic wrap and aluminum foil to prevent freezer burn.
- Thawing: To enjoy from the freezer, thaw in the refrigerator overnight before serving.
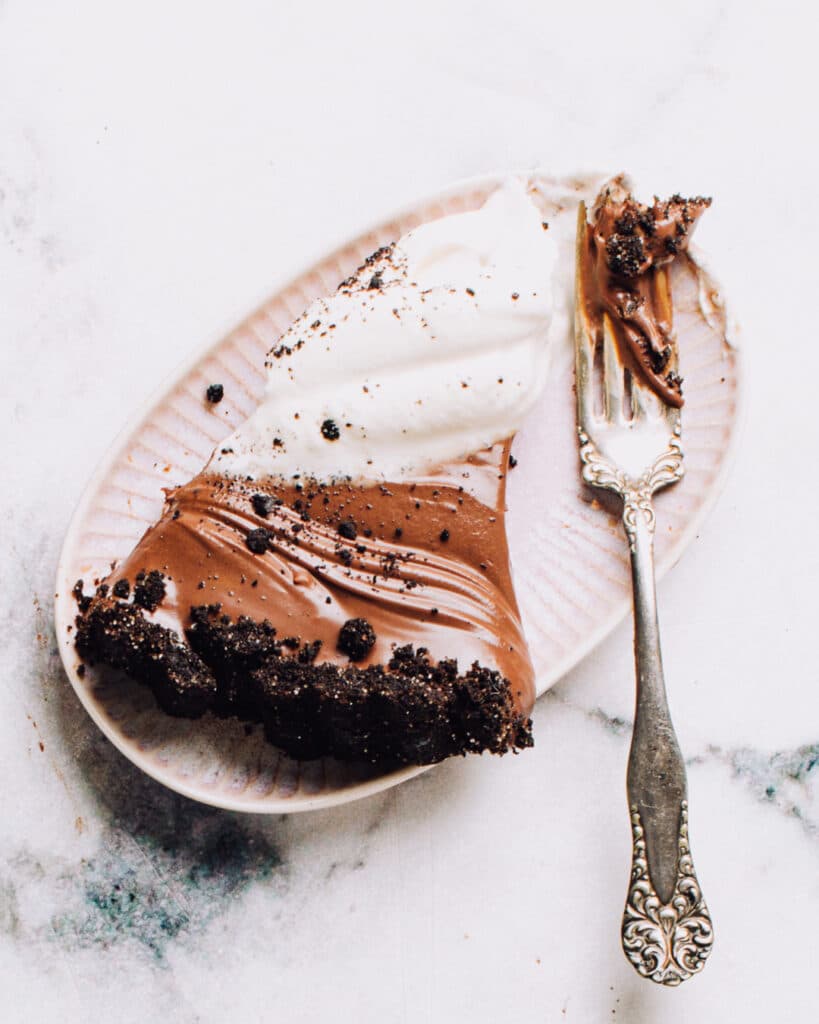
How to Serve this No-Bake Chocolate Tart with Ganache Recipe
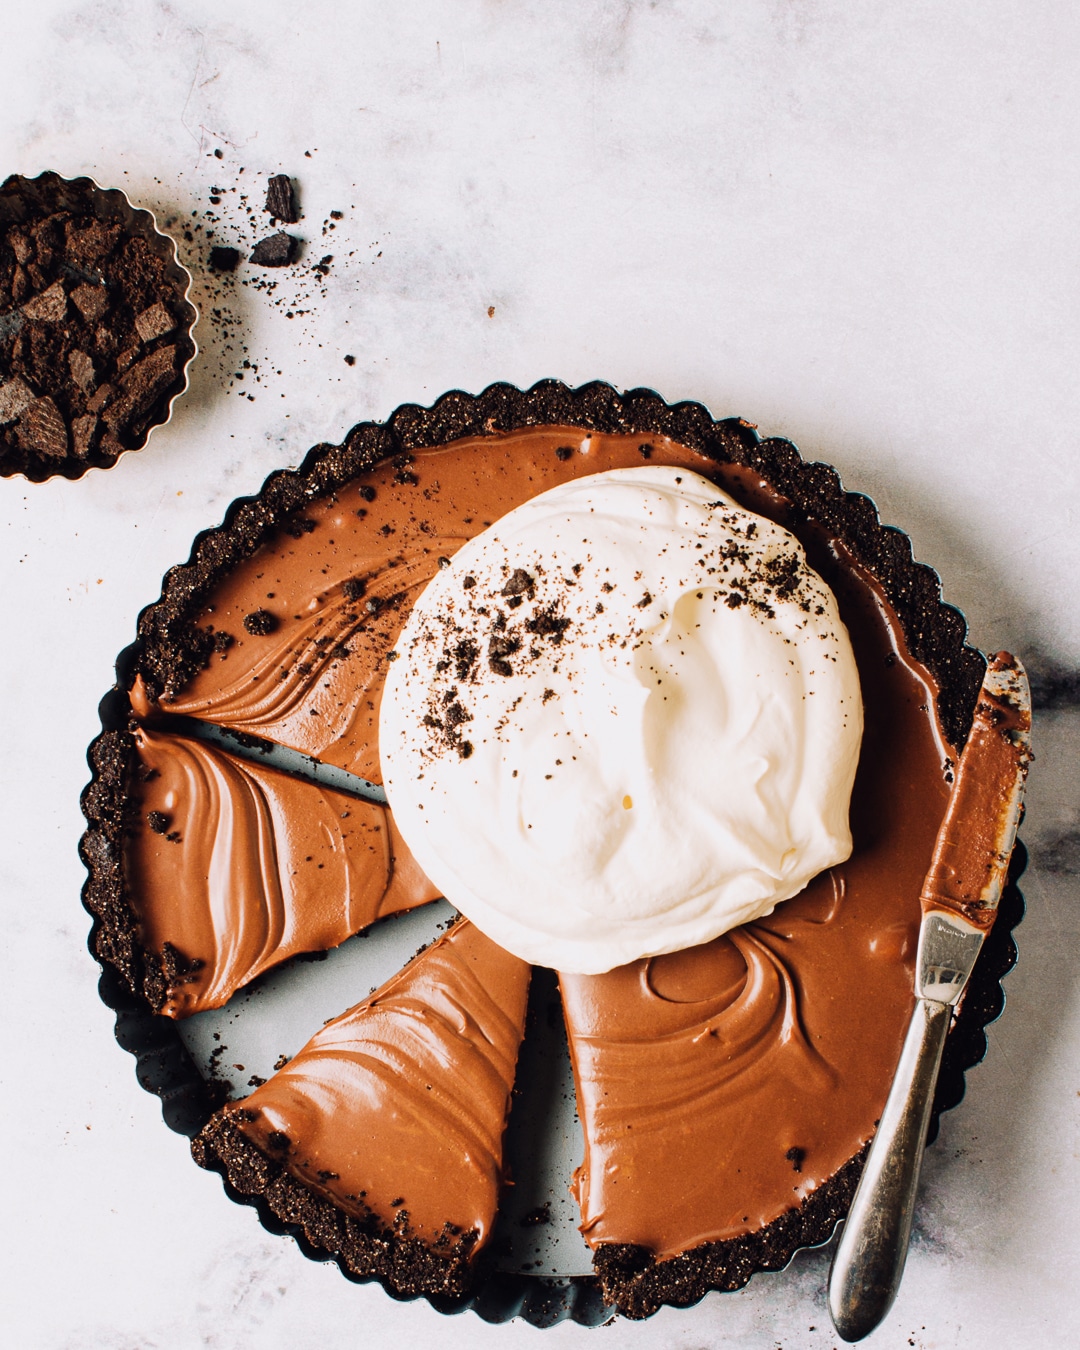
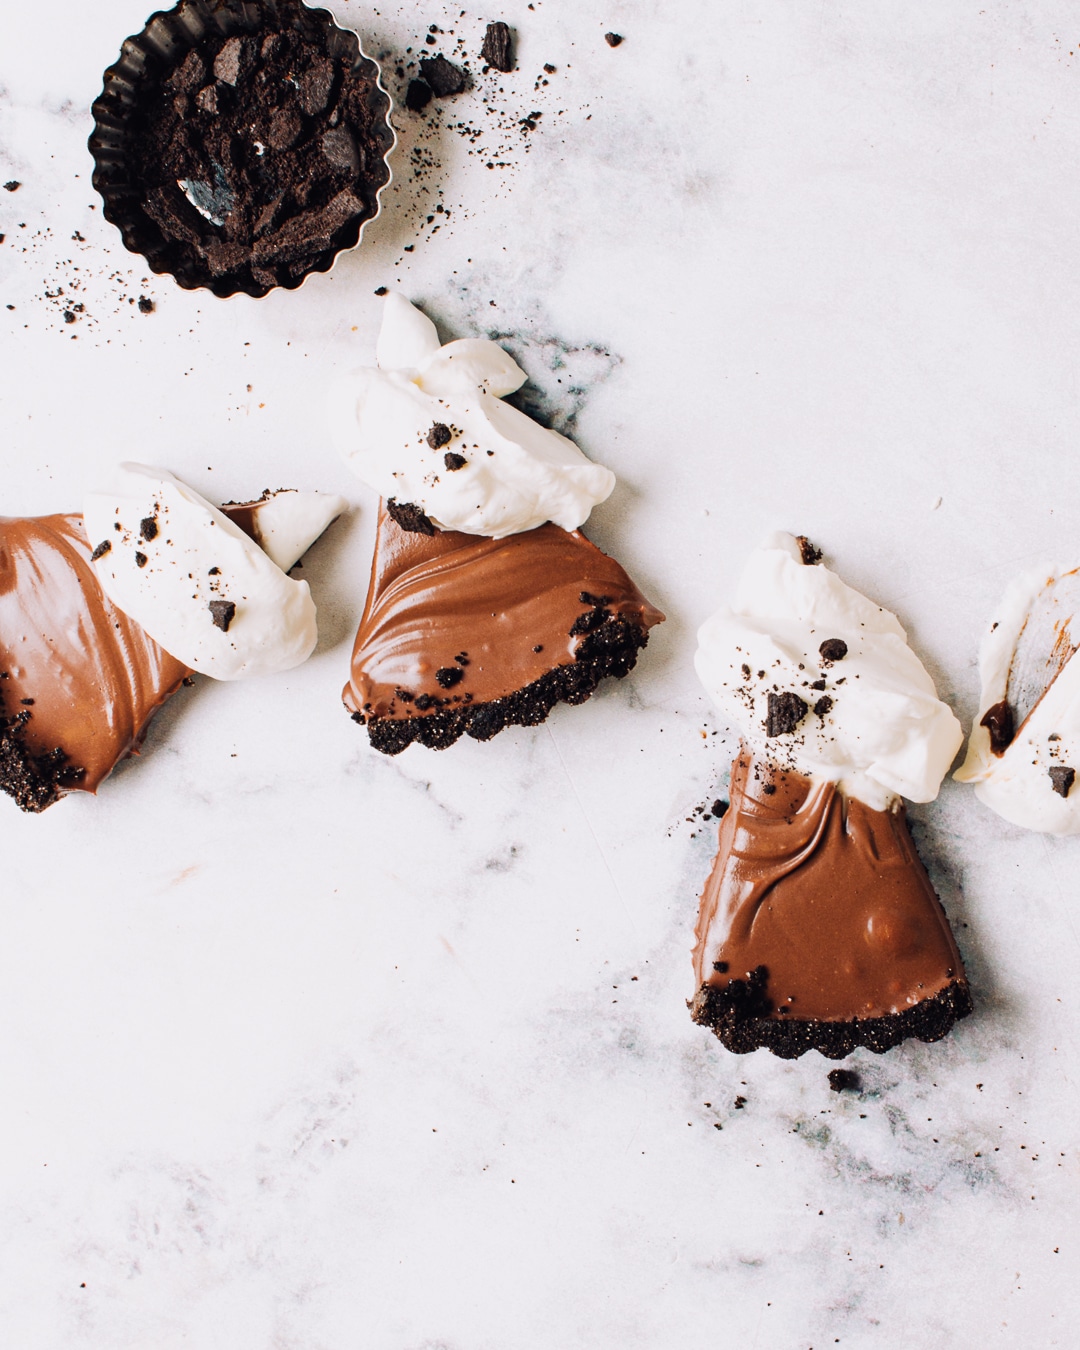
A dollop of sweetened whipped cream on top adds a welcome light, fluffy counterpoint, but a simple sprinkling of flaky salt would be enough. Here are my notes:
- Slicing: Use a sharp knife dipped in hot water for clean, easy slicing.
- Accompaniments: Serve individual slices with a dollop of whipped cream, fresh berries (like raspberries or strawberries), a drizzle of caramel sauce, or a pinch of salt (like flaky sea salt) to enhance the chocolate flavor.
- Temperature: This tart is best served chilled. Take it out of the fridge just a few minutes before you plan to serve it to maintain its texture.
- Portion Size: Given its rich flavor, small slices are usually sufficient, making it perfect for serving a larger group.
3 Most Common Mistakes When Making No-Bake Chocolate Tart with Ganache
Here are the most frequent mix-ups to avoid when making No-Bake Chocolate Tart with Ganache:
- Causing the chocolate to seize: Using the method of pouring hot cream over chocolate allows for a gentle, controlled melting process that minimizes the risk of the chocolate seizing and becoming grainy. The gradual heat from the cream ensures that the chocolate melts evenly and smoothly, resulting in a foolproof, luxurious ganache every time. Other recipes that call for a finicky double boiler method or microwaving the chocolate itself are trickier to master.
- Not Chilling the Crust: Skipping the chilling process will result in a crust that doesn’t hold its shape.
- Rushing the Ganache: Ganache needs time to set. Don’t rush this process; otherwise, it may not solidify properly.
FAQs About No-Bake Chocolate Tart
Just skimming through? Here are some quick answers to the commonly-asked questions.
FAQs About Chocolate Tart
Just skimming through? Here are some quick answers to the commonly-asked questions:
What can I use instead of chocolate cookie crumbs for the crust?
You can use graham cracker crumbs or digestive biscuit crumbs as a suitable substitute for chocolate cookie crumbs.
Can I use milk chocolate instead of dark chocolate?
Absolutely, you can replace dark chocolate with milk chocolate, but keep in mind that it will make your tart sweeter.
How can I make a dairy-free version?
To make a dairy-free version, opt for coconut oil instead of butter and use a non-dairy whipping cream, like coconut cream.
Do I have to use a tart pan?
No, a tart pan isn’t essential. You can also use a pie dish or a springform pan as an alternative.
Can I add flavorings to my ganache?
Yes, you can enhance your ganache with additional flavors. Consider adding vanilla extract, instant coffee, or orange zest.
How do I store leftovers?
For storing leftovers, tightly wrap the tart and place it in the refrigerator for up to 5 days or freeze it for up to a month.
Why did my chocolate tart not set?
If your tart didn’t set, it could be because you didn’t use enough chocolate, didn’t let it chill long enough, or used low-fat cream instead of full-fat.
What do you serve with a chocolate tart?
Complement your chocolate tart with additions like whipped cream, vanilla ice cream, or fresh berries for an extra layer of flavor.
What wine goes with chocolate tart?
A sweet, fortified wine like Port pairs excellently with chocolate tart. Other good options include red dessert wines, sweet Rieslings, or a rich Cabernet Sauvignon.
How long do chocolate tarts last in the fridge?
When stored properly, chocolate tarts can last for 4-5 days in the refrigerator.
Can you freeze chocolate tart?
Yes, chocolate tart can be frozen. Just make sure to wrap it well to avoid freezer burn and aim to consume it within a month for the best quality.
Other tested-till-perfect chocolate desserts you will love:
Best-Ever Chocolate Cheesecake
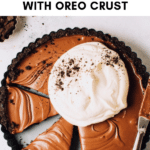
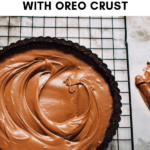
Easy No-Bake Chocolate Tart Recipe
Ingredients
For Tart Shell
- 1 ¼ cups chocolate cookie crumbs *see note
- 2 tbsp granulated sugar
- 4 tbsp melted butter
For Chocolate Filling
- 14 oz 60-70% dark chocolate chocolate chips or chopped bars
- 1 cup heavy whipping cream
- 4 tbsp softened butter salted or unsalted works
Whipped Cream, to serve
- 1 cup cold heavy whipping cream
- ¼ cup powdered sugar
- 1 tsp vanilla extract
Instructions
Prepare the Tart Shell
- Combine cookie crumbs, sugar, and butter in a 9” tart pan.
- Stir until crumbs are evenly moistened.
- Press the mixture firmly into the bottom and up the sides of the pan using a flat-bottomed cup to push it down.
- Freeze for 15 minutes.
Prepare the Chocolate Filling
- Place chocolate in a large heat-safe bowl.
- Place cream in a microwave-safe bowl and microwave on high power for 1 ½ – 2 minutes until steaming hot and bubbles appear around the edges of the bowl.
- Immediately pour the hot cream onto the chocolate.
- Cover the bowl with a baking sheet or large plate and let stand for 5 minutes to melt the chocolate.
- Remove the cover, add the butter, and whisk until smooth. Chocolate should finish melting as you whisk. If not completely melted, microwave on 50% power for 30-seconds, and stir again until smooth.
- Pour into the cooled shell. Chill for 4 hours before serving. Note: For tidy slices, place the chocolate tart in the freezer for 15 minutes before cutting. Let slices come to room temperature on their plates before serving for the best flavour and mouthfeel.
For Whipped Cream
- Pour the cold cream into the bowl and beat on medium-high speed. Once it starts to thicken, add the powdered sugar and vanilla.Continue beating until soft peaks form (the cream holds its shape but the tips curl over).
- Serve tart slices with a dollop of whipped cream.
Notes
Nutrition
Nutrition information is automatically calculated, so should only be used as an approximation.


Can I make the chocolate no bake tart into mini- bites like the cheery cheese cake bite size?
Hi Nance, what a great idea! Sure you can. I’d highly recommend using paper or foil liners for the muffin tin. Press about 1 tbsp of crust into each mini muffin cup, freeze 15 minutes, then fill with ganache and chill 4 hours.
I estimate you’ll get 24-30 mini tartlets from one batch.
Do you scrape the cream out of each Oreo cookie or process them whole?
No need to scrape the filling out. Process the Oreos whole, cream and all. The filling actually helps bind the crust and gives it that nice chewy texture once chilled. Just blitz them into fine crumbs in a food processor and you’re good to go. You’ll need about 16 to make 1 1/4 cups crumbs.
Very rich and creamy. I love that it’s not too sweet.
This was perfect and so easy. Love the dark chocolate flavor.
For an 11″ tart base, how much would the quantities differ?
You’d have to do some math or accept a thinner tart 🙂
I am just making this right now, can I freeze it for later?
Hi June, I haven’t frozen it personally but ganache should be stable enough to freeze!
I was looking at this recipe, thinking about making it but noticed there is 4 T Butter at the end of the ingredient list but isn’t used in the directions for the recipe. Am I missing something?
It looks like in the section “How to Make No-Bake Chocolate Tart” it’s whisked in at the very end of making the ganache – after the hot cream has been poured over the chocolate and left for 5 min, whisk the cream and chocolate, and then whisk in the butter, then pour into the tart crust.
Is there NO sugar I. The chocolate filling? It sounds like just baking chocolate and whipping cream would be pretty bitter
We’re using dark chocolate not bittersweet or unsweetened so it is a silky, luxe dark chocolate flavour. By all means taste the filling and whisk in some granulated sugar while it’s still warm if you like (or swap in part milk chocolate for a sweeter taste).
Hi Susan, it is definitely a dark chocolate tart! The cookie crust and the whipped cream both balance the fruitiness of a pure dark-chocolate ganache but you could absolutely stir in a few tablespoons of sugar to taste while the chocolate is hot to dissolve it.