This totally foolproof, easy pie crust (without food processor or any other special equipment) makes PERFECT flaky, tender pie crust every time.
Psst. I published this easy pie crust recipe in Chatelaine magazine and the Creative Director said it was the best pie crust she’d ever had.
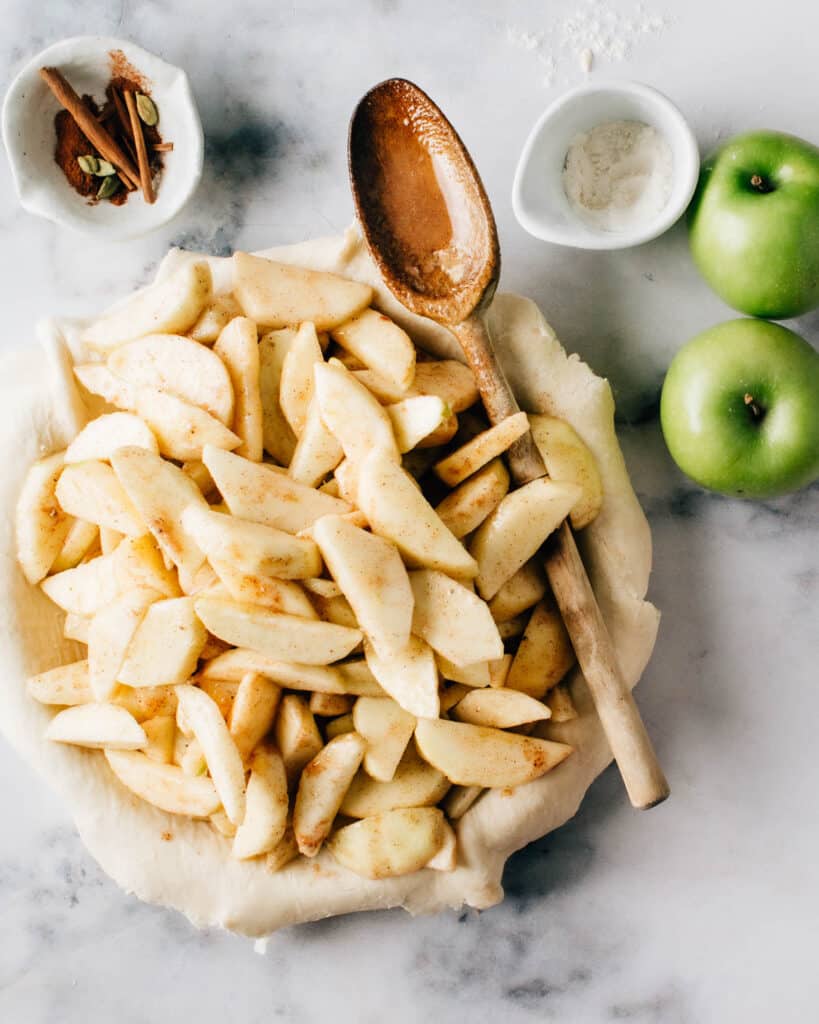
I use this pie dough every year to make my easy apple pie and easy pumpkin pie recipes for Thanksgiving.
5 Secrets to the Best Pie Crust (Without a Food Processor)
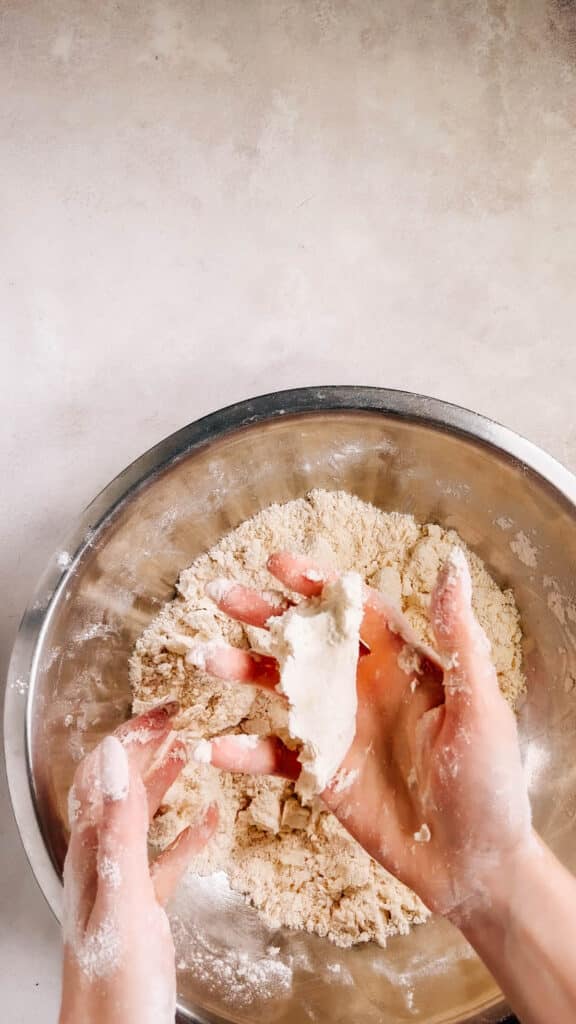
1. Mix most of the butter into the flour until it looks like damp breadcrumbs. This coats the flour in fat to reduce gluten formation, making the dough super soft and tender. Use about two-thirds of your butter for this step.
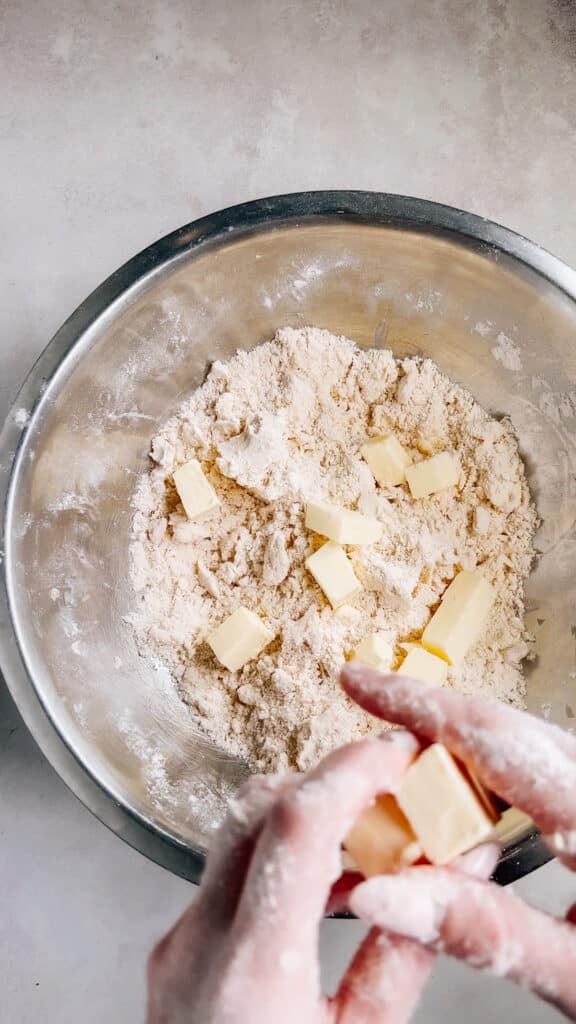
2. Then, add the rest of the butter in visible pieces. This helps create pockets of steam when you bake it, giving you a flaky crust.
3. Choose butter as the fat because if you (like me!) insist on a crust that is delicious and not just a necessary vehicle for bubbly fillings. To get around the melting point issue, make sure the dough is freezer-cold and start baking it in a super-hot oven. This permits the starch to set before butter has time to spread out any artistic details.
4. Chill the dough. There are three crucial reasons to do this:
- A pre-bake chill gives the butter a chance to harden up, maximizing flakiness and preventing too much spread.
- Resting time also lets a tight dough relax so that the crust is softer and won’t spring back and shrink.
- And finally, resting allows hydration, when water absorbs into the flour and moves from wetter areas to drier parts of the mixture. This makes the dough smoother and softer.
5. Use your brain instead of your biceps: Roll the dough out while it’s still soft, before putting it in the refrigerator.
It is absurd how much easier it is to smooth out pliable, room-temperature dough than to whack at a fridge-cold hunk.
But more important than the savings in arm burn, if you roll it out before you chill it, you’re doing all the dough-toughening pressing and pulling actions before the long rest time, giving the dough time to fully relax.
The dough will be softer and keep its shape better than you’ve ever seen. Yay!
Perfect Pie Crust: Just 3 Ingredients
- All-Purpose Flour: Provides the structure for your pie crust. It’s the base ingredient that holds everything together.
- Kosher Salt: Enhances the flavor of the crust. Salt also strengthens the gluten structure, providing a firmer texture.
- Unsalted Butter: Gives the crust its tender, flaky texture and rich flavor. It’s the key to achieving that coveted flaky crust.
Related: Try my No Roll Pie Crust & Graham Cracker Crust Recipes too!
Variations and Substitutions
- Salted Butter: If you’re using salted butter instead of unsalted, reduce the kosher salt to 1 teaspoon to maintain a balanced flavor.
- Whole Wheat Flour: Swap out half of the all-purpose flour with whole wheat flour for a nuttier, more rustic texture.
- Crisco or Vegetable Shortening: For a dairy-free version, use shortening in place of butter. Keep in mind that this will alter the flavor of the dough.
- Lard: For an old-school crust, you can replace half of the butter with lard.
Grab these Tools
Before you start baking, make sure you have the following tools on hand to ensure a smooth and efficient process:
- Kitchen Scale: Optional, but gives the most accurate measurements of flour, butter, and water.
- Large Bowl
- Whisk
- Silicone Spatula
- Parchment Paper: To help shape and roll out the dough. (Wondering what parchment paper is made of, anyway?)
- Rolling Pin
- Pie Plate
- Baking Sheet: To place underneath the pie plate in the oven for even baking.
- Aluminum Foil: For covering and chilling the rolled-out dough and protecting pie edges from over-baking.
How to make Make Pie Crust Without Food Processor


I’m a food scientist so I’m including the “why” behind each of my tips & steps so you understand the reason for the details.
Measure Ingredients:
I know this sounds silly to even count as a “step” but accuracy here really matters. Exact measurements make sure everything turns out perfectly. One cup of flour measured by you can be more packed in than one cup measured by me. That’s why I really prefer to use a scale (use the “metric” button on the recipe card below to see weights).
- Science: A correct ratio of ingredients is totally key. Too much flour and the dough is dry. Too much butter and it won’t hold its shape. Too much water and the crust is tough.
Work in the Butter (First Portion):
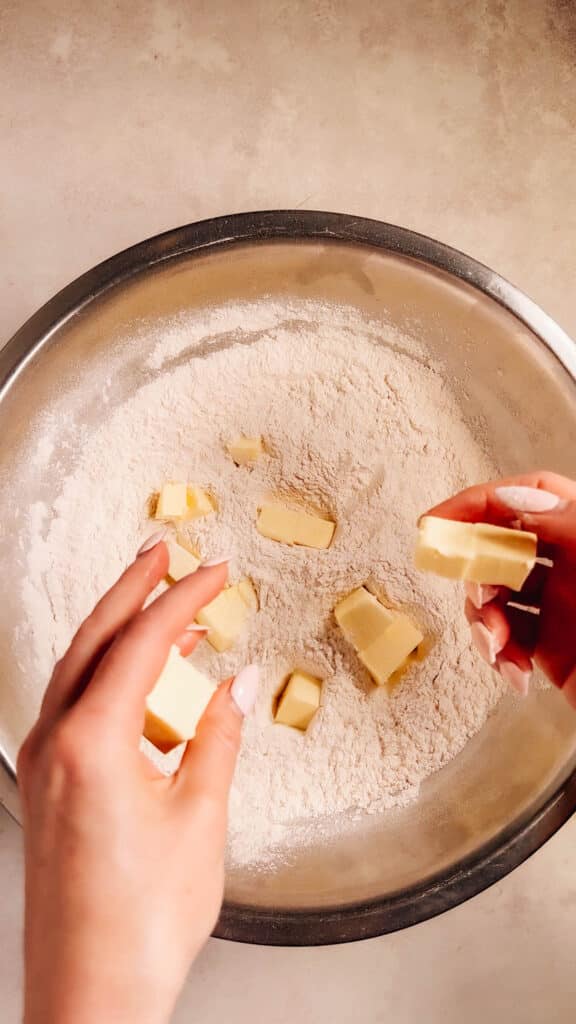
Mix most of your cold butter into the flour until it looks like almond meal. Use your fingers to squeeze the pieces of butter and rub them into the flour.
- Science: This step coats flour particles in fat, preventing them from absorbing too much water. Less water means a softer, tender crust.
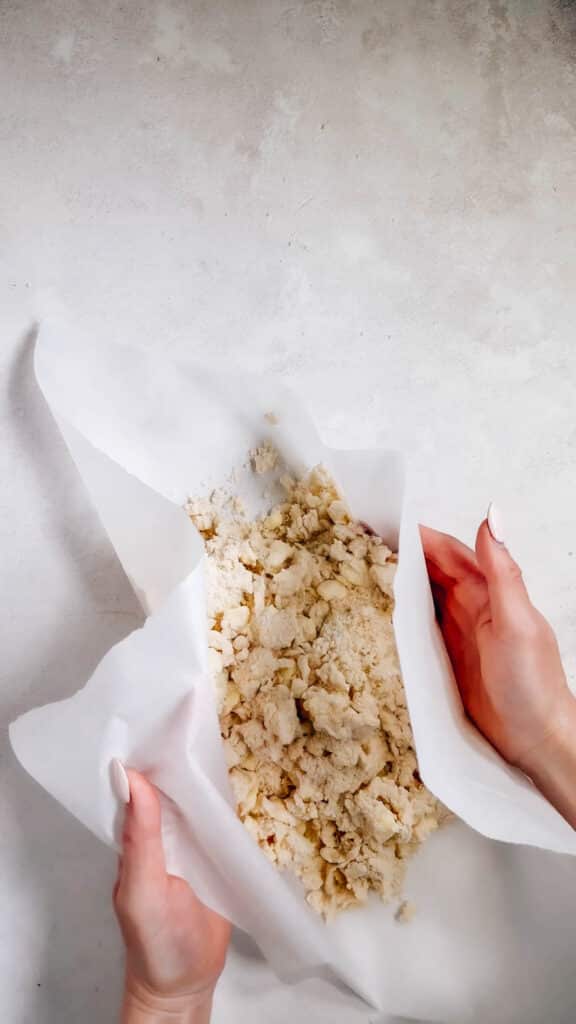
- When the first batch of butter is properly worked in, the mixture will hold together when you squeeze it, like in the picture #4 above.
Add Remaining Butter:
Add more butter, but keep some chunks.
- Science: The chunks melt during baking, creating air pockets that make the crust flaky.
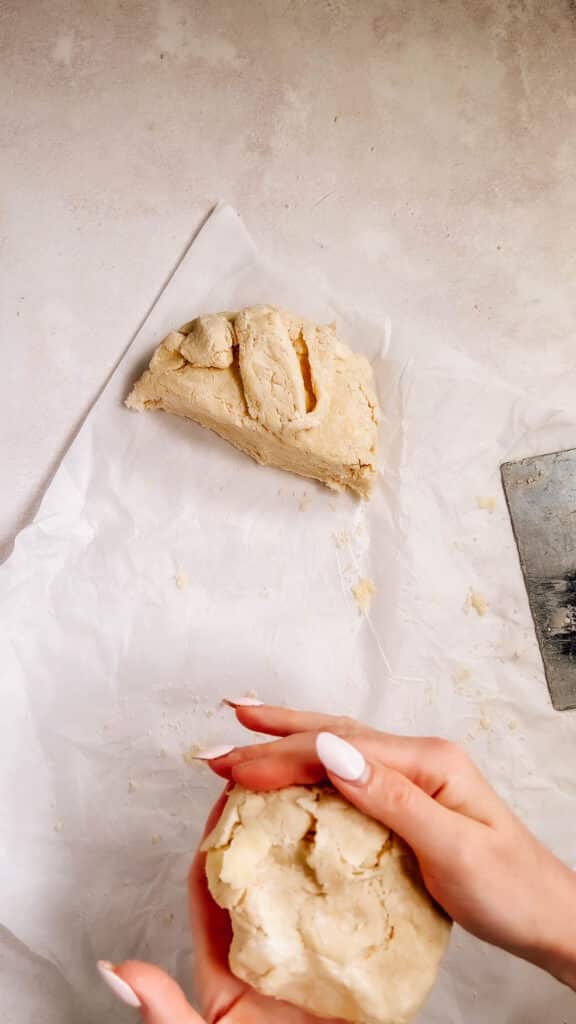
- Continue rubbing the butter in but leave some larger pieces like those visible in the picture #6 above.
Chill Mixture:
Pop the bowl into the freezer for 10 minutes.
- Science: Keeping the butter cold means it won’t fully mix with the flour, which is what you want for a flaky crust.
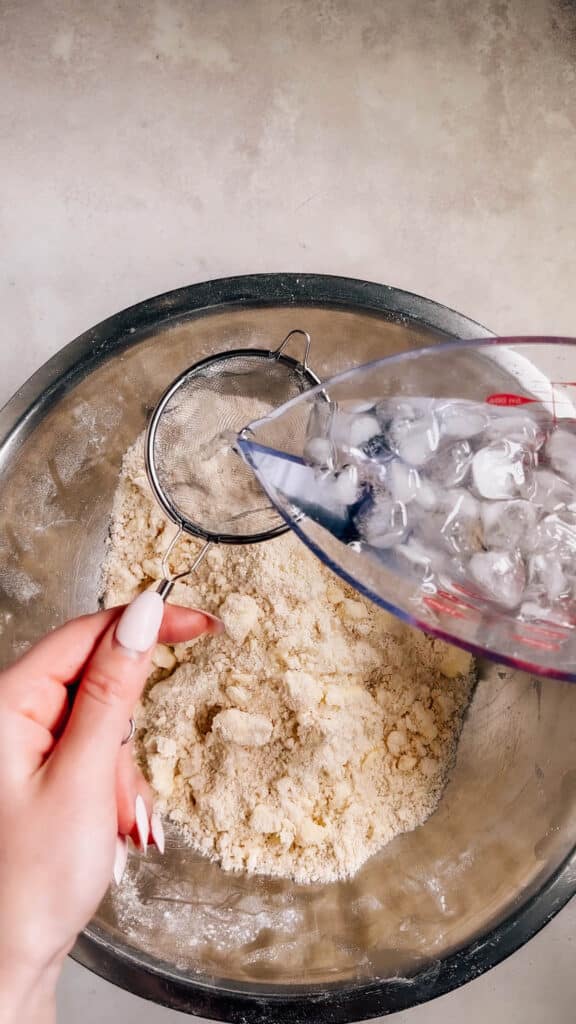
Add Ice Water:
Add very cold water and mix. Fill a big measuring cup with ice, top it up with water, then pour it through a sieve into another measuring cup (or just put the whole bowl on a scale and weigh the water in like I do in the video).
- Science: Cold water helps keep the butter hard, which is good for flakiness. It also helps bring the dough together.
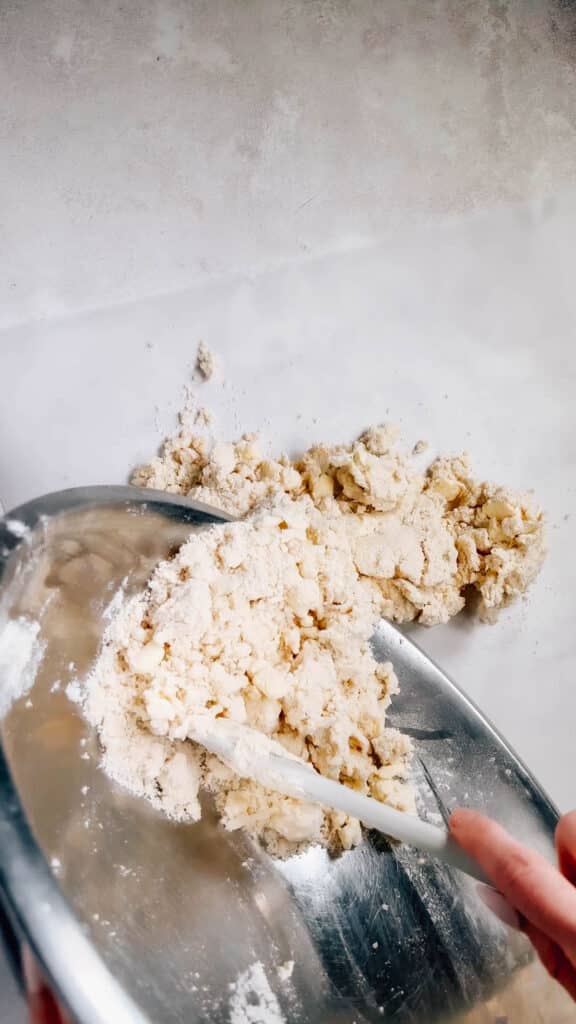
- Use a rubber spatula to toss the water through the flour mixture, but only until it’s a clumpy mess (like the photo #7 & 8 above). Dump it onto a sheet of parchment paper to finish making it into a dough.
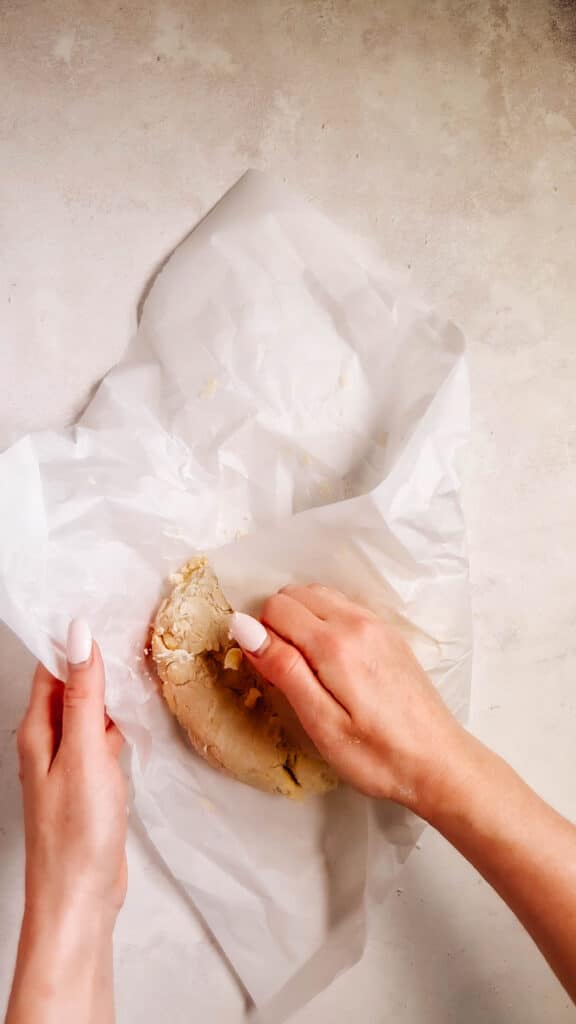
Fold and Press:
Fold the sides of the parchment paper over the dough mixture to press the messy mixture together into a disk. Keep moving the dough around as you press it together until it holds a round shape.
- Science: This pressing technique is gentler than kneading. It helps combine the ingredients without overworking them, which keeps the crust tender. In the photo #10 above, you can see how it comes together into a disc. It will still look dry and cracked at the edges at this point. That’s normal.
Let it Rest:
Set aside for 30 minutes.
- Science: Resting lets the flour hydrate (fully soak up the water), making the dough softer and easier to roll out without it breaking.
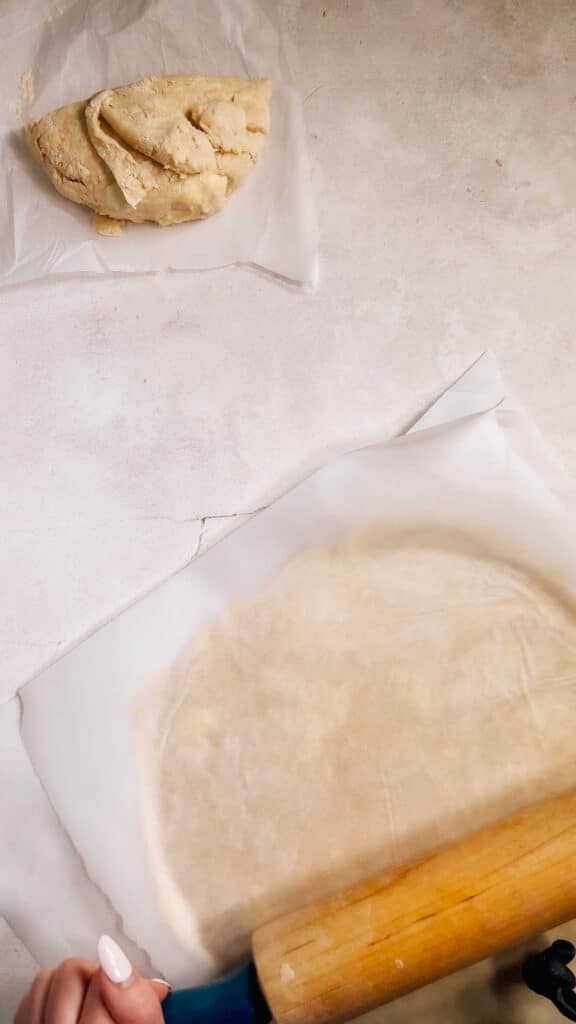
Divide and Roll:
Cut the dough in half and roll each piece out. You can see in the photo above how the hydrating time makes it a smoother dough, with less dry floury edges (a little dryness is still normal).
- Science: Rolling it out before the chilling time saves major arm ache and makes a way more tender crust. By working the dough BEFORE it has a long rest, you give the gluten time to relax. Rolling it after chilling it means you’re tightening it up, making it tough again. Plus, it’s just way more difficult to work with. It makes no sense to me at all to roll cold dough.
- See section below on my go-to rolling technique.
Chill Again:
Put it in the fridge for at least 2 hours.
- Science: Chilling lets the fat in the dough firm up, making it easier to work with and resulting in a flakier crust. It relaxes the gluten making a more tender crust. It is very, very important.
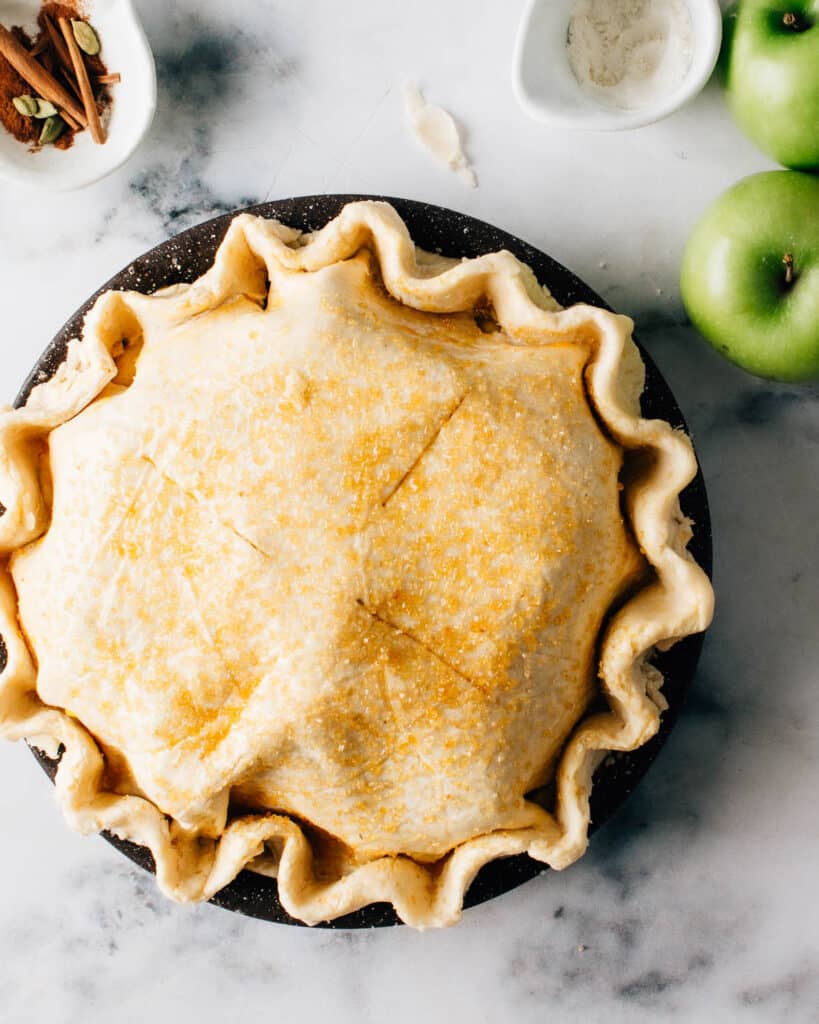
Prep for Baking:
Fill and freeze the pie for 30 minutes before baking.
- Science: Freezing sets the shape and structure of the pie, helping any decorative crimping hold up during baking.
Bake the Pie:
Start hot, then lower the temperature.
- Science: The initial high heat makes the water in the dough turn to steam quickly, puffing up the crust and making it flaky. It also sets the outer structure of the crust so that your edges don’t just melt away. Lowering the heat cooks the inside without burning the outside.
Rolling Technique: Rotating and Flipping for Even Thickness
This is my tried-and-true approach to easy rolling out the pie crust.
- Place the Dough: Start by placing your dough disc between two sheets of parchment paper. This eliminates the need for extra flour and prevents sticking. Use a larger piece of parchment than you think you’ll need. Let one corner of it hang over the edge of the counter and use your hip to pin it down so it doesn’t slip around as you roll.
- Initial Roll: Use a rolling pin to gently roll the dough from the center outward. Don’t press too hard; let the weight of the rolling pin do the work.
- First Quarter Turn: After a few rolls, give the dough along with its parchment paper a quarter turn (90 degrees).
- Continue Rolling: Roll the dough a few more times from the center outward.
- Second Quarter Turn: Once again, rotate the dough a quarter turn. By continually turning the dough, you’re ensuring it doesn’t get rolled out more in one direction than in another.
- Flip the Dough: Carefully peel back the top layer of parchment, flip the dough over, and replace the parchment. This helps you roll out the dough out thinner. Peeling and repositioning the paper makes sure the dough doesn’t get all wrinkly.
- More Rolling and Turning: Continue the process of rolling and rotating, and flip one more time. Keep an eye on the thickness; you’re aiming for a consistent level across the entire piece of dough.
- Final Check: Once you’re happy with the thickness (generally about 1/8-inch for a pie crust), you’re good to go! Peel off the top parchment paper and you’re ready to transfer the dough into your pie dish.
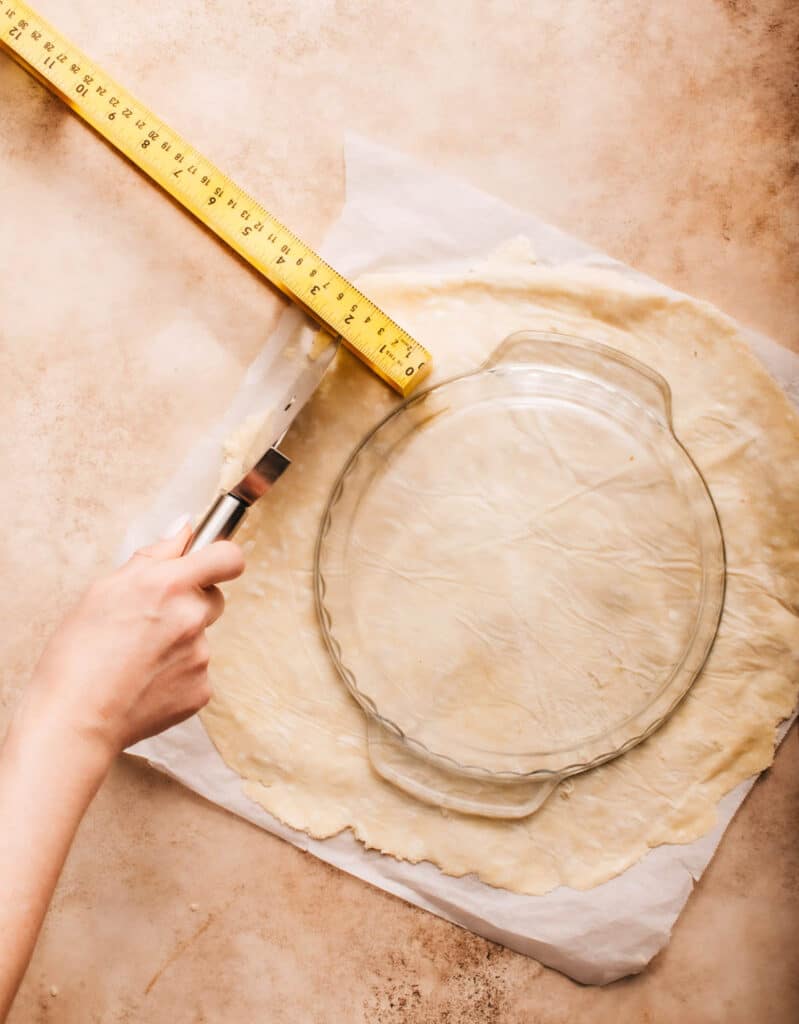
What size should you roll out the pie crust?
The diameter to which you should roll your pie dough depends on the size of your pie pan. Generally, you’ll want the dough to be about 2-3 inches larger in diameter than the top of your pie pan.
For example, for a standard 9-inch pie pan:
- The base of the pan is usually 9 inches.
- Add 1-1.5 inches for each side to account for the depth of the pan. This makes it 11-12 inches.
- Add another 1-2 inches if you plan to have an overhang or crimped edges.
So, for a standard 9-inch pie pan, you would typically roll out your dough to about 12-14 inches in diameter. This ensures you have enough dough to fully cover the base, sides, and have some left for the edges.
Homemade Pie Crust Make Ahead and Storage
Keep your pie game strong by knowing how to prep ahead and store leftovers properly.
- Make Ahead: Prepare the dough up to 3 days in advance and store it in the fridge. I prefer to roll it out before refrigearting and store it flat, wrapped in parchment paper first and then foil.
- Freeze Unbaked Dough: You can also freeze the dough for up to 3 months. I prefer to roll it out before freezing and store it flat, same as for refrigerating.
- Freeze Baked Pie: Fully cooked pie can be frozen for up to 2 months. Cool it completely before wrapping in aluminum foil and placing it in an airtight container or zip-top bag.
- Reheat: To reheat frozen pie, bake it at 350°F, covered with foil, for about 60 minutes, or until warm throughout. There’s no need to thaw it first, but if you do, reduce the reheating time.
- Leftovers: Store any leftover pie in the fridge for up to 5 days. Keep it in an airtight container to maintain its freshness.
That’s the wisdom I can impart. Now I hope you’re positioned to create the flaky, tender, beautiful pies of your dreams. Now that you know how to make pie crust, here’s how to make pie!
Absolute Must-Try Pie Recipes
Favourite Sweet Pies:
- Easy Apple Pie Recipe
- Easy Pumpkin Pie Recipe
- Strawberry Rhubarb Pie
- Blueberry Pie
- Chai Apple Pie
- Strawberry Rhubarb Pie
- Peanut Butter Pretzel Pie
Favorite Savory pies:
The Challenge with Making Tender and Flaky Pie Crust
Pie crust is tricky to master because you want two opposing things at once: a flaky and tender. And the funny thing is, the science for each of these is completely different.
- For a crust to be tender, it must have a lot of the fat worked completely into the flour.
- But to be flaky, it must have big ‘ol chunks of fat.
And then there’s flavor. Let’s be real: to be delicious we need all the butter.
- But butter’s melting point is lower than shortening or lard. So, that means it tends to melt before the shape is set, which can be a problem if you’re trying to keep all those decorative details nice and pretty.
Sheesh, is this dough or d’oh?
Don’t bang your head on the wall just yet, though. After YEARS of testing and tasting, I feel super confident I’ve put together a recipe that gets you tender, flaky AND failproof pie crust (no food processor needed!).
So excited to share with you!

Foolproof, Easy Pie Crust Recipe (Without Food Processor)
Video
Ingredients
- 3 cups all-purpose flour
- 1 ½ tsp kosher salt
- 1 ⅛ cup unsalted butter cold, and cut into 1-inch pieces
- 9 ½ tbsp ice water (that's 1/2 cup + 1 1/2 tbsp)
Instructions
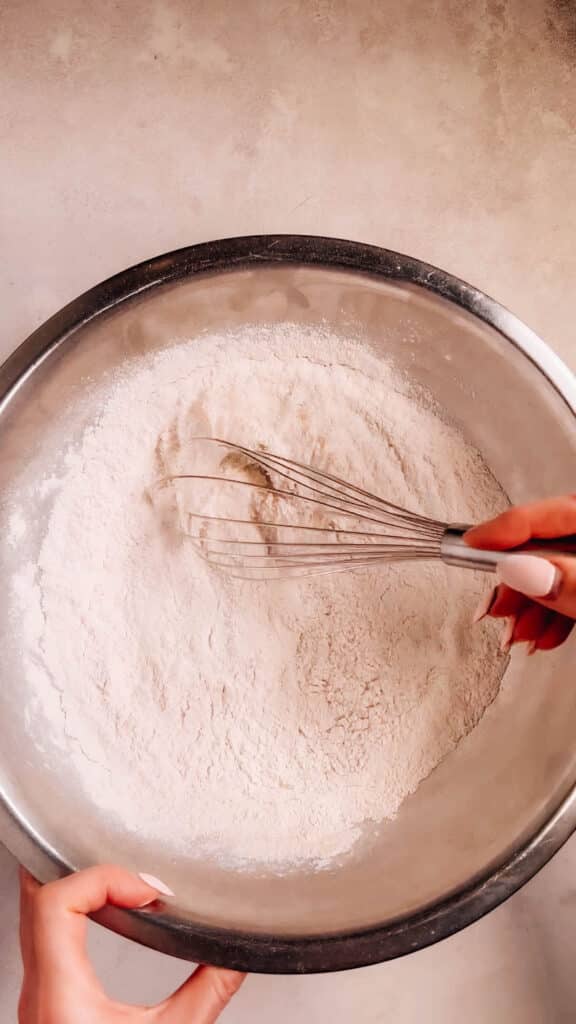
- Measure Your Dry Ingredients: In a large bowl, combine flour and salt.
- Add Most of the Butter: Add about two thirds of the butter (roughly 3/4 cup or 170 g butter) to the flour. Use your fingers to mix the butter into the flour until it looks like almond meal or damp crumbs. Rubbing most of the butter into the flour makes the crust super tender.
- Add Remaining Butter: Add remaining butter to the mixture. Mix it in, but leave some small chunks of butter. Adding some distinct chunks creates pockets of steam, making the pie flaky. Place the bowl in the freezer for 10 minutes.
- Add Ice Water: Take the bowl out of the freezer and mix in the ice-cold water. Use a spatula to gently mix it in. It will look a bit messy, and that’s okay.
- Form the Dough: Dump the mixture onto a large piece of parchment paper. Use the paper to help you fold and press the dough together a few times until it forms a ball. Let it rest for 30 minutes at room temperature.
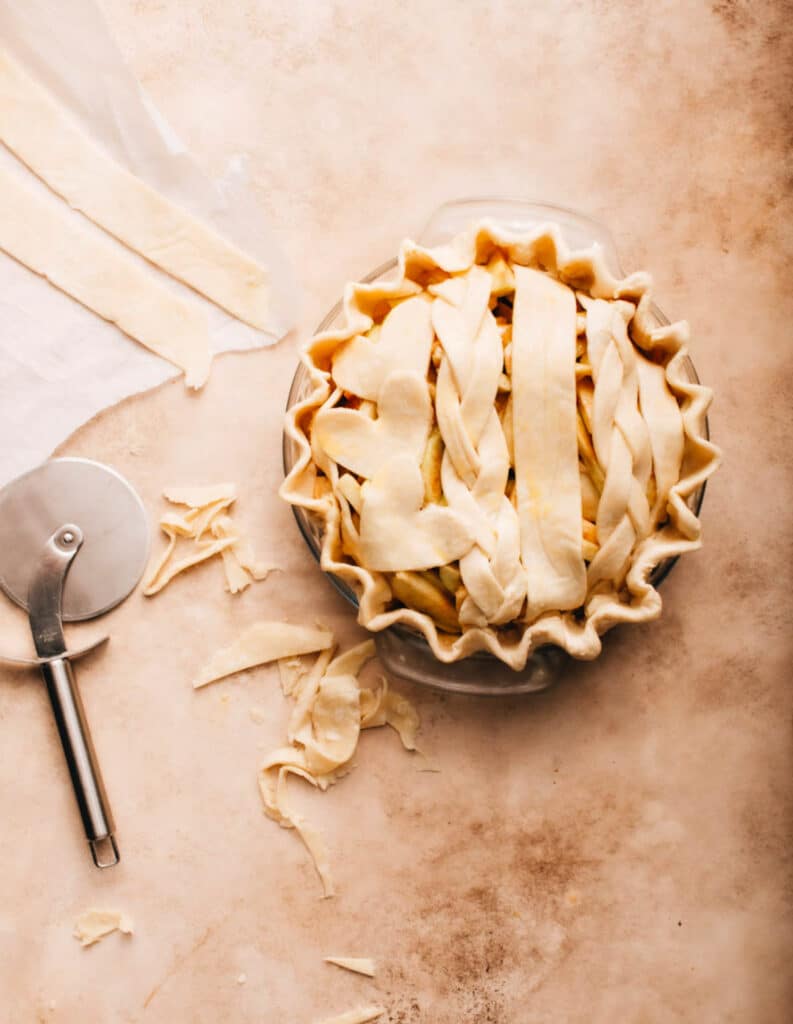
- Roll Out the Dough: Divide the dough into 2 pieces. Roll each piece out between two sheets of parchment paper. Trim away the shaggy edges using a knife or pastry cutter and discard excess dough. The dough circles should be 2 inches larger than your pie plate.
- Chill the Dough: Stack the two pieces of rolled-out dough with parchment paper in between and wrap them in foil. Chill in the fridge for at least 2 hours or overnight.
- Preheat Oven: Put a baking sheet in the oven and preheat it to 425°F.
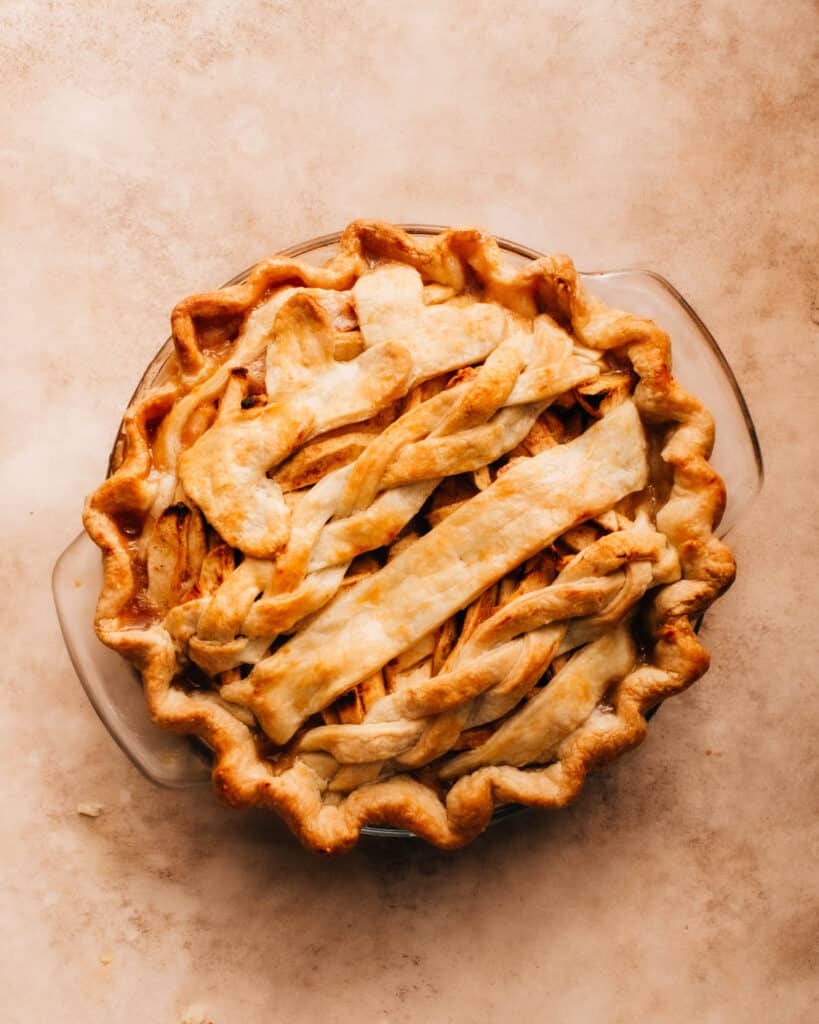
- Assemble and Bake: Fill your pie and add the top crust. Crimp the edges of the pie crust and cut a steam vent in the top of the pie. Freeze it for 30 minutes while you preheat your oven. Then bake it on the hot baking sheet for 20 minutes at 425°F. Lower the temperature to 350°F and bake until done.
Notes
Nutrition
Nutrition information is automatically calculated, so should only be used as an approximation.


I love your pie crust and recipe. Could I make the crust and freeze the dough for future use?
I do it every single time I make a batch of dough! It makes a mess on the counter so I do it 2x and freeze the rolled-out dough for future pies. I freeze it flat wrapped in the parchment paper + plastic wrap.
I’m a 73 man with big whiskers, long gray hair, and a wizard look about me. For years people have said that my skills in the kitchen are magical.
Every year the 6 – 8 children in my neighborhood bring me cherries from trees in our area (as long as they first ask the owner for permission to pick them). They bring me enough cherries to fix pies for their families every week; and for me to put up for the year.
I’ve tried many pie recipes including my previous favorite from a girlfriend of mine in college (that was even better than my mom’s).
Yours is the one I’ll share with my children and grandchildren.
Talk about magic in the kitchen!
Thanks for sharing.
can i save it in the fridge over night?
Hi Asher, yes, you can save it in the fridge for 3-4 days, just make sure it’s tightly wrapped in plastic wrap so it doesn’t dry out. For longer than that, freeze it.
I’m curious about the extra 1 1/2 tbsp water. I assume you add it with the rest? Or maybe 1/2 c plus that equals 128g?
Hi Molly, yes you use all the water at the same time!
Pie crusts can be tricky, but your detailed guide is incredibly helpful Jennifer! I’ve been experimenting with different crust recipes, and I’m curious about your thoughts on incorporating whole wheat flour for a nuttier flavor and added nutrition. Have you tried this, or do you have any tips for making whole wheat pie crust?
Hi Carleigh, a little bit of whole wheat flour (like, 1/3-1/2 cup) can work without impacting the recipe much. More than that can make it turn out dry and dense. Whole wheat flour absorbs more moisture than white flour, so it throws of the ratio of liquid to dry ingredients in the recipe.