I know that whoopie pies had their moment back in 2009 (before macarons and cupcakes and cake pops edged them out of the spotlight), but I can’t help revisiting them because, 1. I LOVE THEM and 2. I think I’ve perfected the recipe.
The cakes are fudgey and moist and the filling is billowy and marshmallow-y, but not over-rich or tooth-achingly sweet. So can we bring them back in style, please? Because I seriously don’t think a cookie-cake hybrid (or even life itself) could get any better than these right here.
To accomplish the super-fudgy moist cakes, you want to make sure you take them out of the oven before you think they are done. They’ll still look shiny, and really just the edges will be set. There may be cracks on a couple of them, but you want to take them out before significant cracking occurs. Despite being very soft, but once cooled, they’ll be perfect.
Trust me – I thought I’d under-baked one tray, and was going to pop it back in the oven for a couple of minutes but those ones ended up being the best of them all.
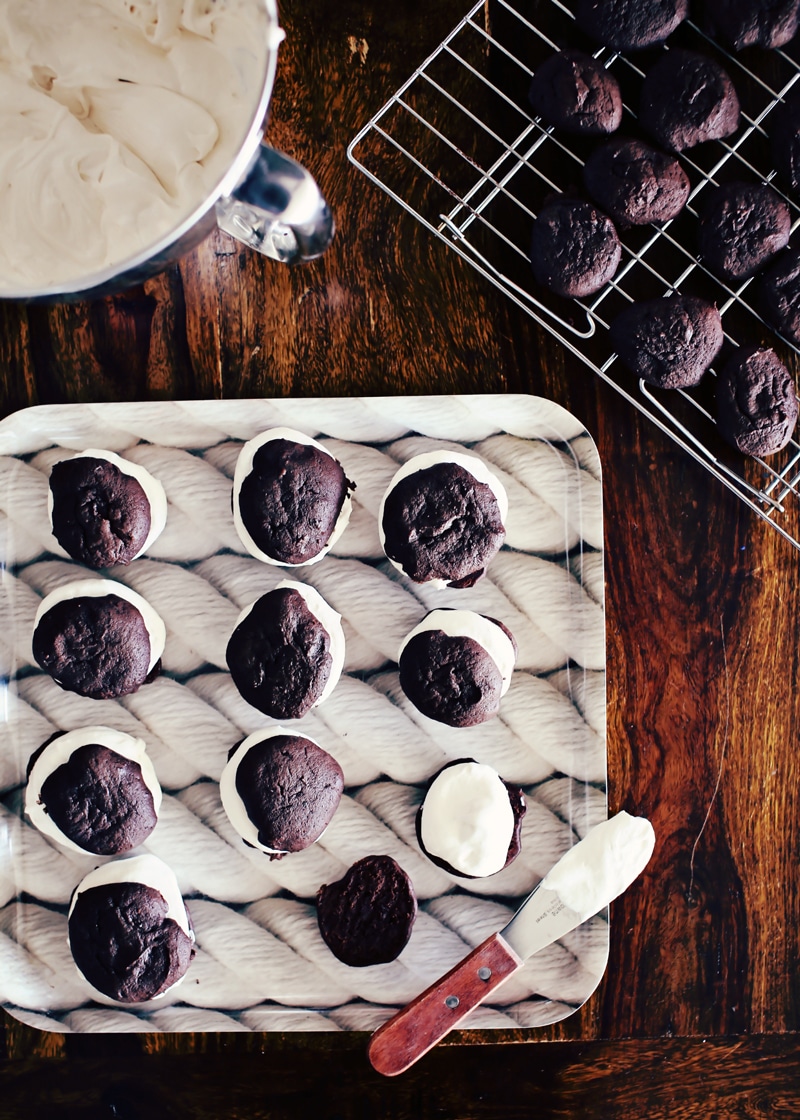
To make the filling, I started off in the direction of a 7-minute frosting (a.k.a. marshmallow frosting), dissolving sugar in egg whites over simmering water. But rather than beating it over the water, I transferred it to a standing mixer to beat it into stiff peaks, so that it would cool enough to whip some soft butter into it.
This joining of forces between Swiss meringue buttercream and 7 minute frosting created the perfect amalgam of sticky and creamy. A marshmallow frosting that doesn’t make your teeth ache, and a buttercream that doesn’t make you feel like you just ate a stick of butter. HEAVEN.
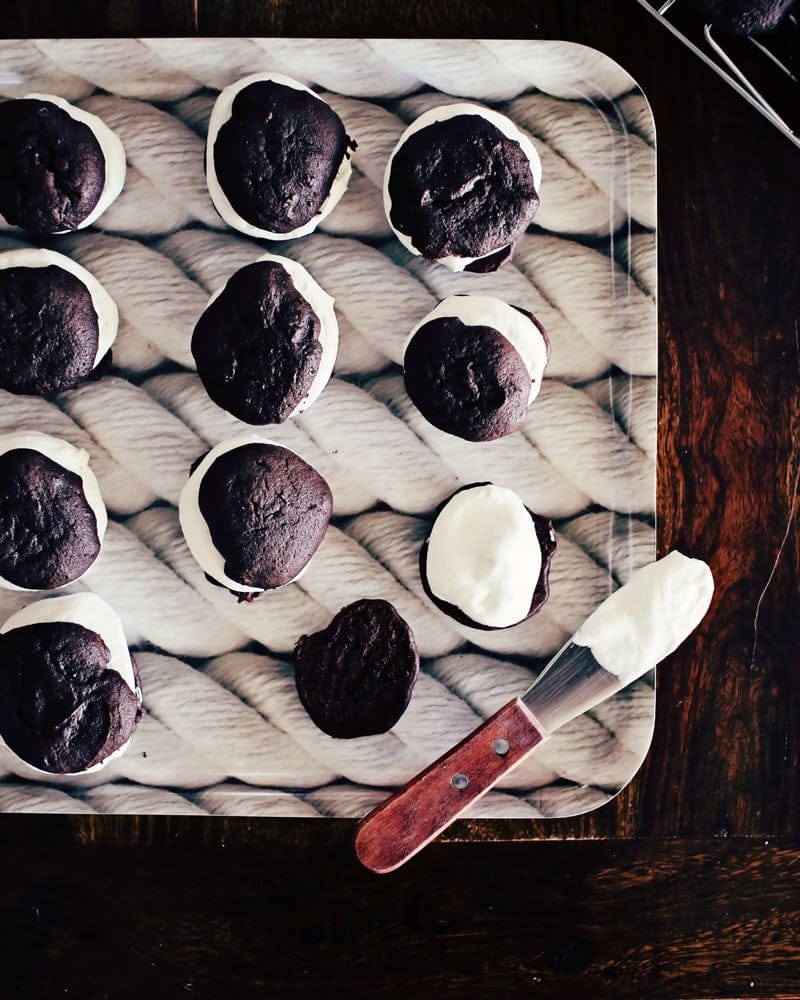
The only thing is, the frosting is quite soft – so these babies require napkins. I recommend refrigerating them as you fill them, to help set them up and prevent the tops from sliding off.
Also, as the recipe indicates, the frosting will likely go through a soupy stage, after incorporating the butter. Just pop it in the fridge for a half-hour or so and beat it again – it’ll firm up.
P.S. I really need to put some kale in my (whoopie) pie hole. I’ve just eaten two of these for lunch, not to mention the frosting that I needed to taste and adjust along the way, and the cookie that was shaped like Canada that just had to be sampled – y’know, to find out if it tasted like Canada.

Classic Whoopie Pies
Ingredients
For the cookies
- 3 ½ cups all-purpose flour
- 1 ½ cups Dutch process cocoa powder
- 2 tsp baking powder
- 1 tsp baking soda
- ½ tsp salt
- 1 cup buttermilk
- 1 cup sour cream
- 2 tsp vanilla extract
- 1 cup unsalted butter
- 2 cups sugar
- 2 large eggs
For the filling
- 2 cups granulated sugar
- 3 egg whites
- 10 tbsp softened butter
- 2 tsp vanilla extract
Instructions
- Make the cookies: Preheat the oven to 350°F (175°C). In a large bowl, whisk together the flour, cocoa, baking powder, baking soda and salt. Set aside.
- In a separate bowl, whisk the buttermilk with the sour cream and vanilla. Set aside.
- Beat the butter and sugar in a stand mixer until light and fluffy, about 2 minutes, scraping down the bowl occasionally. Beat in the eggs one at a time. With the mixer on low, beat in 1/3 of the flour mixture, followed by 1/2 of the buttermilk mixture. Repeat, ending with the final 1/3 of the flour mixture.
- Drop by level tablespoonfuls onto parchment-lined baking sheets. Bake 6 minutes, or until set but still a bit shiny (if you press the centre, it will leave an indent). They will look underdone — this is essential to chewy, delicious cakes.
- Make the filling: Combine the sugar and egg whites in a heatproof bowl set over a pot of simmering water. Cook, whisking occasionally, until the sugar is completely dissolved (rub a bit between your fingers — you should feel no granules), about 7 minutes (160°F on a candy thermometer for food safety). Transfer to a stand mixer fitted with the whisk attachment and beat 10 minutes, until glossy and stiff. Beat in the butter a tablespoon at a time, then the vanilla. If the frosting is runny (it probably will be), refrigerate 30 minutes, then beat again for 1 minute.
- Assemble: Spread a heaping tablespoon of frosting onto the flat side of one cookie and sandwich with another, then transfer to a plate. Move them to the fridge after every half-dozen or so, as the filling is gooey and will spread. Continue until all the cookies are sandwiched. Keep refrigerated until ready to serve.
Notes
Nutrition
Nutrition information is automatically calculated, so should only be used as an approximation.