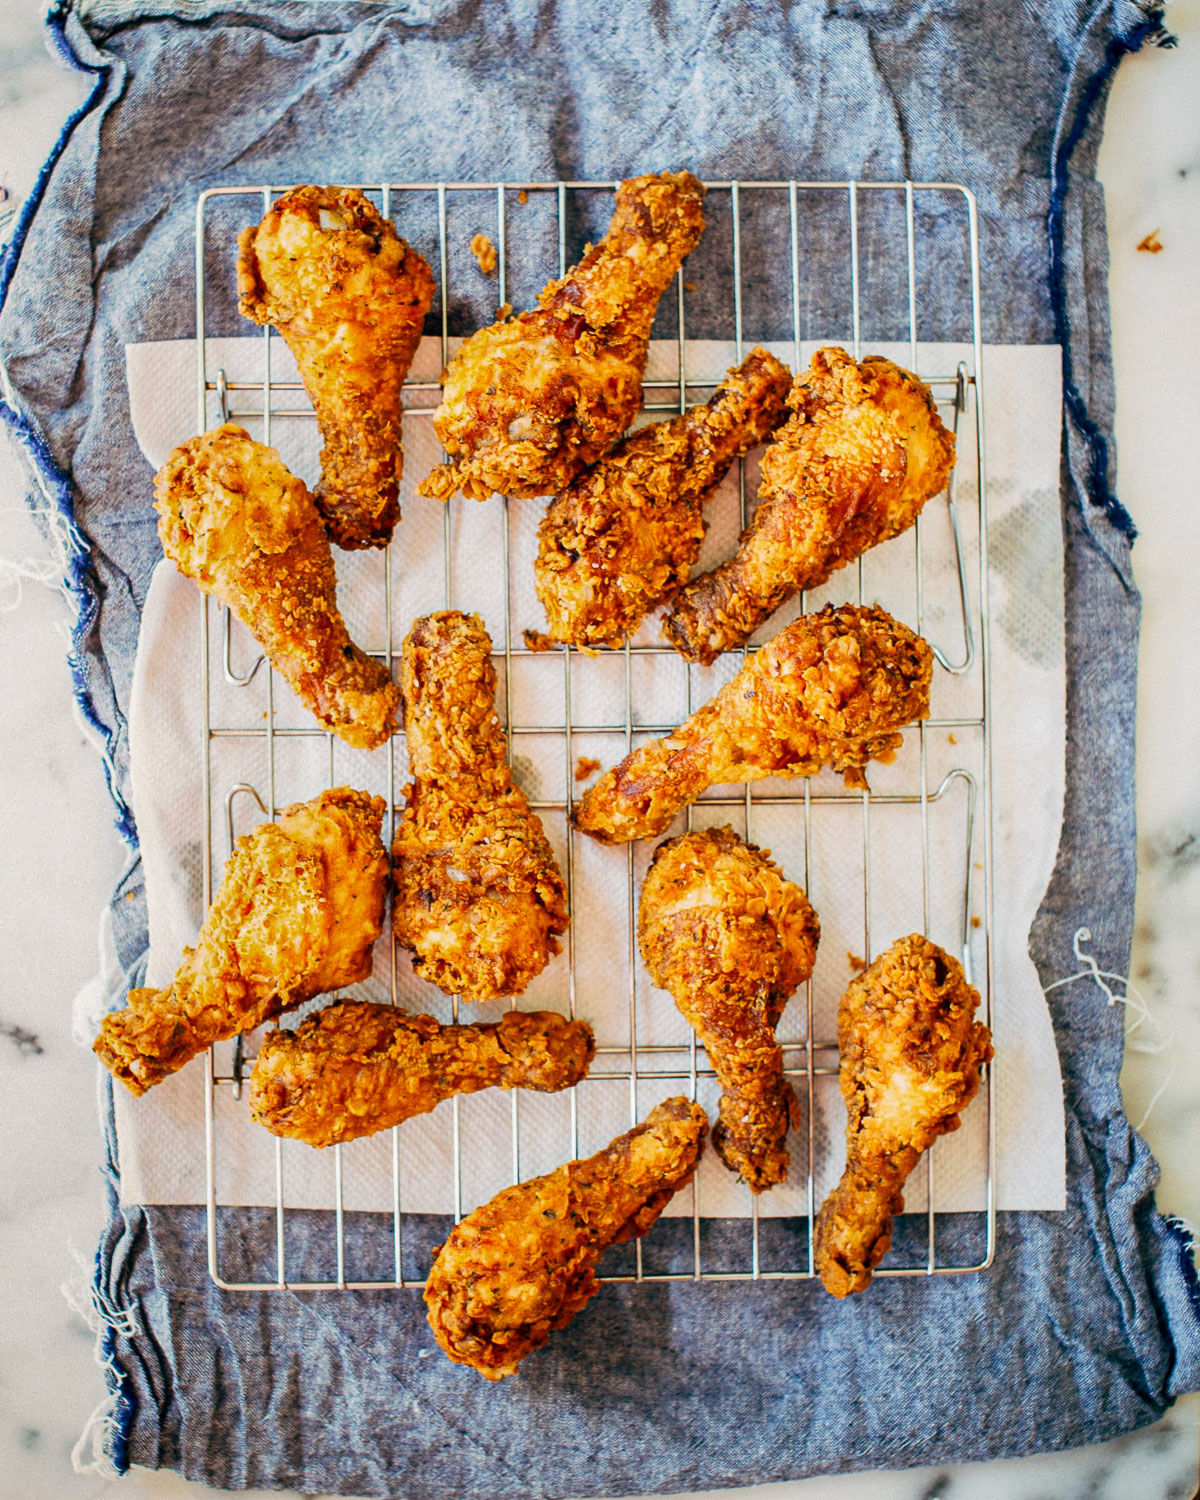
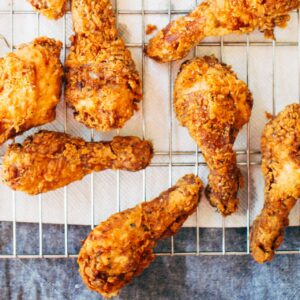
This light and crispy buttermilk fried chicken recipe is the one I keep coming back to. The coating is flaky and shatteringly crispy, and the chicken is always juicy.
The secret to my best buttermilk fried chicken is baking powder in the flour mixture. It creates tiny bubbles in the crust as the chicken fries, which makes the coating puff up and stay crunchy. It sounds like a small thing but it makes a real difference. This is the same trick behind why restaurant fried chicken often feels lighter than homemade.
The buttermilk does two things. It tenderizes the chicken while it marinates, and it gives the coating something to grip onto. Overnight is the sweet spot, but even one hour works well on a weeknight.
Light & Crispy Buttermilk Fried Chicken Ingredients
Here’s everything you need for the marinade and the coating.
Chicken & Marinade Ingredients
- Bone-in chicken drumsticks: This recipe makes 12 drumsticks. They’re the ideal cut for frying because they cook at the same rate and stay juicy.
- Buttermilk: The lactic acid in buttermilk tenderizes the meat and adds a subtle tang. It also helps the flour coating stick properly.
- Kosher salt
- Black pepper
Coating Ingredients
- All-purpose flour: The base of the coating.
- Baking powder: This is the secret ingredient. It reacts with the heat of the oil to form bubbles in the crust, making it light and airy instead of thick and dense.
- Dried parsley: Adds a bit of color and flavor to the coating.
- Paprika: For color and a mild smokiness.
- Kosher salt
- Garlic powder
- Onion powder
- Canola or peanut oil: Both have a high smoke point, which is exactly what you need for frying at 350°F. Vegetable oil works too.
Full recipe quantities are listed in the recipe card at the bottom of this article.
Variations and Substitutions
A few easy ways to adjust this recipe to suit what you have.
- Other chicken cuts: Thighs and breasts work here too. For thicker pieces, once the outside is golden, transfer to a 350°F oven to finish cooking through. The interior needs more time than the exterior can handle on the stovetop. For boneless chicken, try my Chicken Schnitzel recipe instead.
- Buttermilk swap: No buttermilk on hand? Stir 2 tbsp of white vinegar or lemon juice into 2 cups of regular milk. Let it sit for 5 minutes until it curdles slightly. It works just as well.
- Spice it up: Add 1/2 to 1 tsp of cayenne pepper to the flour mixture for heat. Smoked paprika in place of regular paprika adds a deeper flavor too. Or go all in with my spicy Indian fried chicken recipe.
- Gluten-free: Swap the all-purpose flour for a 1:1 gluten-free baking blend. The baking powder trick still applies and works the same way.
- Air fryer version: You can air fry the coated chicken at 400°F for 20 to 25 minutes, flipping halfway. It won’t be quite the same as deep frying, but it’s a lighter option.
Grab These Tools
You don’t need specialized equipment, but a couple of things really do matter here.
- Large cast iron skillet or deep fryer: Cast iron is my top pick. It holds heat steadily and recovers temperature quickly between batches. A deep fryer also works great.
- Instant-read thermometer: You need two temperature readings here: 350°F for the oil, and 165°F for the chicken. Don’t skip this tool.
- Large zippered freezer bag: For shaking the flour coating onto the chicken. It’s quick, thorough, and the cleanup is just throwing out the bag.
- Wire rack over a baking sheet: The chicken rests here after frying. The rack lets air reach all sides so the bottom stays crispy. Line the sheet with paper towels underneath to catch drips.
- Shallow baking dish: For the buttermilk marinade.
How to Make Light & Crispy Buttermilk Fried Chicken: An Easy Guide
The active cooking time is only about 10 minutes. Most of the time is hands-off marinating. Here’s how it all comes together.
Marinate the Chicken
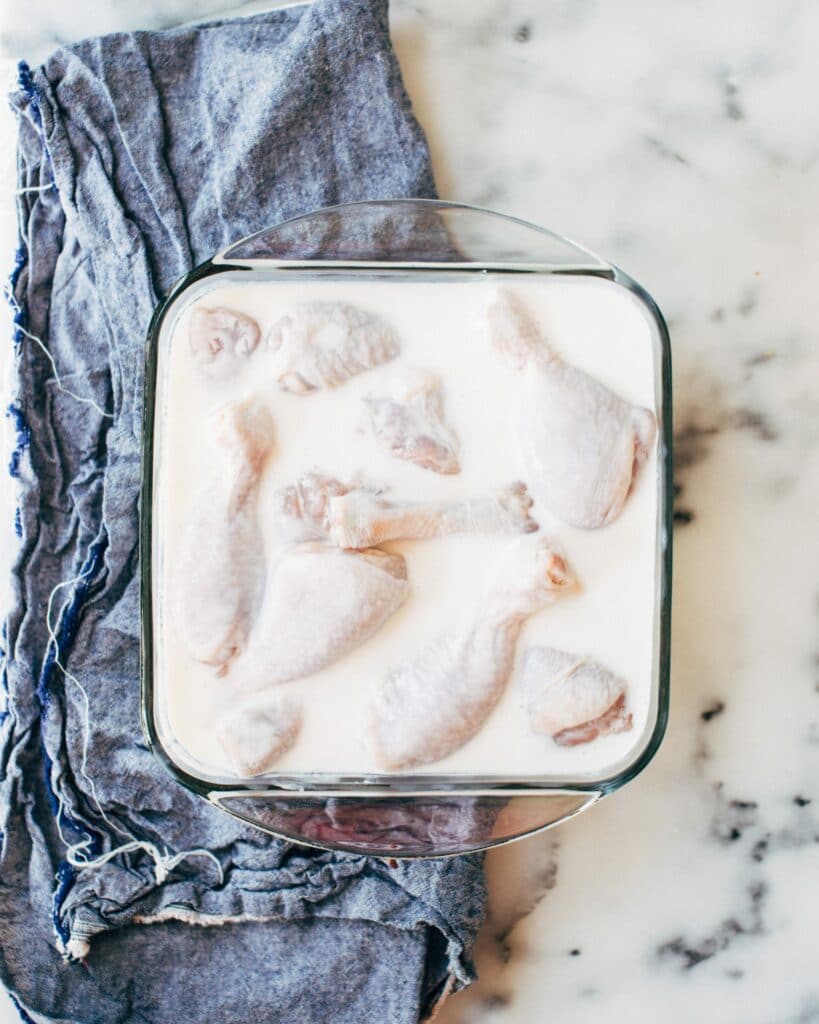
Whisk 1 tsp salt and ½ tsp pepper into 2 cups of buttermilk in a shallow baking dish. Add the chicken and turn each piece to coat. Cover and refrigerate for at least 1 hour, or overnight.
Before frying, take the chicken out of the fridge 30 to 60 minutes early. Room temperature chicken is important. Cold chicken drops the oil temperature fast, which leads to greasy, uneven frying.
Make the Coating
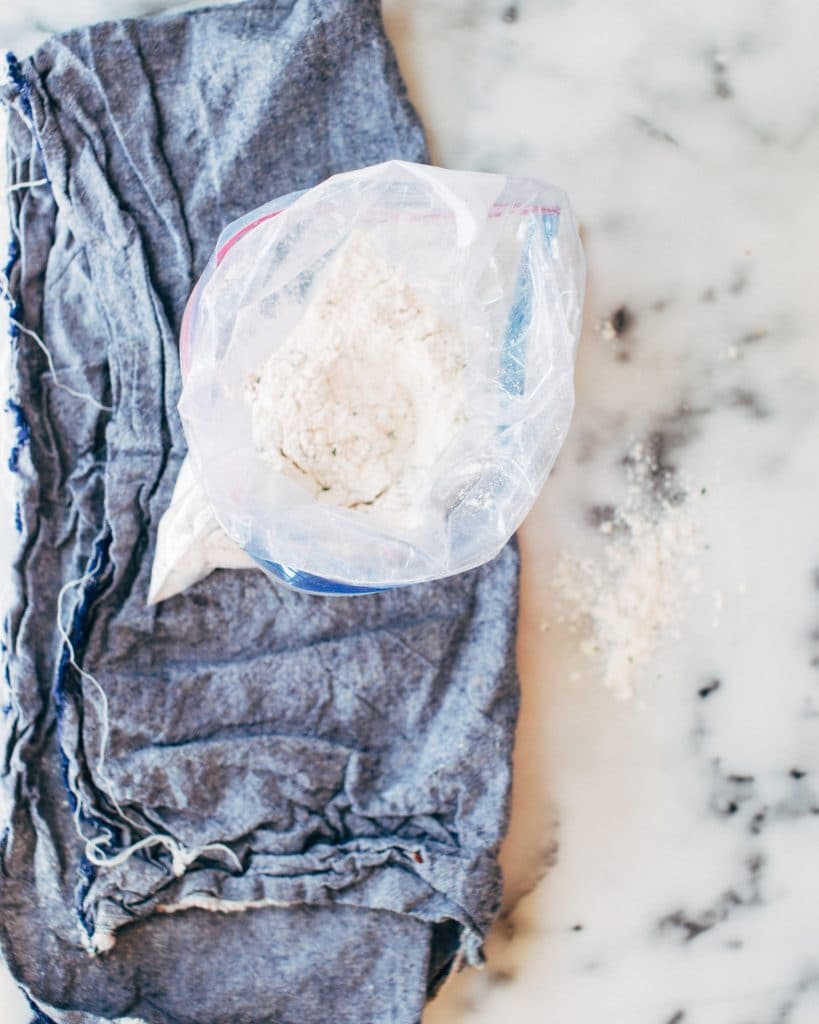
Add the flour, dried parsley, paprika, baking powder, salt, garlic powder, and onion powder to a large zippered freezer bag. Seal it and shake well to combine everything evenly.
Heat the Oil
Heat canola or peanut oil to 350°F. In a cast iron skillet, aim for about ¾ inch of oil. Use a thermometer to confirm the temperature before the first piece goes in.
Line a baking sheet with paper towels and set a wire rack on top. This is where the fried chicken will rest after cooking.
Bread and Fry the Chicken
Remove chicken from the marinade one piece at a time. Let the excess drip off, then drop it into the flour bag. Seal and shake until the piece is evenly coated.
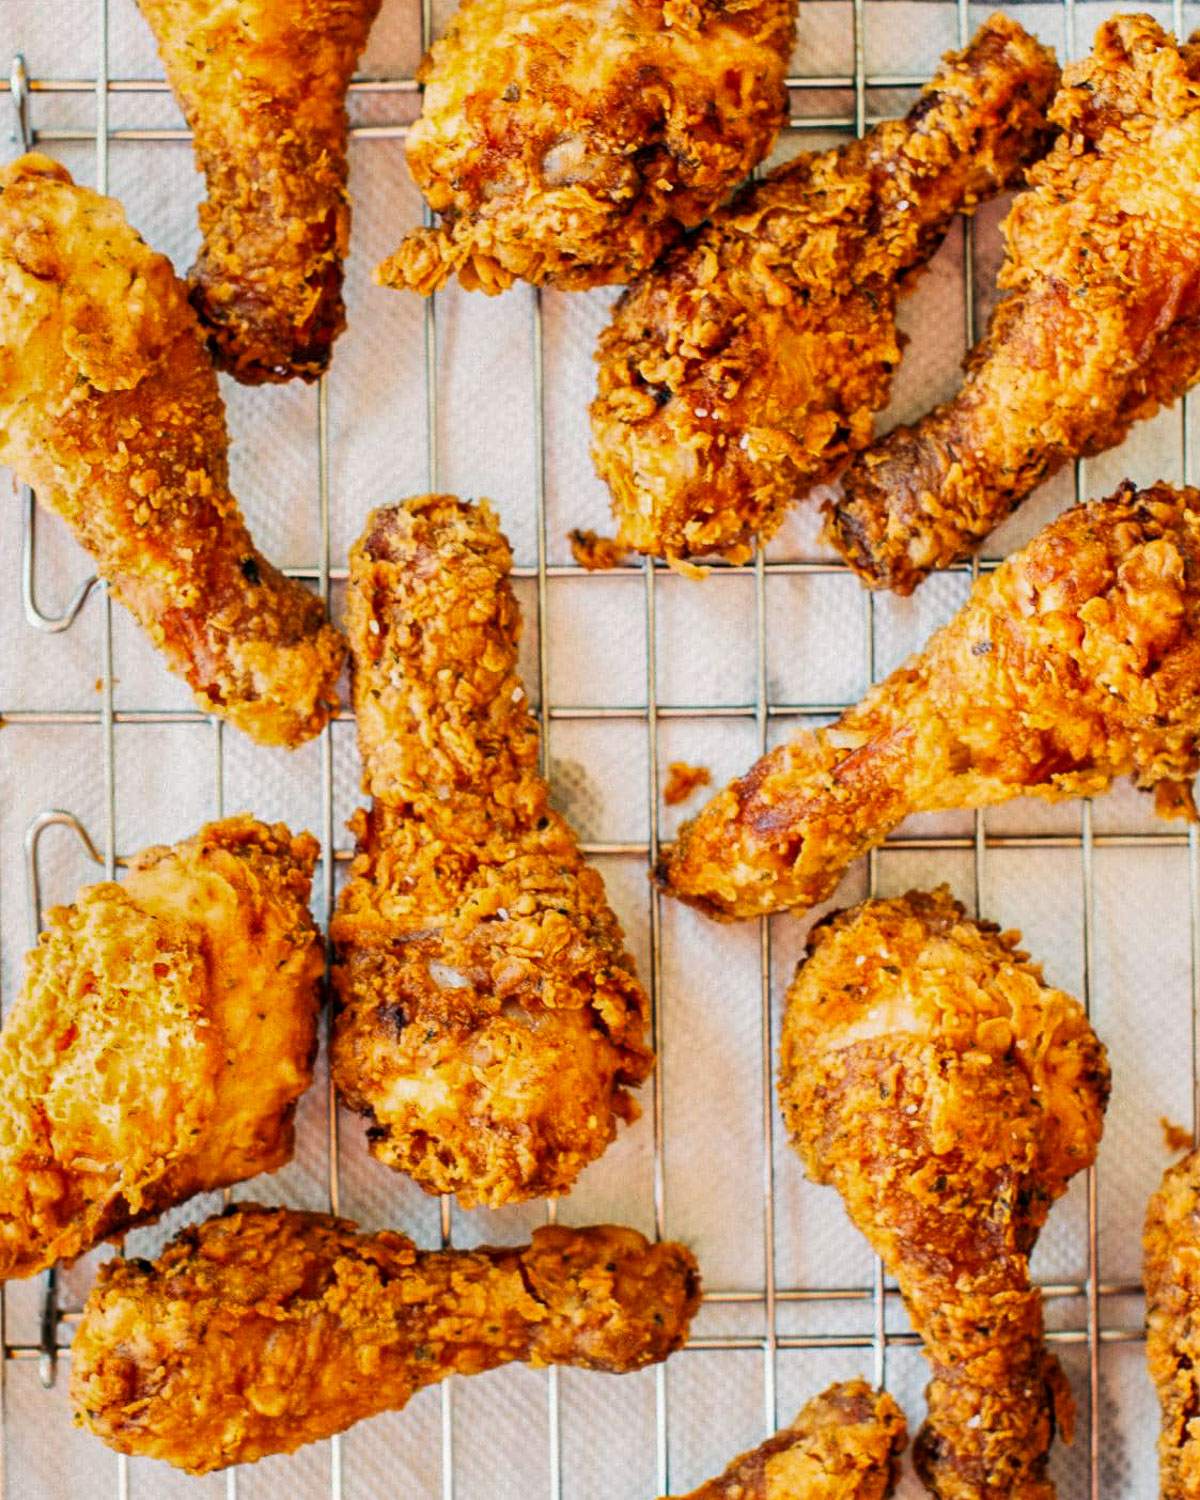
Cook in batches. Do not crowd the pan. Fry each batch, flipping once, until deep golden brown and the internal temperature reaches 165°F. This takes 8 to 12 minutes depending on the size of the pieces.
Rest on the Rack
Transfer each batch to the wire rack in a single layer. Don’t stack the pieces. Serve hot, or cool completely on the rack before refrigerating.
5 Common Mistakes When Making Buttermilk Fried Chicken
Here are the most frequent mix-ups to avoid when making buttermilk fried chicken:
- Frying cold chicken: Cold chicken from the fridge shocks the hot oil and brings the temperature down fast. When the oil cools below 350°F, the coating absorbs grease instead of crisping. Always bring the chicken to room temperature first.
- Not monitoring the oil temperature: The oil should stay at 350°F. Too cool and the coating gets soggy. Too hot and the outside burns before the inside cooks through. Check it between batches and adjust your heat.
- Crowding the pan: Adding too many pieces at once drops the oil temperature and causes the chicken to steam rather than fry. Cook no more than 4 pieces at a time in a standard skillet.
- Resting directly on paper towels: Paper towels absorb the oil but trap steam underneath the chicken. The bottom goes soft. Use a wire rack so air reaches all sides.
- Skipping the baking powder: This is what makes the crust light. Don’t substitute it with anything else or leave it out. It’s a small amount but the effect is real and noticeable.
Make Ahead and Storage
Marinate the chicken the night before and fry fresh. Fried chicken also reheats really well with the right method.
Storing Leftovers
- Cool completely first: Let the chicken rest on the wire rack until it reaches room temperature. Sealing it warm traps steam and makes the coating go soft.
- Refrigerator: Store in an airtight container for up to 3 days. Keep the pieces in a single layer or separated by parchment if stacking.
Freezing
- Freeze after frying: Cool completely, then freeze in a single layer on a baking sheet. Once solid, transfer to a freezer bag. Keeps for up to 2 months.
- Thawing: Thaw overnight in the fridge before reheating. Don’t microwave from frozen.
Reheating Buttermilk Fried Chicken
- Oven: Place chicken on a wire rack over a baking sheet. Reheat at 400°F for 15 minutes. This brings back most of the original crispiness.
- Air fryer: Here’s how to reheat fried chicken in the air fryer.
- Skip the microwave: It turns the coating limp and chewy. The oven or air fryer is always worth it.
How to Serve This Buttermilk Fried Chicken Recipe
Fried chicken fits every occasion. It’s just as good at a summer cookout as it is on a cold Tuesday night. Keep the sides simple so the chicken stays the star.
Fried Chicken Dipping Sauces
- Hot honey sauce (like I use on my Hot Honey Fried Chicken Sandwich)
- Honey mustard chicken sauce
- Ranch dressing
- Nashville Hot Sauce
- Mango Habanero Sauce
- A simple mix of melted butter and bottled hot sauce (like Frank’s) for dipping
Side Dishes for Fried Chicken
These are the sides I reach for most often with this recipe.
- Easy homemade coleslaw is the classic pairing and takes just 5 minutes to put together.
- Fluffy buttermilk drop biscuits were made for serving alongside fried chicken. One bowl, no rolling required.
- Macaroni salad is a great make-ahead option when you’re feeding a crowd. It just gets better as it sits.
- Light and crispy onion rings or fried potatoes since you’re in frying mode already.
- Corn on the cob or roasted sweet potato wedges are simple additions that round out the plate.
Final Notes, Pro Tips + Science-Based Secrets
A few things I’ve learned from making this recipe many times over.
- Baking powder is the real secret: When baking powder hits hot oil, it produces carbon dioxide bubbles inside the coating. These bubbles expand and create a porous, airy crust that’s light instead of dense. It’s the same principle behind why tempura batter is so delicate.
- Buttermilk tenderizes through acidity: The lactic acid in buttermilk breaks down the muscle proteins in the chicken. This is why buttermilk-marinated chicken is noticeably more tender and juicy than chicken marinated in water or plain milk.
- Room temperature is non-negotiable: When cold chicken hits hot oil, the oil temperature drops sharply. The coating then sits in cooler oil and absorbs fat instead of crisping. Let the chicken come up to room temperature every time.
- Cast iron is the best pan for frying: It has excellent heat retention, which means the oil temperature recovers quickly after each batch goes in. Stainless or nonstick pans lose heat too fast for consistent results.
- Flip once and only once: Multiple flips interrupt crust formation. Let the first side set completely before turning. Flip once at the midpoint and leave it alone.
- Small batches produce better results: I know it takes longer, but frying too many pieces at once drops the oil temperature and produces steamed, pale, oily chicken. Four pieces at a time in a standard 12-inch skillet is the limit.
FAQs About Light & Crispy Buttermilk Fried Chicken
Just skimming through? Here are some quick answers to the commonly-asked questions.
At minimum, marinate the chicken for 1 hour. Overnight is even better and gives the most tender result. The longer the buttermilk has to work, the more it breaks down the proteins in the meat. If you’re short on time, 30 minutes will still make a difference compared to no marinade at all.
Yes, thighs and breasts work well too. Drumsticks are ideal because they’re uniform in size and cook evenly all the way through on the stovetop. For thicker cuts like bone-in breasts or thighs, fry until the outside is golden, then transfer to a 350°F oven to finish cooking to 165°F without burning the crust.
Canola and peanut oil are the top choices because both have a high smoke point well above 350°F. Vegetable oil also works. Avoid olive oil, which smokes at lower temperatures and can impart a strong flavor. Whatever oil you use, check the temperature with a thermometer before adding the chicken.
Baking powder reacts with the heat of the oil to produce carbon dioxide gas inside the coating. Those bubbles expand and create a light, porous crust instead of a dense, heavy one. This is the science behind why the crust feels so much lighter than standard flour-only coatings. Don’t substitute or skip it.
An instant-read thermometer is the most reliable method. You’re aiming for 350°F. If you don’t have one, drop a small pinch of flour into the oil. If it sizzles actively and rises to the surface immediately, the oil is ready. If it sinks or sizzles very weakly, give the oil a few more minutes.
Absolutely. A large cast iron skillet is actually my preferred method. Fill it with about ¾ inch of oil and heat it on the stovetop over medium-high heat. Cast iron holds and distributes heat better than most pans, which helps you maintain a steady frying temperature throughout the whole batch.
Other Chicken Recipes You’ll Love
- 41 best chicken drumstick recipes
- Easy oven-baked honey BBQ chicken drumsticks
- Crispy baked chicken parmesan
Light and Crispy Buttermilk Fried Chicken
Ingredients
For Chicken & Marinade:
- 12 bone-in chicken drumsticks
- 2 cups buttermilk
- 1 tsp kosher salt
- ½ tsp pepper
For Coating:
- 2 cups all purpose flour
- 2 tbsp dried parsley
- 1 tbsp paprika
- 2 tsp baking powder
- 2 tsp kosher salt
- 1 tsp garlic powder
- 1 tsp onion powder
- canola or peanut oil for frying
Instructions
- Whisk salt into buttermilk in a shallow baking dish. Add chicken, turning to coat. Cover and refrigerate, allowing chicken to marinate at least an hour (up to overnight). Bring chicken to room temperature before frying (that means taking it out of the fridge 30-60 minutes prior).
- Add all ingredients for coating into a large zippered freezer bag and shake to combine.
- Heat oil in a deep fryer to 350ºF, or 3/4" deep in a large cast iron skillet. Line a baking sheet with paper towels and place a wire cooling rack on top.
- Remove chicken a piece at a time from the marinade, letting excess drip off. Add chicken to the bag with flour mixture and shake to evenly coat. Cook chicken in batches, flipping once, until golden brown and cooked through (165ºF internal temperature), 8-12 minutes. Transfer to wire rack in a single layer. Serve hot, or cool completely on the wire racks before refrigerating.


This chicken was so good and reminded me of the Zimbabwean KFC. Love it!!!
My husband and I are not fans of drumsticks. Until this recipe! Marinated in buttermilk overnight and they turned out so tender and flavorful!Would definitely make again!
This sounds really great. Can I make it earlier in the day and warm up for dinner