Of all the recipes for Graham Cracker Crust, this one just WINS. Only 3 ingredients, slices clean + holds firm! You don’t even have to bake it! Bonus? It is done in 5 minutes!
My Favorite of Recipes for Graham Cracker Crust
Just 3 basic ingredients come together for this simplest of graham cracker crust recipes, and it tastes superior to any store-bought crust.
Ingredients You Need
- Graham cracker crumbs – You’ll need 11 full graham cracker sheets to yield 1 ½ cups of fine crumbs. Crush finely using a food processor or a rolling pin.
- Salted butter – Binds the crumbs and adds rich flavor. Salted keeps it balanced.
- Sugar – Helps the crust hold together and adds sweetness. It also caramelizes slightly when baked for extra flavor. Brown sugar works, too.
Variations and Substitutions
You’ve got options if you need to switch things up.
- Use unsalted butter – Just add a pinch of salt to enhance the flavor.
- Swap the flavor – Try Biscoff cookie crumbs, digestive biscuits, or chocolate wafers for an Oreo pie crust. You can add a pinch of cinnamon if you’d like.
- Make it gluten-free – Use gluten-free graham-style crackers if needed.
Full ingredient quantities in the recipe card below.
Grab These Tools
Nothing fancy required—just basic kitchen staples.
- Springform pan, pie plate or muffin pan (if making mini cheesecakes)
- Medium bowl – For combining the crumbs, butter, and sugar.
- Measuring cups – For pressing the crust evenly and firmly.
- Parchment paper and cooking spray – Helps with easy release.
How to Make the Best Homemade Graham Cracker Crust Recipe
It only takes a few minutes to make this crust, and you can choose to bake it or not depending on your filling.


Prep Your Pan
- Line the bottom of a 9” springform pan with parchment paper. Spray the bottom and sides with cooking spray so slices lift out cleanly.
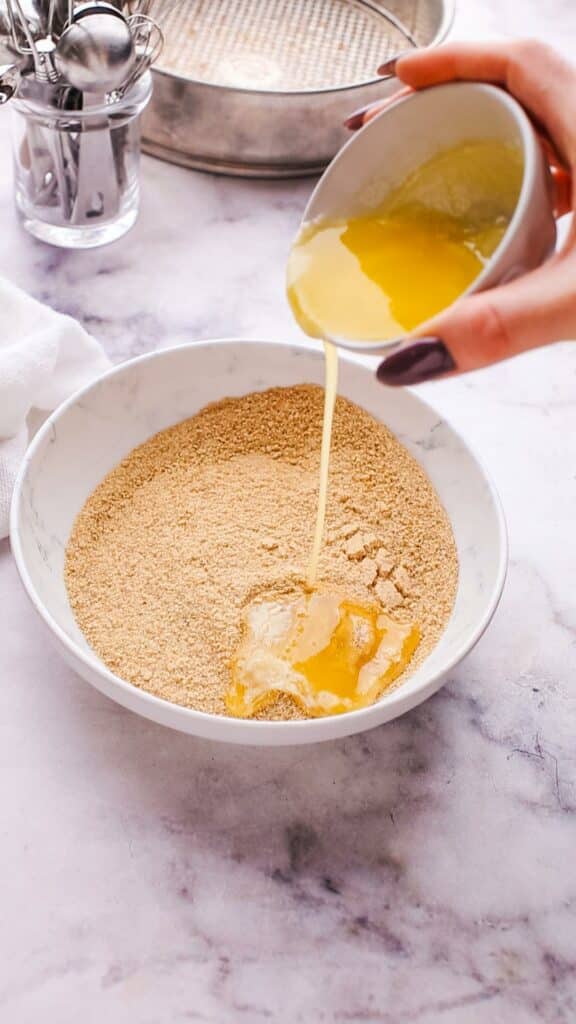
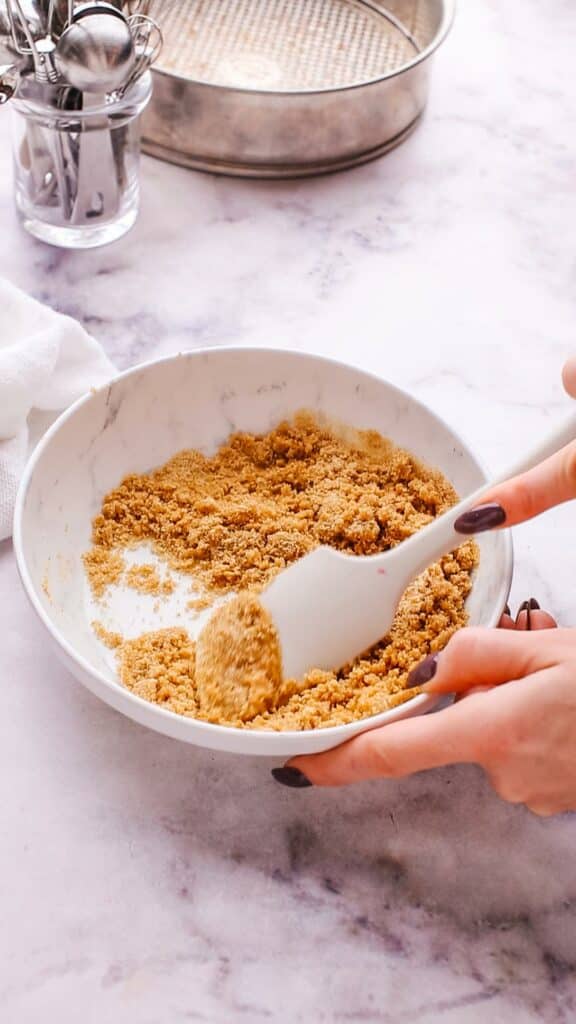
Mix the Ingredients
- Stir crushed graham cracker crumbs, melted butter, and sugar in a bowl until everything is evenly moistened.
- It should look like wet sand and hold together when squeezed.
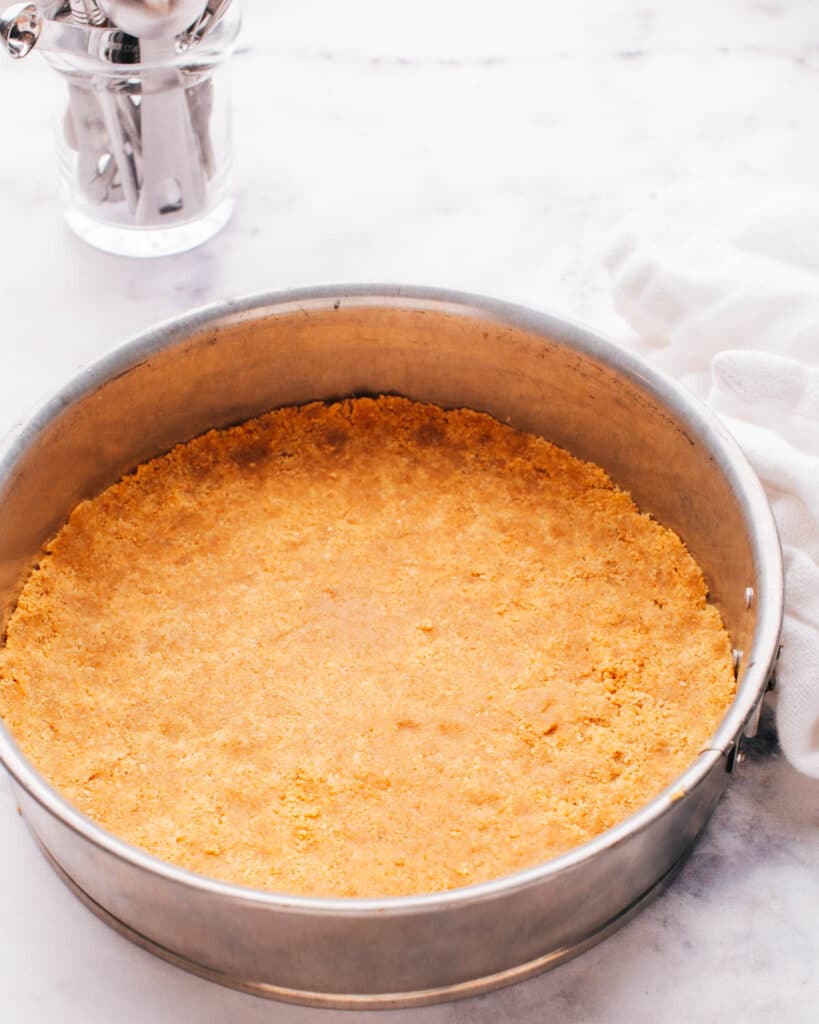
Press It Firmly
- Transfer the mixture to your prepared pan.
- Use the bottom of a measuring cup to press it into an even layer and about 1” up the sides.
- Firm pressure here makes a sturdier crust that won’t fall apart.
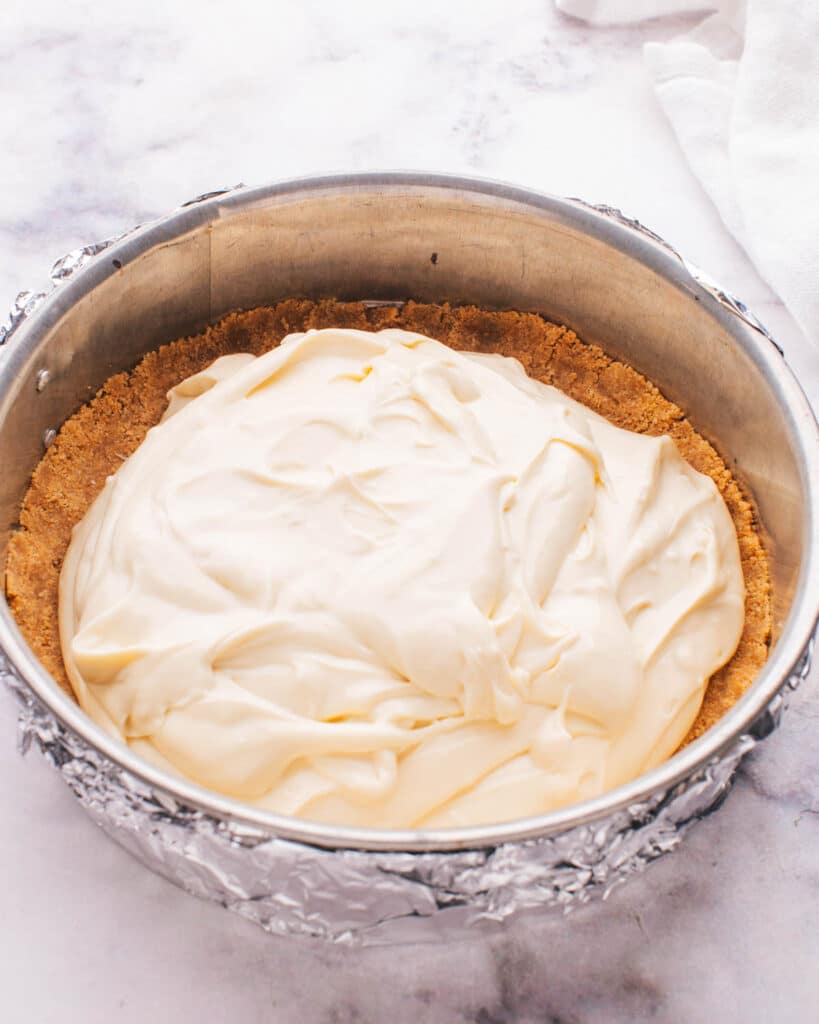
Chill or Bake
- For a no bake filling, like my cherry cheesecake squares, freeze the crust for 10 minutes.
- If you want a firmer texture and toasty flavor (especially for Philadelphia cheesecake), bake it at 350°F for 8–10 minutes. Let it cool before adding your filling.

To Bake or Not to Bake?
Whether or not to bake your graham cracker crust depends on the texture you want and the kind of filling you’re using.
Baking gives the crust a firmer, crunchier bite. It also brings out more flavor—think toasty graham cracker and hints of caramel from the sugar. A no-bake crust stays soft and buttery, with a milder taste.
For No-Bake Cheesecakes
If you’re making a no-bake cheesecake, chilling the crust is totally fine. Once the butter firms up, the crust holds together well—at least while it’s cold. At room temp, the butter will soften and the crust can crumble more easily.
For Baked Cheesecakes
When you’re baking the filling, I recommend pre-baking the crust. It’s OK not to bake it, just serve the cheesecake cold and expect a slightly more crumbly base.
- The sugar melts and acts like glue as it cools, making the crust more solid. It also makes a barrier to keep it from getting soggy once you pour in the liquid batter.
My Take
If I’m not baking the filling, I’ll often skip baking the crust.
But if I want super-clean slices, I bake it every time. You get a sturdier texture and more flavor for just 8 minutes of oven time. Worth it.

Make Ahead and Storage
You can prep the crust in advance to make cheesecake assembly even faster.
Storing Leftovers
- Cover the filled cheesecake tightly and store it in the fridge for up to 5 days. The crust holds up well if it was packed firmly and kept cold.
Freezing Homemade Crust
- Wrap the empty crust (baked or unbaked) tightly in plastic wrap and foil. Store in the freezer for up to 3 months.
- You can also freeze the whole cheesecake after filling—just thaw overnight in the fridge.
Cheesecake Recipes to Try it With
I love buttery graham cracker crust recipes with all kinds of baked and no bake cheesecake recipes. Here are a few of my favorites:
Graham Cracker Pie Crust
This graham cracker crust isn’t just for cheesecake. It works beautifully pressed in and up the sides of a 9-inch pie plate. It’s so much easier than traditional pie crust!
- For pies that don’t require baking, just chill the crust as directed. If your pie filling is warm, go with the baked crust so it doesn’t soften too much underneath. It holds up better and brings out a nice toasty flavor that balances sweet, rich fillings.
- You can also use it for baked pies that don’t need a long oven time. Use the blind baking method (par-bake the crust empty in the pie pan) for 8–10 minutes, then fill and bake pie as your recipe calls for. It adds a buttery, crunchy contrast that’s especially good with custard pies or puddings.
- It’s especially good with creamy, cold-set pies like no-bake chocolate tart, strawberry white chocolate mousse tart, or peanut butter pie.

The BEST of ALL Recipes for Graham Cracker Crust (3 Ingredients!)
Ingredients
- 1 ½ cups graham cracker crumbs *see notes
- ¼ cup salted butter melted
- 2 tbsp sugar
Instructions
- Line the bottom of a 9” springform pan with parchment paper. Spray the bottom and sides with cooking spray.
- In a large bowl, stir graham cracker crumbs, melted butter, and sugar together until evenly moistened. Press the mixture firmly into the bottom and 1 inch up the sides of the prepared pan using a flat-bottomed measuring cup or glass.
No-Bake Option
- Freeze the crust for at least 10 minutes while you prepare the filling. Keep it cold until the cheesecake is served. *See notes section below to decide whether to bake or not.
Baked Option
- Bake the crust in a 350°F oven for 8 to 10 minutes, until lightly golden and fragrant. Let it cool completely before adding the filling.
Notes
- For baked cheesecakes (with liquid batter), baking the crust helps create a moisture barrier to prevent the crust from getting soggy before the filling sets.
- No-bake crust is quicker and works perfectly, but is softer and more delicate.
- Either way, pressing the crumbs firmly is key.
Nutrition
Nutrition information is automatically calculated, so should only be used as an approximation.


My new go-to crust recipe. The butter-to-crumb ratio is spot-on — held together beautifully and didn’t get soggy under the filling. Used it for cheesecake and key lime pie back to back.