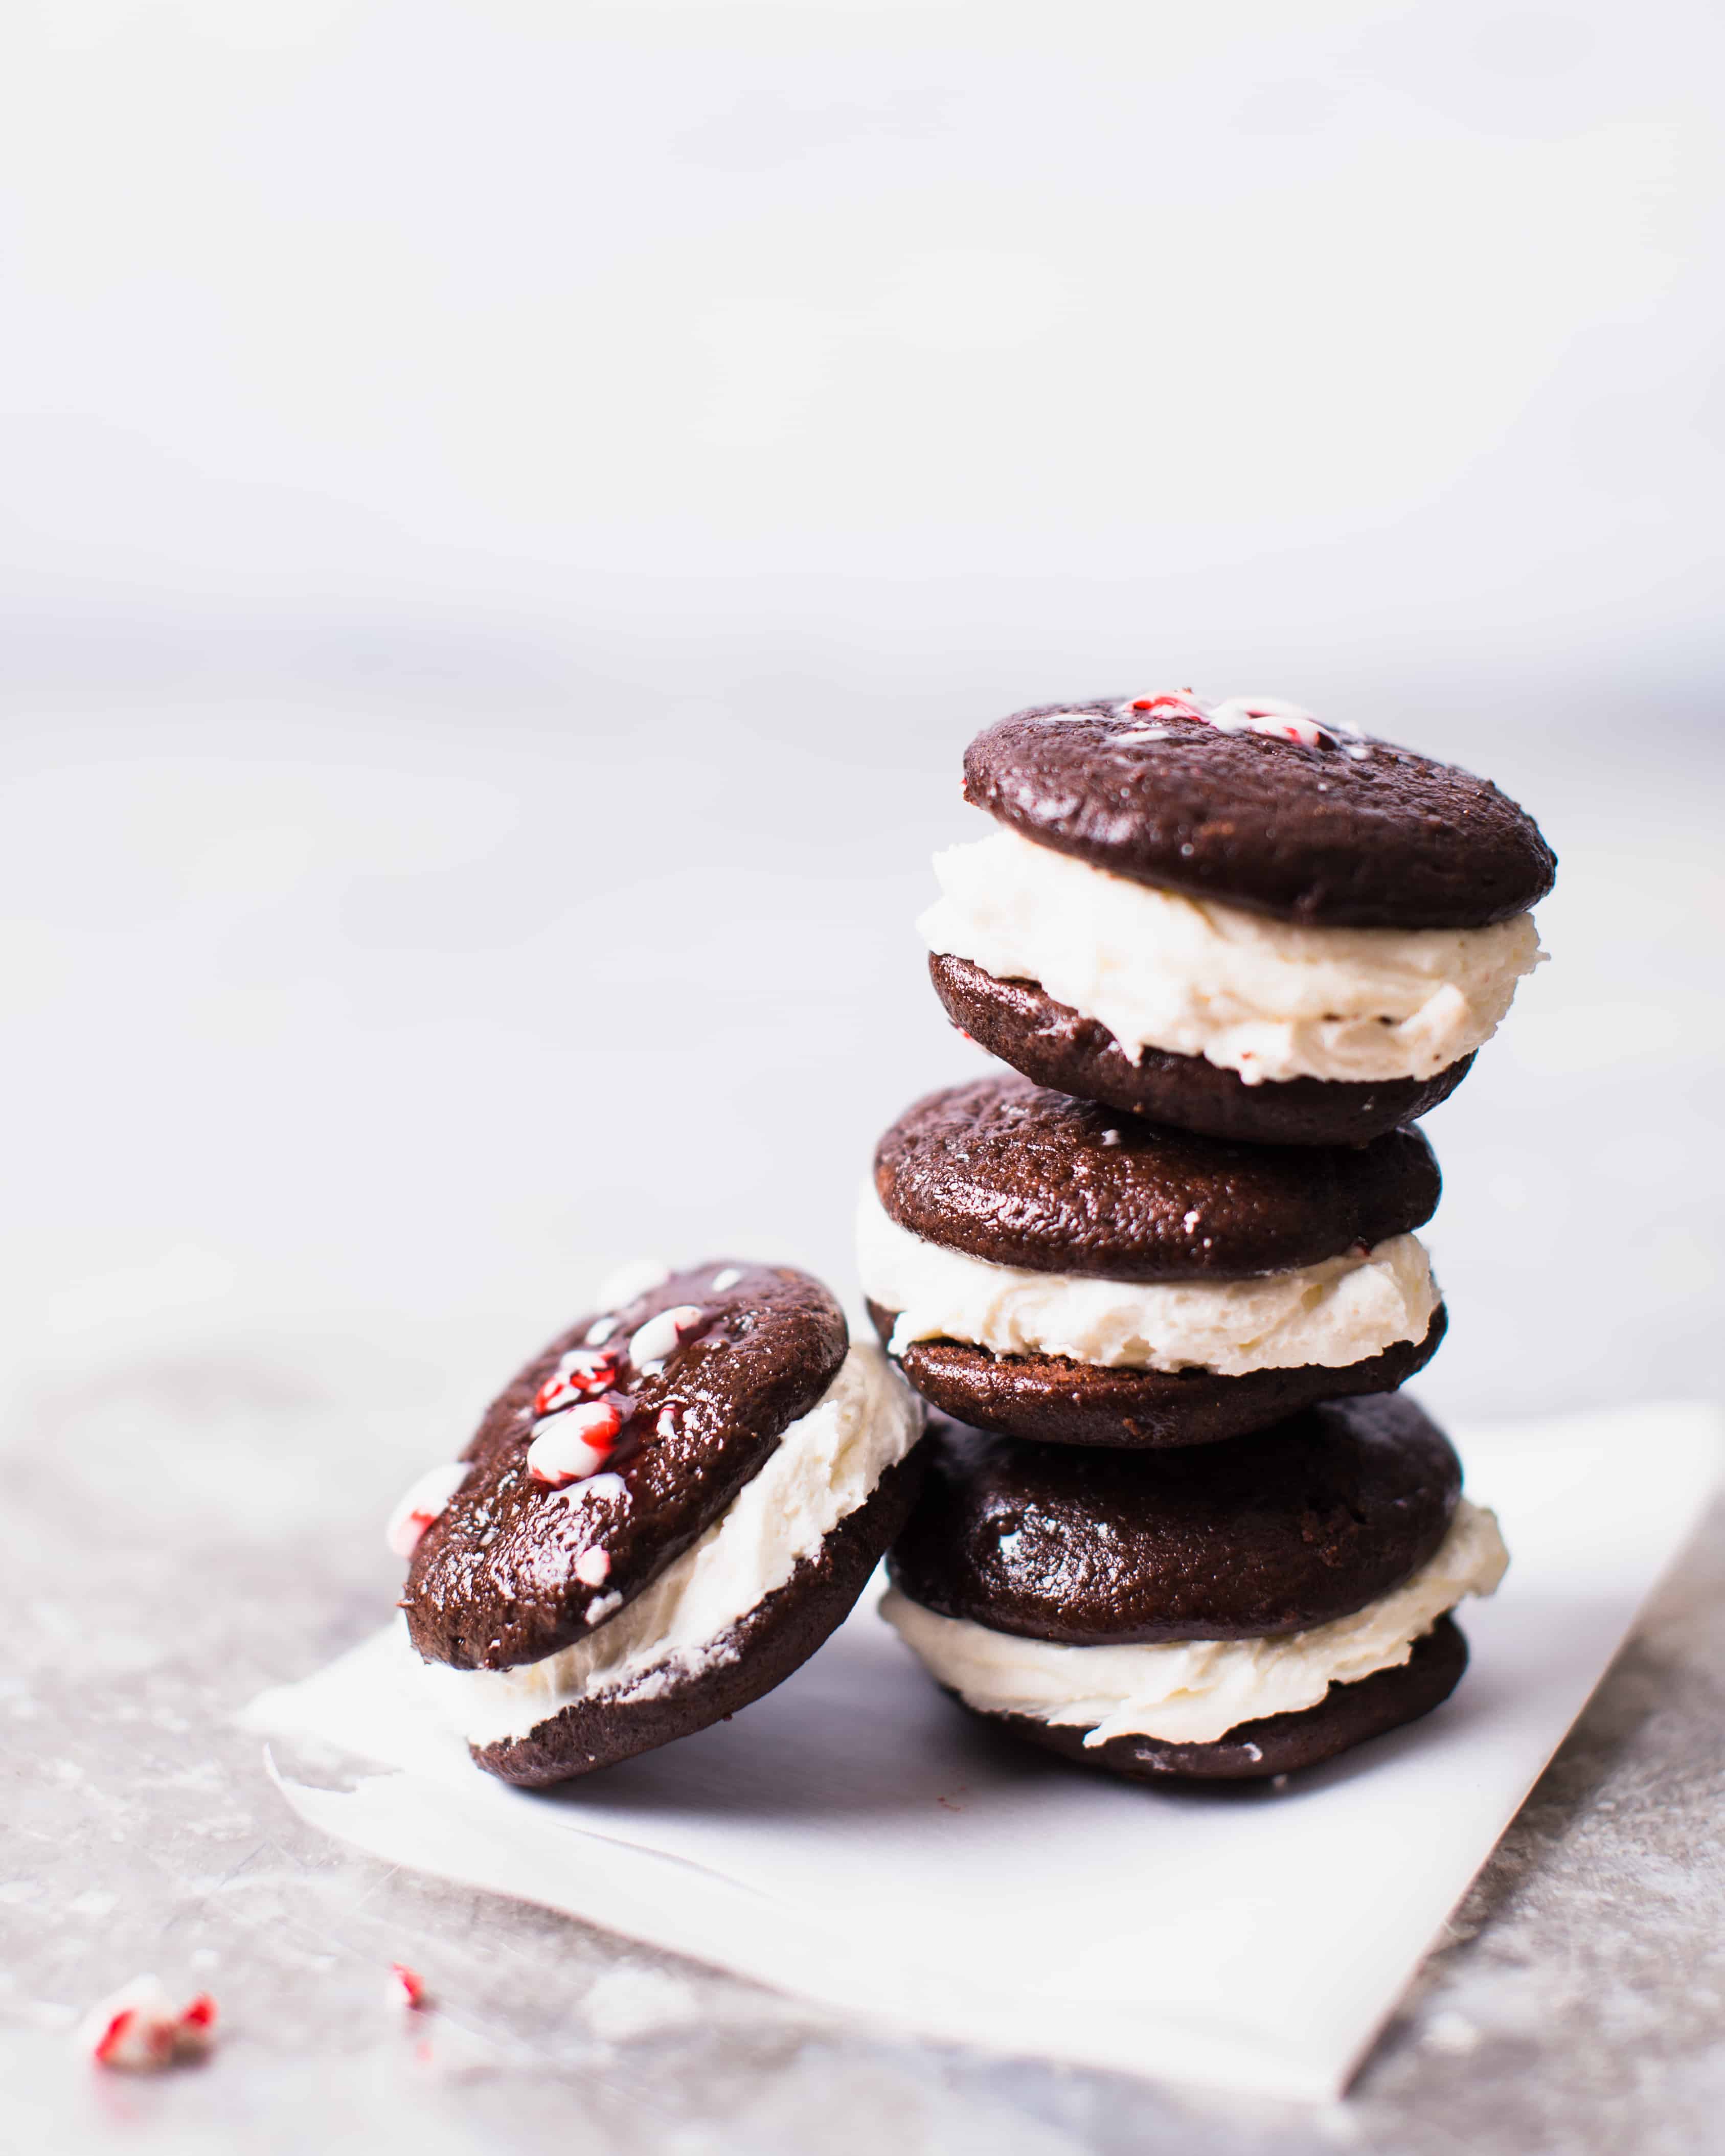
A delicious Peppermint Whoopie Pie recipe for chocolate mint lovers. Soft chocolate cookies stuffed with fluffy peppermint buttercream.
Why You’ll Love Peppermint Whoopie Pies
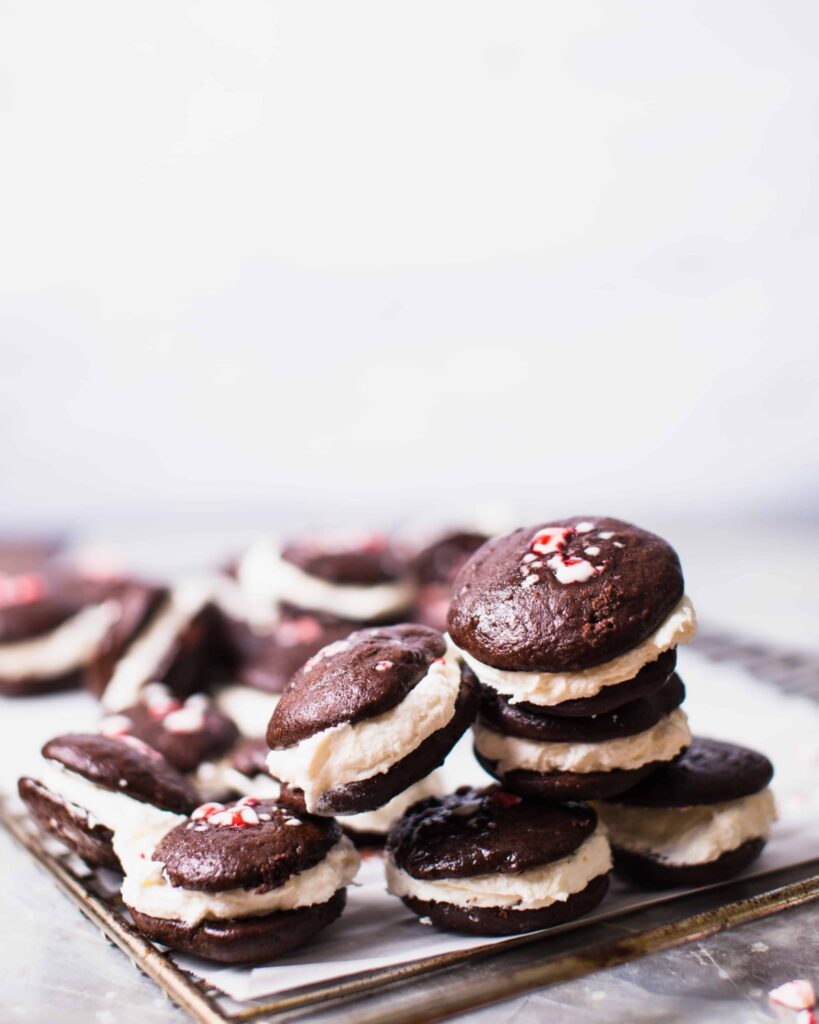
- It’s Whoopie Time: If you aren’t familiar, a whoopie pie is basically two soft, cakey chocolate cookies sandwiching a pillowy cream filling.
- Cool & Refreshing: The creamy mint buttercream filling is the perfect contrast to the rich chocolate cookies, making this a refreshing minty alternative to traditional marshmallow frosting.
- Festive Treats: Celebrate Christmas with something special that everyone will love! Make these yummy whoopie pies for your family and friends and see how quickly they disappear.
As an East Coaster, whoopie pies are in my blood. They originate in the North Atlantic and they are taken very seriously (one of my best friends had them at her wedding!). They’re one of my first memories of baking with my mom.
Here’s What You Need to Make this Mint Whoopie Pie Recipe
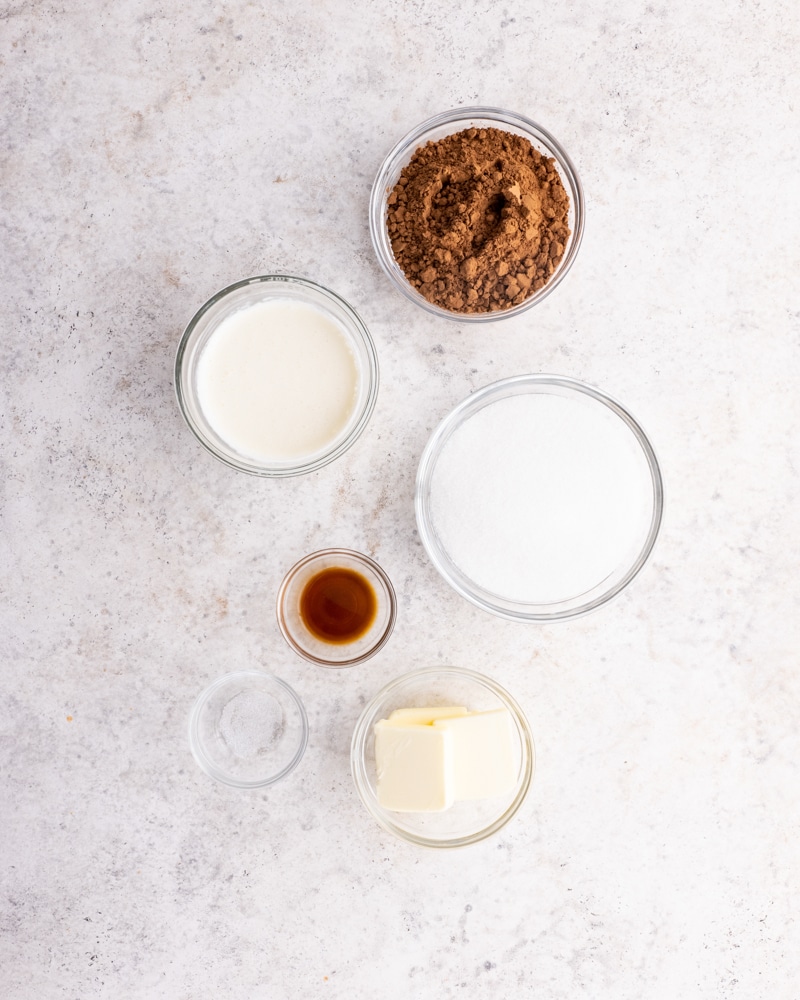
Peppermint Whoopie Pies Ingredients
Let’s break down the ingredients by their role in each component of the recipe:
For the Cookies:
- All-Purpose Flour: The base for your cookie dough.
- Unsweetened Cocoa Powder: Gives the cookies a rich chocolate flavor.
- Baking Powder & Baking Soda: Leavening agents that help the cookies rise.
- Salt: Enhances the flavors of the other ingredients.
- Butter: Adds richness and moisture to the cookies.
- Granulated Sugar: Sweetens the cookies.
- Eggs: Bind the ingredients and add structure.
- Milk: Moistens the dough.
- Sour Cream: Adds tanginess and tenderizes the cookies.
- Vanilla Extract: Enhances overall flavor.
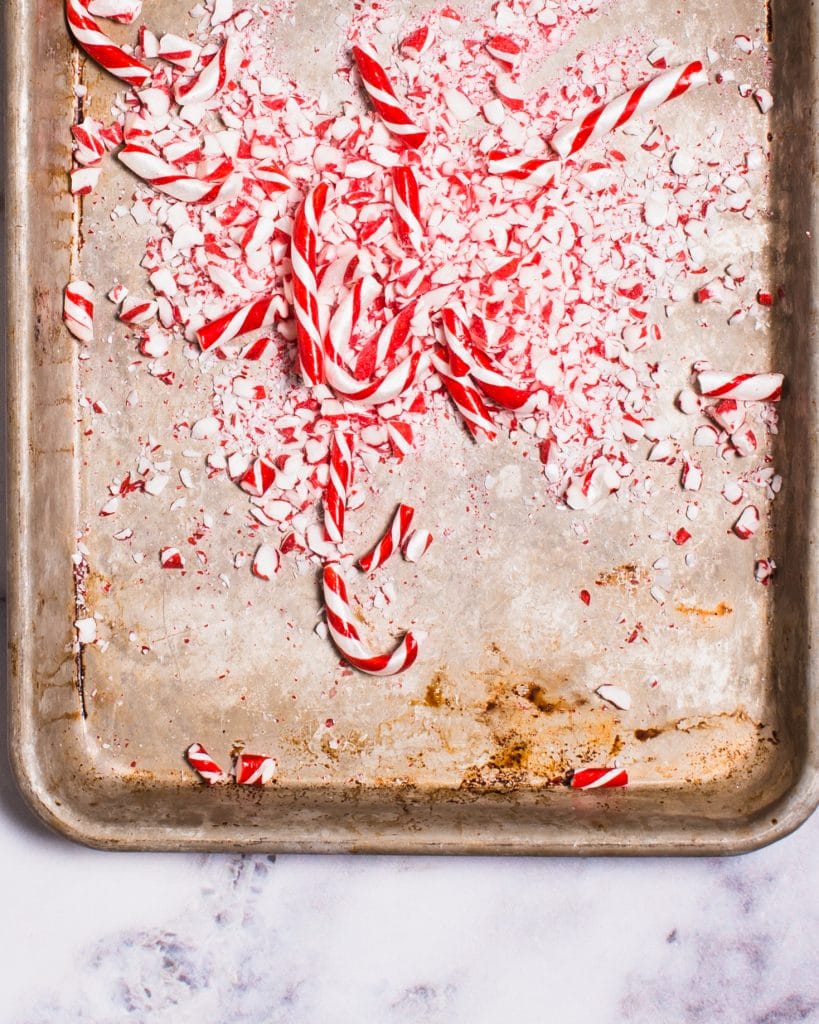
- Crushed Peppermint Candies (like Candy Canes): Adds peppermint flavor and crunch.
For the Mint Buttercream Frosting:
- Unsalted Butter: Creamy base for the filling.
- Confectioners’ Sugar: Sweetens and smooths the filling.
- Peppermint Extract: Provides the distinctive peppermint flavor.
- Milk: Adjusts the consistency of the filling.
Variations and Substitutions
Customize your whoopie pies with these ideas:
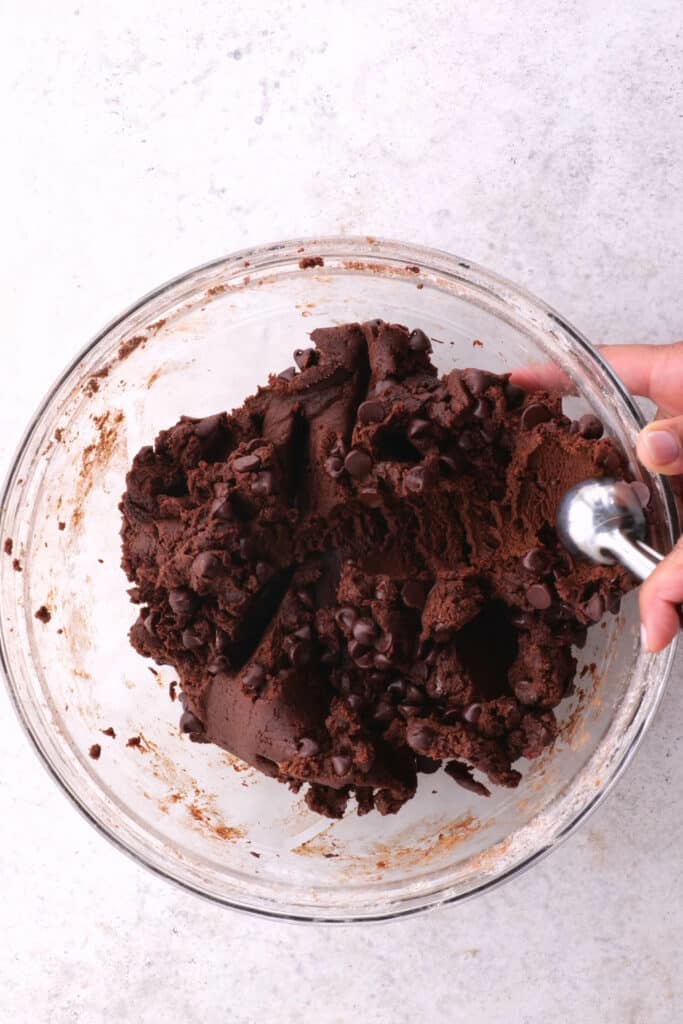
- Chocolate Chips: Mix into the cookie batter for extra chocolatey cookies.
- Food Coloring: Add a few drops of red or green food coloring to the filling for a festive look.
- Mini Chocolate Chips: Sprinkle on top of the filling before sandwiching for added texture.
Grab these Tools
Ensure you have the following tools for a smooth baking experience:
- Medium Bowl: For preparing both the cookie dough..
- Whisk: To mix dry ingredients thoroughly.
- Standing Mixer: Ideal for creaming butter and sugar, and for making the filling.
- Baking Sheets: For baking the cookies.
- Parchment Paper: To line the baking sheets. Prepared cookie sheets prevent sticking and make for easy clean up.
- Cooling Rack: To cool the cookies after baking.
- Cookie Scoop or Tablespoon: To portion out the cookie dough.
How to Make Peppermint Whoopie Pies
Get Ready, Set, Bake! Get all your ingredients ready for some delicious peppermint whoopie pies.
How to Make Peppermint Whoopie Pies: An Easy Guide
Dive into the holiday spirit with these Peppermint Whoopie Pies, a perfect blend of chocolatey goodness and peppermint freshness.
Preparing the Whoopie Pie Cookie Dough
- Combine Dry Ingredients: Start by whisking together the flour, unsweetened cocoa powder, baking powder, baking soda, and salt in a medium bowl. This mixture will be the dry base for your cookies.
- Cream Butter and Sugar: In the bowl of a stand mixer, beat room temperature butter with granulated sugar on medium speed until the mixture becomes light and fluffy. This step is crucial for achieving the right texture.
- Incorporate Eggs: Add eggs to the butter mixture one at a time, beating well after each addition. Ensure each egg is fully incorporated before adding the next.
- Mix in Wet Ingredients: With the mixer on a low setting, gradually beat in the milk, sour cream, and vanilla extract. These ingredients will add moisture and richness to your cookies.
- Add Dry Mixture: Slowly mix in the dry ingredients to the wet mixture. Be sure to scrape down the sides of the bowl to ensure everything is evenly combined.
Baking the Cookies
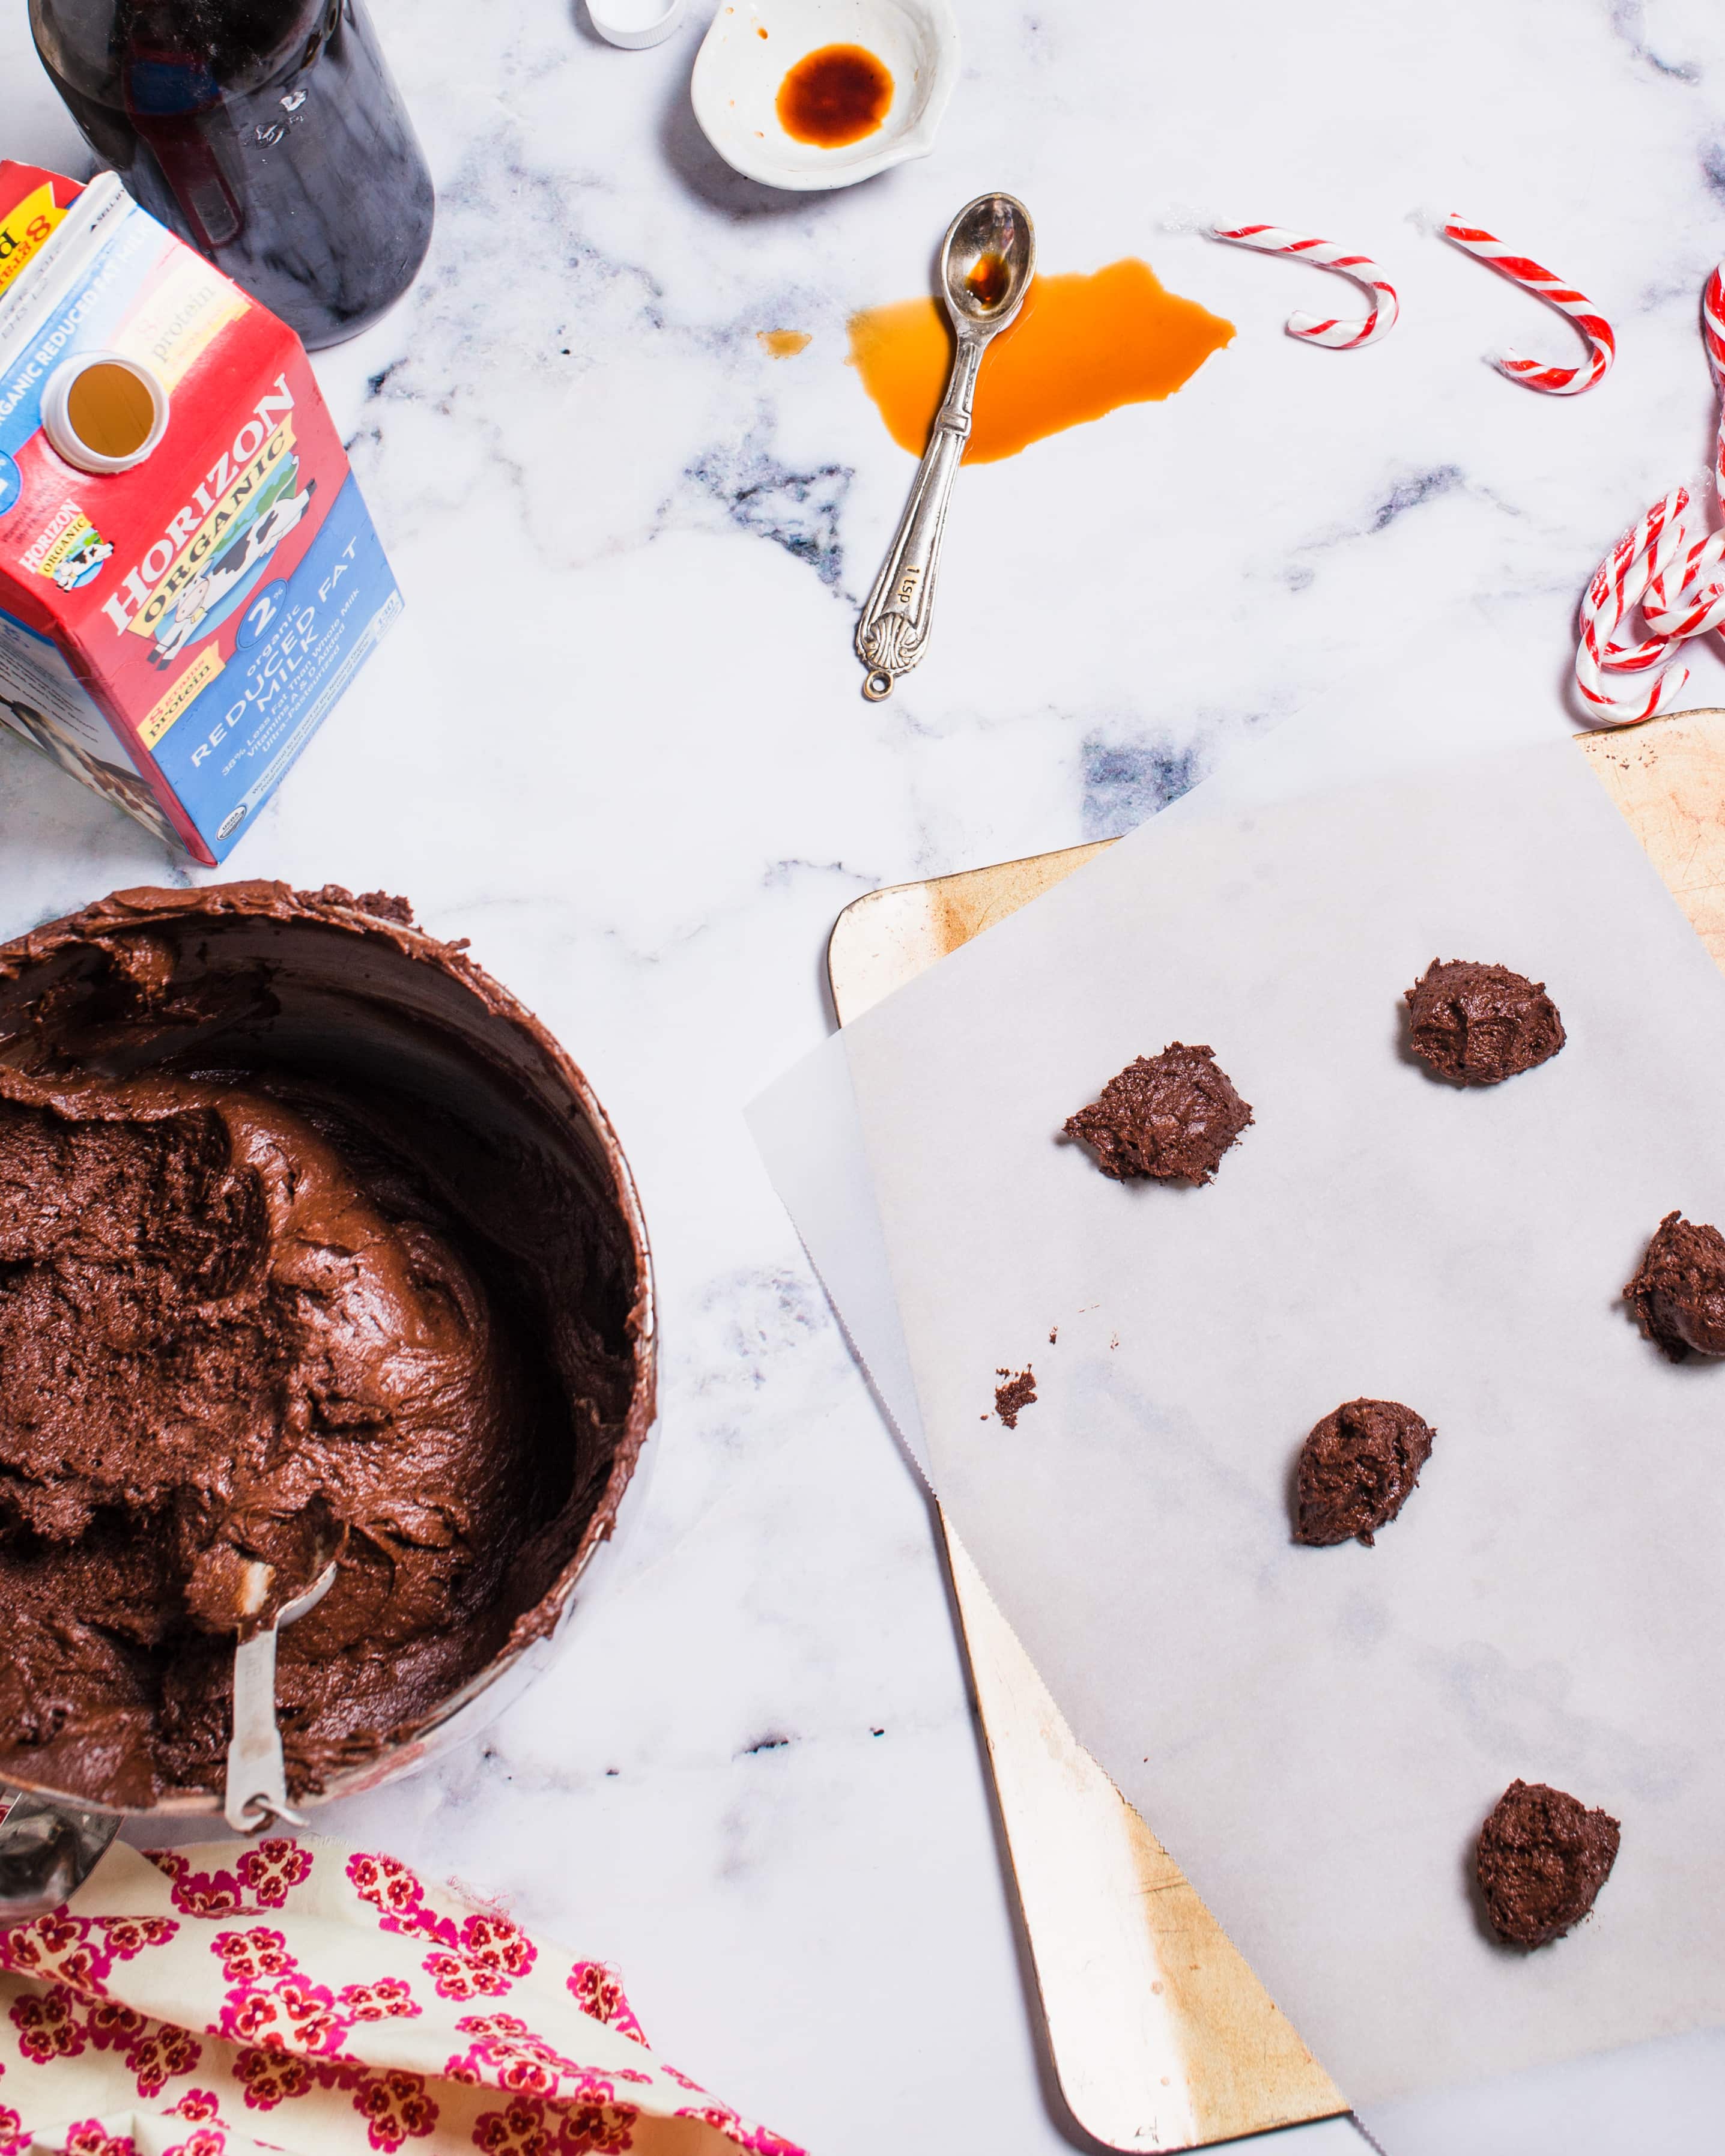
- Preheat and Prepare: Preheat your oven to 350ºF and line baking sheets with parchment paper.
- Form Cookies: Drop level tablespoonfuls of the batter onto the prepared baking sheets, leaving space between each for expansion.
- First Bake: Bake the cookies for 4 minutes. Then, briefly remove from the oven.
- Add Candy Canes: Sprinkle a bit of crushed candy cane onto each cookie for a sparkly peppermint finish.
- Final Bake: Return to the oven and bake for an additional 2 minutes. The cookies should be set but still soft and a bit shiny.
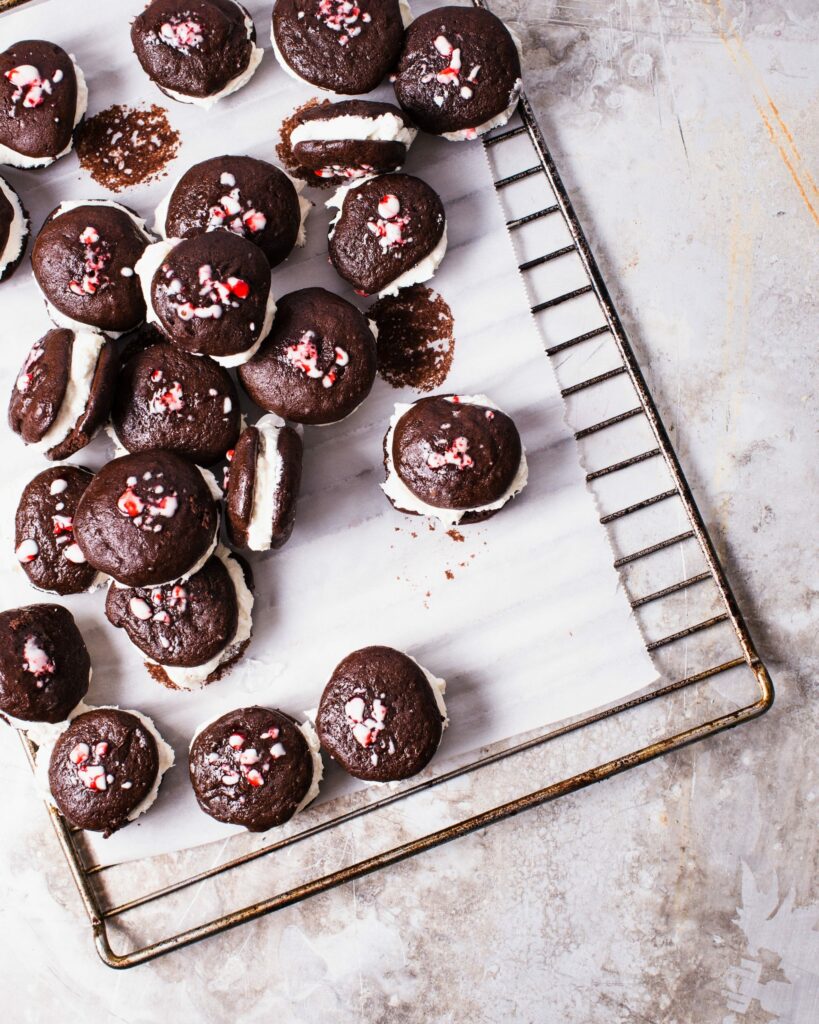
- Cooling: Let the cookies cool on the baking sheet for a few minutes, then transfer to a wire rack to cool completely.
Note: Don’t add the candy canes from the start because they melt and lose their pretty distinct colors and sparkly look.
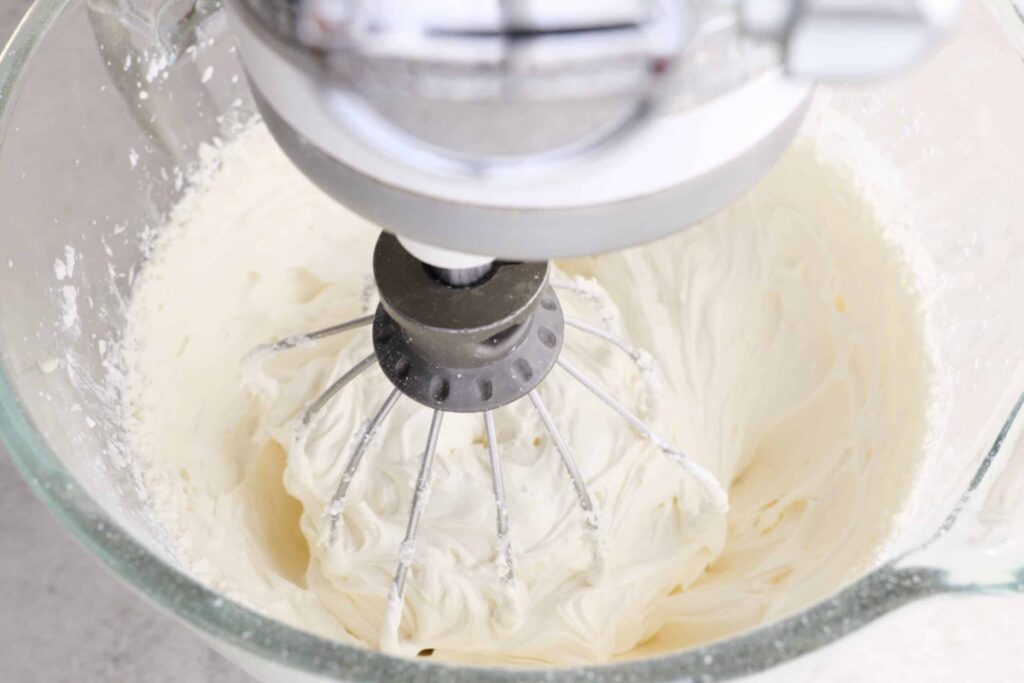
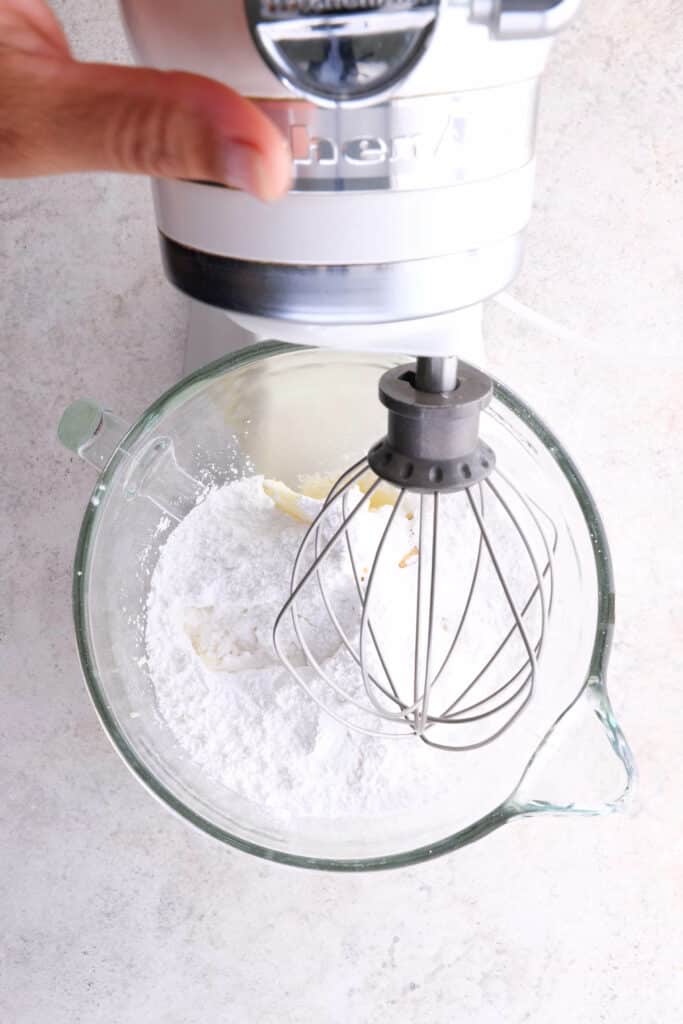
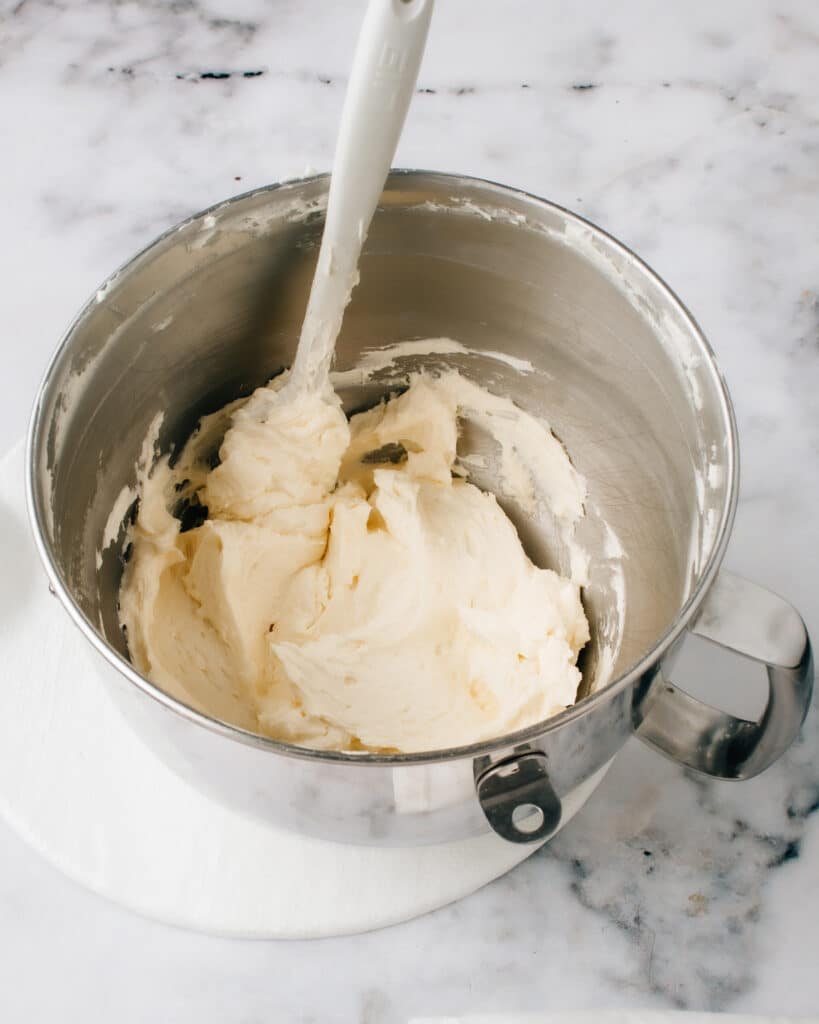
Making the Fluffy Peppermint Buttercream Filling
- Blend Filling Ingredients: In the bowl of an electric mixer fitted with a whisk attachment, combine unsalted butter, powdered sugar, peppermint extract, and milk. Beat on high speed until the mixture is light and fluffy, about 5 minutes.
Note: Consider “air” an ingredient and don’t cut the beating time short. You want to whip it good to get that perfect pillowy consistency.
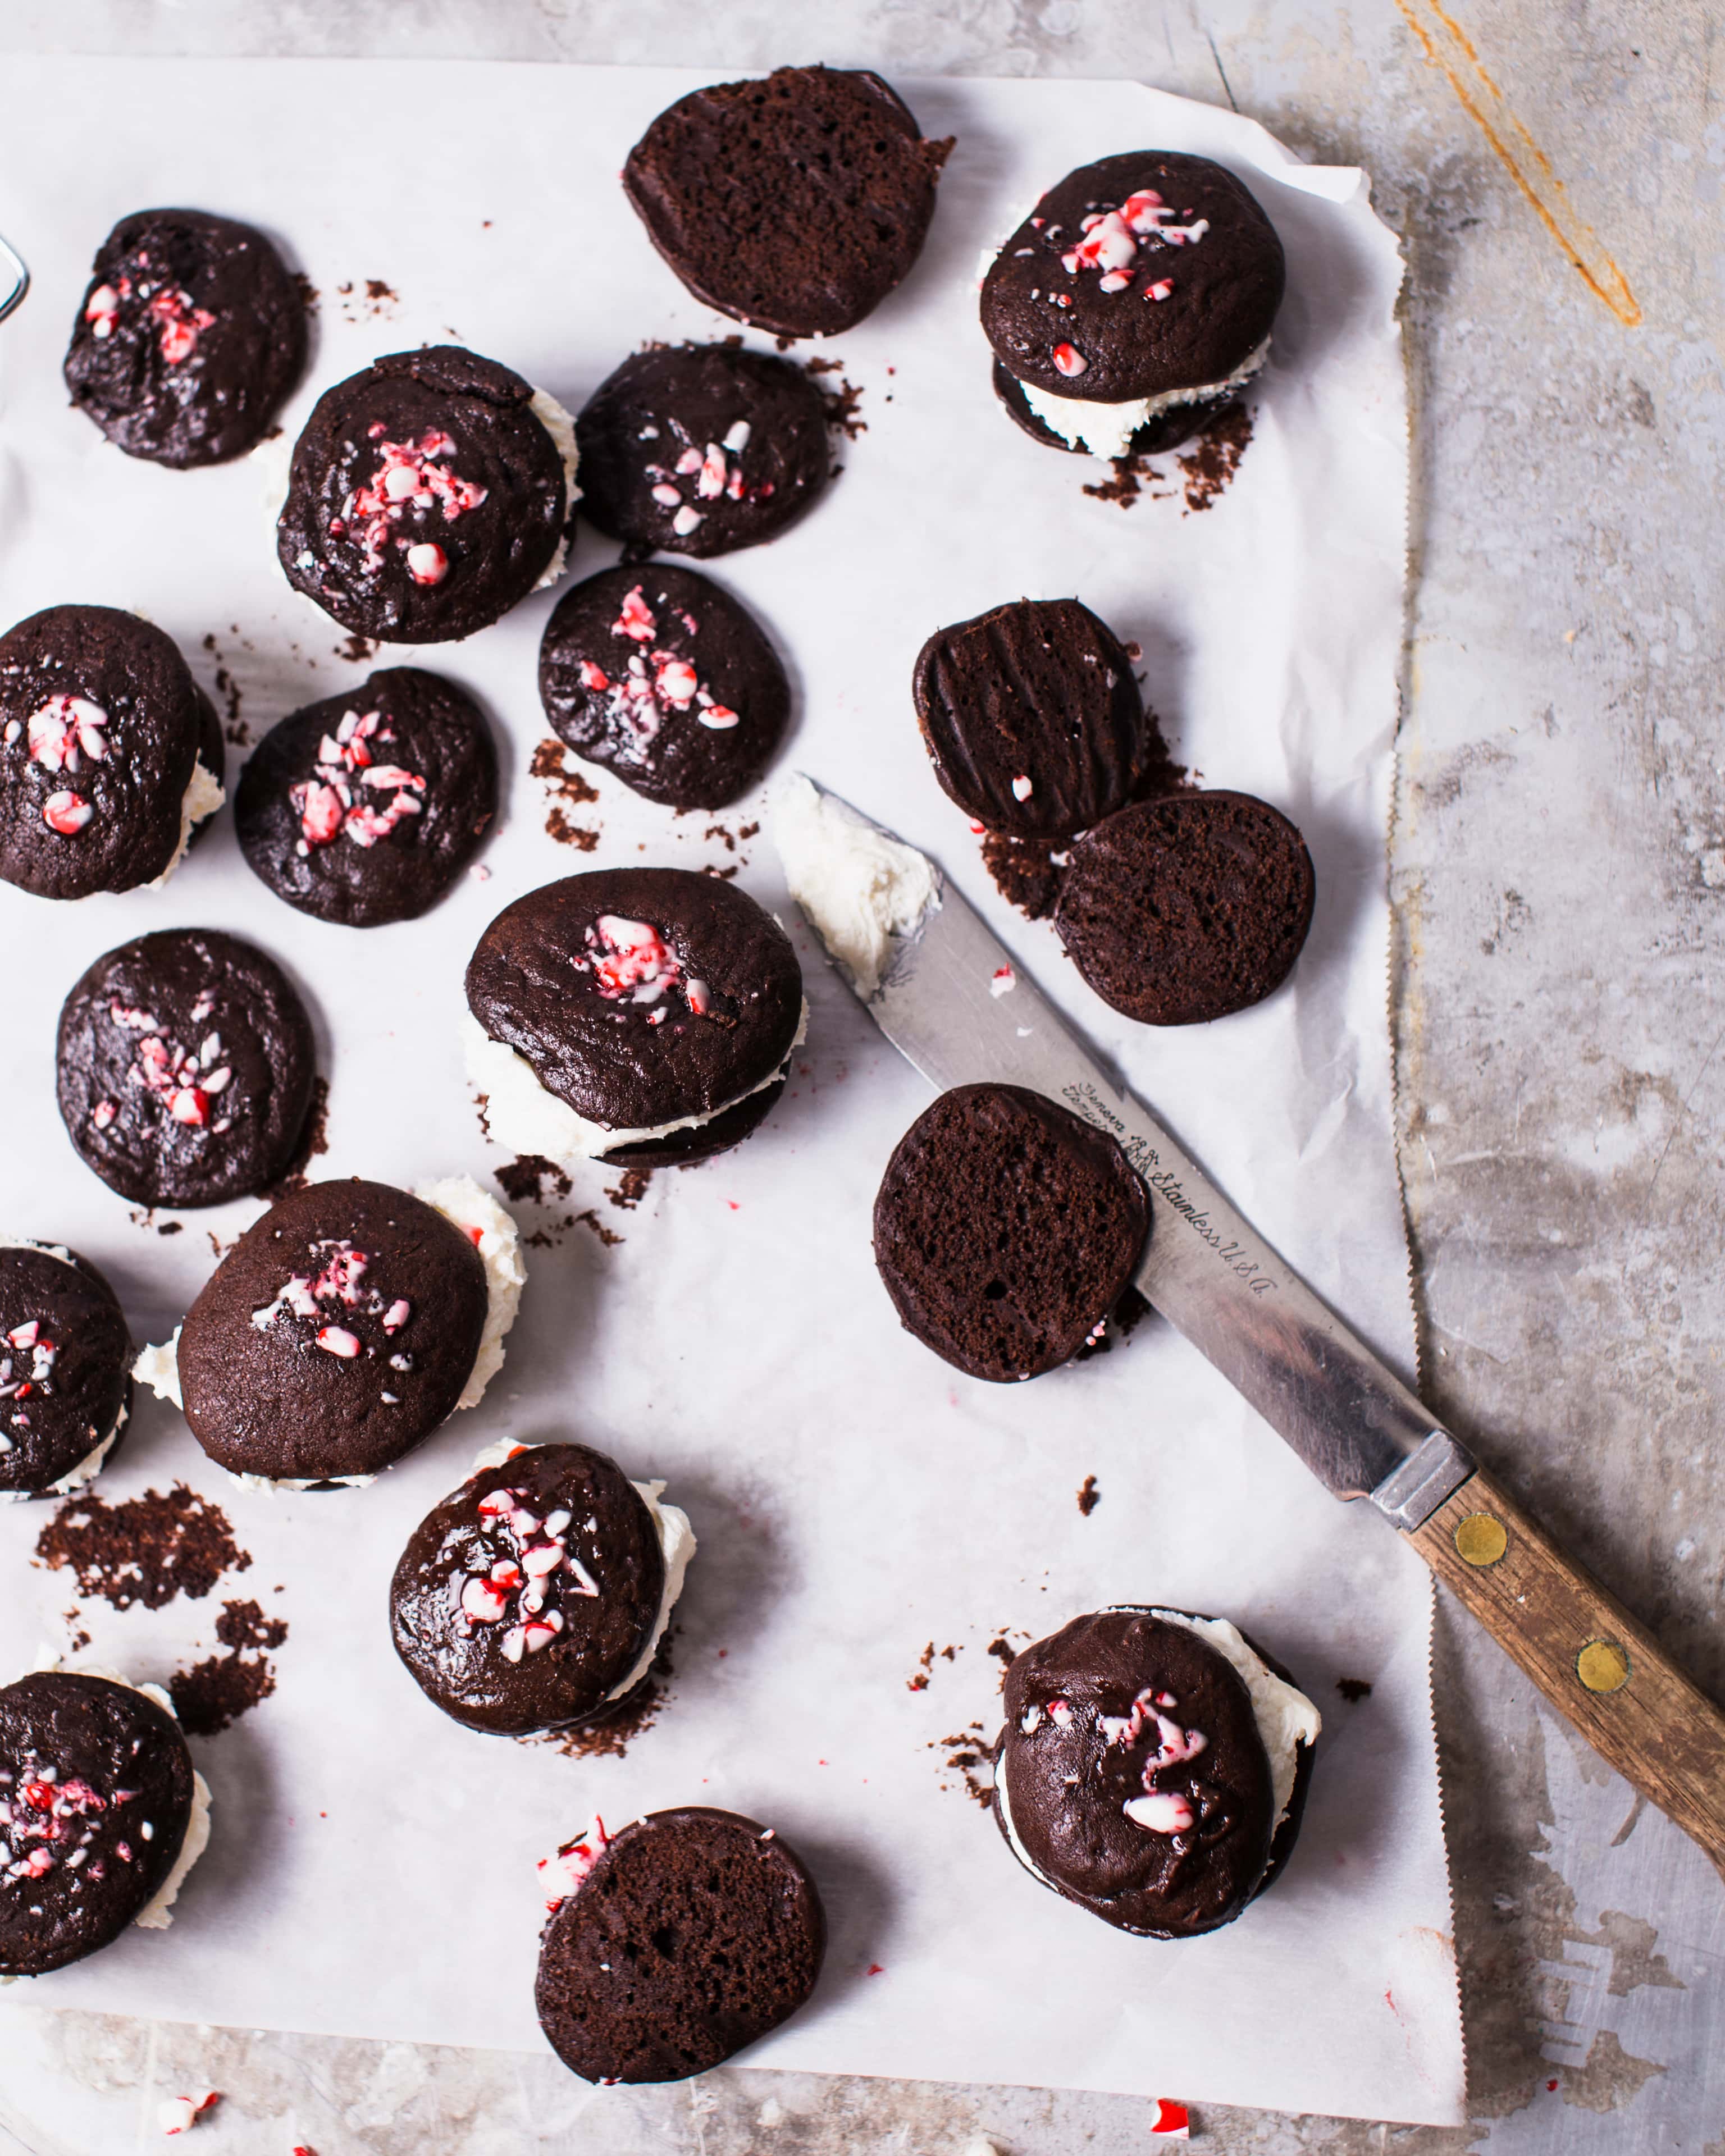
Assembling the Whoopie Pies
- Frost Cookies: Spread a generous tablespoon of frosting on the flat side of half of the cookies.
- Sandwich Together: Close the whoopie pies by placing the remaining cookies on top of the frosted ones, pressing down gently to spread the filling to the edges.
- Chill as You Go: After frosting every half-dozen whoopie pies, transfer them to the refrigerator. This helps the filling set and prevents it from spreading.
- Repeat: Continue the process until all cookies are used.
Note: Let cookies cool completely or the frosting will melt.
How to Store Peppermint Whoopie Pies
Store Assembled Pies: To keep your completed peppermint whoopie pies tasting their best, place in an airtight container or bag.
The assembled pies will last at room temperature for up to 3 days.
How to Make Whoopie Pies in Advance
This recipe makes a big batch. You can freeze the baked cookies on their own, or freeze them filled and assembled. I usually make a few Christmas treats mid-December and fill a plate to thaw for a couple of hours anytime friends are coming over.
Here are a few tips:
- Freeze Unfrosted Cookies: Pre-baking your cookies and freezing them is a great way to make your life easier. Once you’ve baked the cookies, cool them completely on wire racks before transferring to a container or bag. Then freeze for up to two months for freshness and convenience when you’re ready to eat!
- Make-Ahead Filling: Mix all ingredients together in a stand mixer with a whisk attachment and beat until light and fluffy. Once it’s done, scoop the frosting into a resealable bag or airtight container and store in the fridge for up to 1 week. Let it come back to room temp and give it a quick beat again just before using.
- Assemble & Serve: Thaw the cookies (or fill them while still frozen – they’re really easy to work with while semi firm).
Or freeze after they’re assembled:
- Just freeze goodies in a single layer on wax or parchment paper-lined baking sheet first (to avoid them sticking together in storage),then pack into freezer bags to freeze up to 3 months.
5 Common Mistakes When Making Peppermint Whoopie Pies
Here are the most frequent mix-ups to avoid when making Peppermint Whoopie Pies:
- Overmixing the Dough: Overmixing can lead to tough cookies. Mix just until the ingredients are combined.
- Not Measuring Ingredients Properly: Accurate measurements are crucial for the moist, tender cookie texture and fluffy filling.
- Overbaking the Cookies: Overbaking can make the cookies too hard. They should be soft and slightly underdone when removed from the oven.
- Under-beating the Filling: If you don’t whip the frosting for long enough with the whisk attachment, the filling will be stiffer and taste very sweet, instead of being the fluffy, airy, creamy dream it is when properly beaten. Don’t stop just because it’s creamed – it’ll get much lighter in texture and color as you continue whipping.
- Filling While Warm: Chilling the assembled whoopie pies helps the filling set and prevents it from oozing out.
FAQs About Peppermint Whoopie Pies
Just skimming through? Here are some quick answers to the commonly-asked questions about Peppermint Whoopie Pies:
Can I make these whoopie pies in advance?
Yes, you can make them a day in advance. Store them in the refrigerator until ready to serve.
How do I store leftover whoopie pies?
Store them in an airtight container in the refrigerator for up to 3 days.
Can the whoopie pie filling be flavored differently?
Absolutely. You can use vanilla or almond extract instead of peppermint for a different flavor.
Is it necessary to use sour cream in the cookie batter?
Sour cream helps to make the cookies tender, but you can use plain yogurt as a substitute.
Can the whoopie pies be frozen?
Yes, you can freeze them for up to a month. Thaw in the refrigerator before serving.
What’s the best way to ensure even-sized cookies?
Using a cookie scoop or measuring spoon helps to create cookies of uniform size.
Don’t Miss These Other Fan-Favorite Christmas Baking Recipes
- Chocolate Mint Cookies
- Molasses Cookies with Icing
- Peanut Butter Marshmallow Squares
- Toblerone Cookies
- Cookie Dough Bites
- Soft and Chewy Gingerbread Men
- Hermit Cookies
- Kourabiedes (Greek Christmas Cookies)
- The Most Amazing Sugar Cookies

Peppermint Whoopie Pies
Ingredients
For Filling:
- 1 ½ cups unsalted butter
- 6 cups confectioners' sugar
- ¾ tsp pure peppermint extract
- 3 tbsp milk
For Cookies:
- 3 ½ cups all-purpose flour
- 1 ½ cups unsweetened cocoa powder
- 2 tsp baking powder
- 1 tsp baking soda
- ½ tsp salt
- 1 cup butter room temperature
- 2 cups granulated sugar
- 2 large eggs
- 1 cup milk
- 1 cup sour cream
- 2 tsp vanilla extract
- ¼ cup crushed candy canes
Instructions
To make cookies:
- Preheat oven to 350ºF. In a large bowl, whisk together flour, cocoa powder, baking powder, baking soda, and salt. Set aside.
- Beat butter and sugar in a standing mixer until light and fluffy, about 2 minutes, pausing occasionally to scrape down sides and bottom of bowl with a rubber spatula. Beat in eggs, one at a time, for about 30 seconds each, pausing to scrape down sides.
- With mixer speed on low, beat in milk, sour cream, and vanilla extract, followed by the flour mixture.
- Drop by level tablespoonfuls onto parchment-lined baking sheets. Bake 4 minutes, remove from the oven and sprinkle each with a bit of crushed candy cane, then bake 2 minutes more. Cookies are done when set but still a bit shiny (if you press the centre, it will leave an indent). They will look underdone – this is essential to chewy, delicious cakes.
To make filling:
- Combine all ingredients in stand mixer with whisk attachment and beat until light and fluffy, about 5 full minutes.
To assemble:
- Spread a heaping tablespoonful of frosting onto flat side of one cookie. Sandwich with another cookie, and transfer to a plate. Transfer to the fridge after you’ve frosted every half-dozen or so, as the filling is gooey and will start to spread out. Continue until all the cookies have been sandwiched. Keep refrigerated until ready to serve.
Nutrition
Nutrition information is automatically calculated, so should only be used as an approximation.


Is there nutritional information on these anywhere?
I made these with a few substitutions and I’ve been told they are the best muffin I’ve ever made. Thanks for the inspiration!
I used 1 cup of whole wheat flour and one cup of regular, subbed unsweetened apple sauce for most of the oil, added 1/2tsp of cinnamon and 1tsp of vanilla extract. And I used frozen blueberries instead of chocolate chips.
Lovely! Glad you liked. Thanks for sharing a photo, love it! 🙂
oh, and also used 1/2 c sugar as watching sugar intake, they were still devine:)
oh, and also used 1/2 c sugar as watching sugar intake, they were still devine:)
yum, just made these and used 1/2 c bran and 1/2 c ground linseed. they are delicious and light. ate 3 with my cuppa and will make them again, thanks
yum, just made these and used 1/2 c bran and 1/2 c ground linseed. they are delicious and light. ate 3 with my cuppa and will make them again, thanks
yum, just made these and used 1/2 c bran and 1/2 c ground linseed. they are delicious and light. ate 3 with my cuppa and will make them again, thanks
These sound delicious! Love that you call them “branana muffins”. 🙂 Can’t wait to give them a try. Love your site!
Thanks Alanna! 🙂
These sound delicious! Love that you call them “branana muffins”. 🙂 Can’t wait to give them a try. Love your site!
Thanks Alanna! 🙂
These sound delicious! Love that you call them “branana muffins”. 🙂 Can’t wait to give them a try. Love your site!