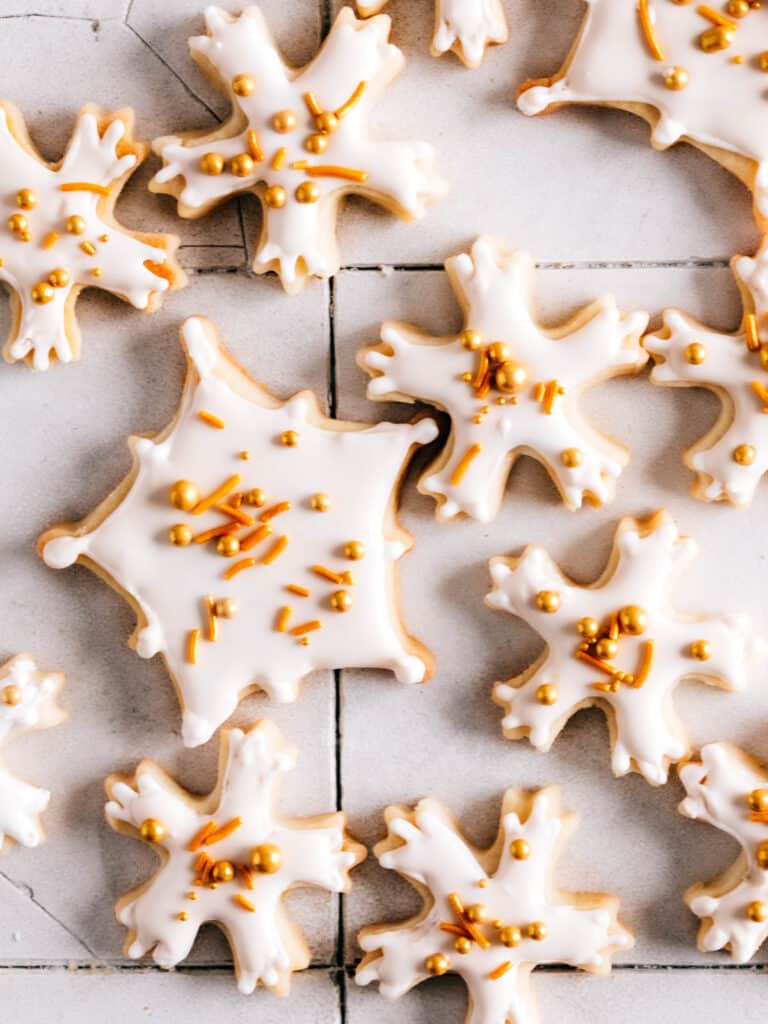
How to make stunning Snowflake Cookies with the easiest, no-fail recipe that requires just one bowl and no chilling. Decorate with royal icing.
Snowflake Cookies: Why You’ll Love This Recipe
- This is a 1-bowl recipe – no one wants to be doing loads of dishes over the holidays.
- I’m gonna show you the EASIEST EVER method for icing cookies. Life changing. I don’t exaggerate. See quick video right here 👇
- You only need 5 basic ingredients to whip these beauties up.
- The “reverse creaming” method of adding the butter directly to the flour mixture ensures cookies that hold their shape beautifully and are lovely and tender.
- No chill. (Just like my kids, ha.) Most cut-out decorated cookies require a 1-hour (or more) chill time before rolling and cutting. The ingredient proportions and technique of this recipe make that step unnecessary. Cookies faster, yay!
- Minimal cooling time before decorating: because my kids have no chill, this is a big selling feature for these Christmas cookies. Royal icing has no butter, so you can actually frost cookies while they’re still warm and the icing won’t melt off.
Snowflake Cookie Ingredients

- Butter: To minimize the number of ingredients to source, I used salted butter (since that’s what everyone tends to have on hand). Substitute unsalted butter if you like, and double the salt in the recipe. Adequate salt is super important to balance the flavor of this cookie.
- Flour + Sugar. The dry ingredients.
- Eggs: Bind and help the cookies rise.
- Flavouring. Vanilla extract is what gives the flavor of classic sugar cookies. I love to add the zest of one lemon in addition to make lemon snowflake cookies (and if you love lemon, you must try these Lemon Curd Cookies). You could alternatively skip the lemon and use 1/4 tsp almond extract.
How to Make These Easy Snowflake Cookies
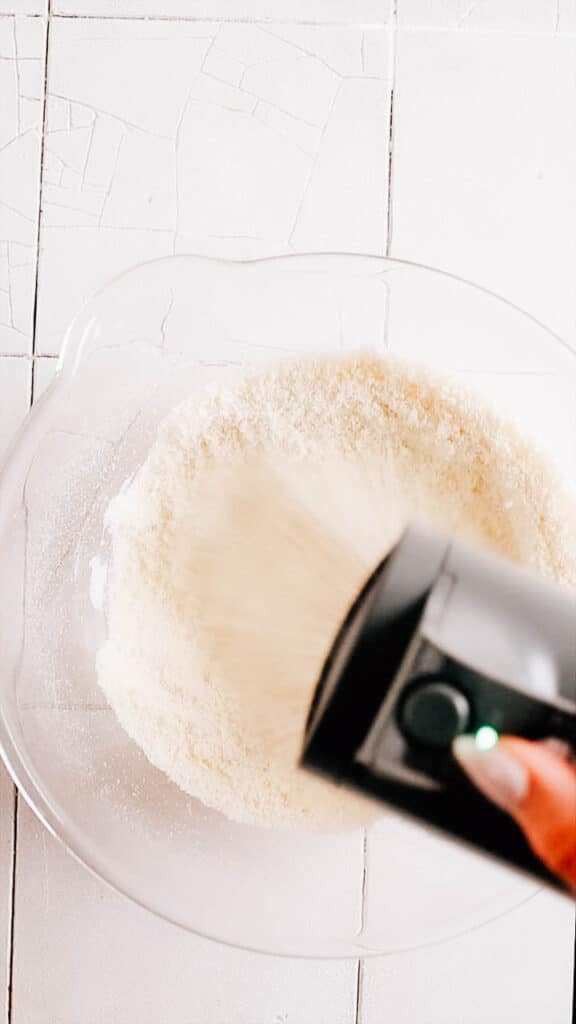
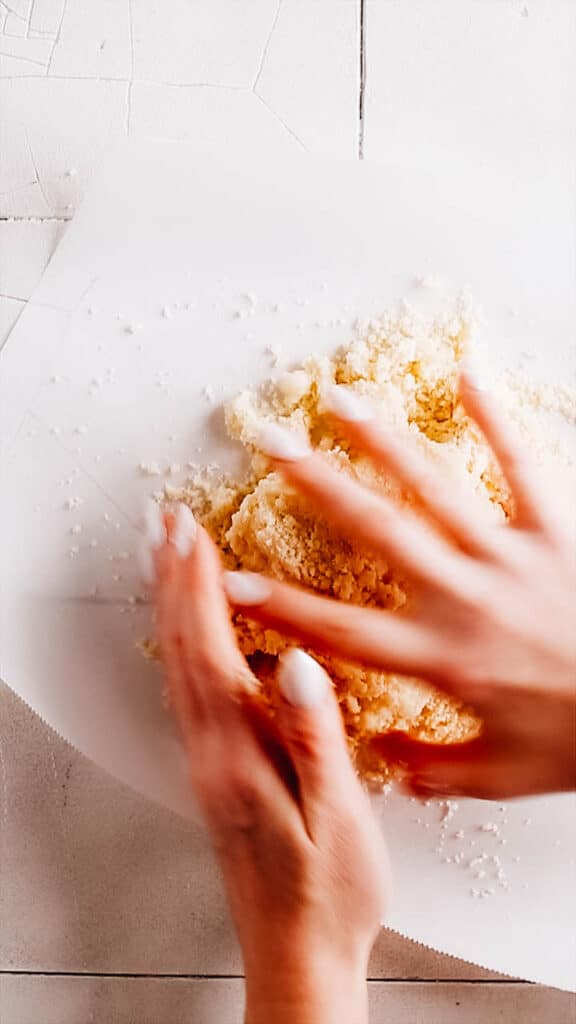
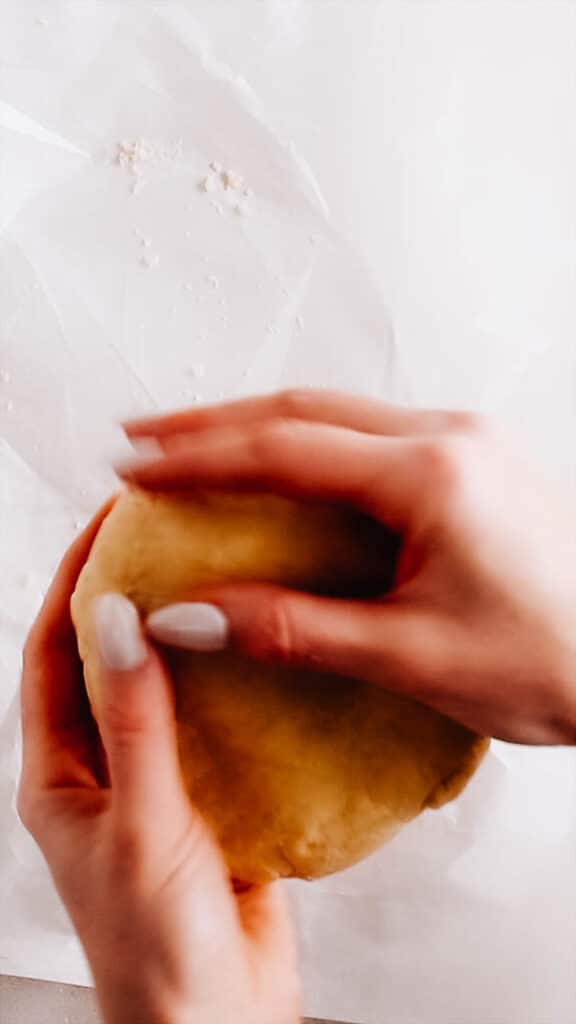

- Make the sugar cookie dough using the reverse creaming method—mix the dry ingredients first, then beat in the butter with an electric mixer before adding the egg and vanilla. Press the crumbly dough together into a disk.
- Grab a rolling pin and roll out the dough on a lightly floured surface, cut your shapes using floured snowflake cookie cutters and bake them to golden perfection.
- Cool on wire racks until you can handle them, then ice them with sweet royal icing. Finish with sprinkles while the icing is still wet for a little extra magic.
The World’s EASIEST Way to Decorate Cookies
I love using a simple dunk method for flooding a cookie. It makes a beautiful, smooth, glossy icing icing that looks professional that takes 1% of the skill and effort that piping does.

Make Royal Icing:
It’s basically just powdered sugar whipped to stiff peaks with egg whites or meringue powder (see recipe notes below) and a splash of vanilla.
Thin it out to “flood” consistency by adding water by half-teaspoonfuls until it passes the “10-second test”. The test can be done by running your spatula through the bowl of icing and counting the seconds it takes to settle back to a smooth surface. (The thicker the icing, the longer it takes to settle.) When the icing is thin enough to smooth back out in 10 seconds, it’s ready to use.
Decorate the Cookies:
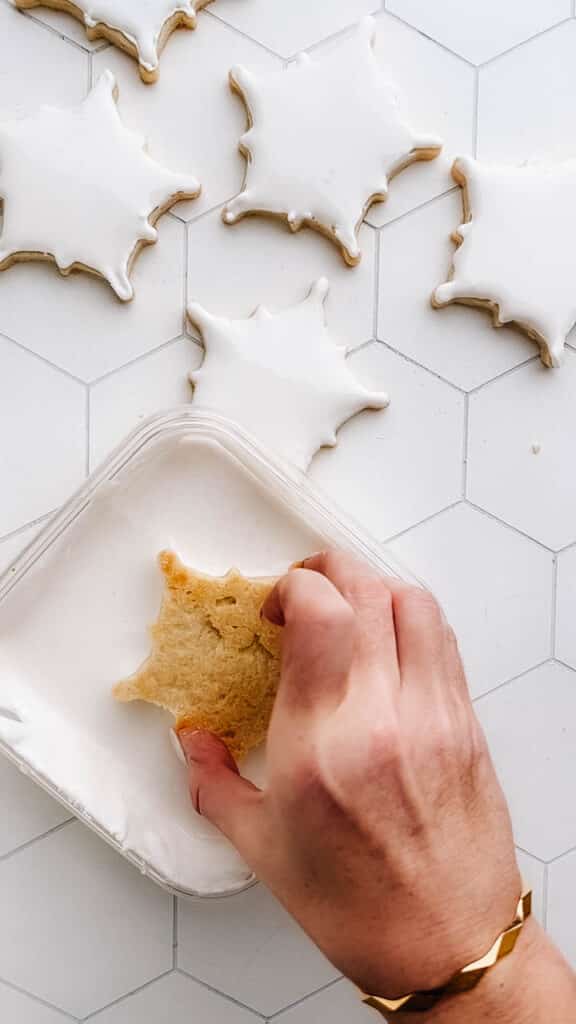
Dunk the cookie facedown in the icing. Do this by holding the edges, and only dipping the surface of the cookie.
Holding it facedown, let the excess drip back into the icing bowl, then flip the cookie over and place it on the counter.
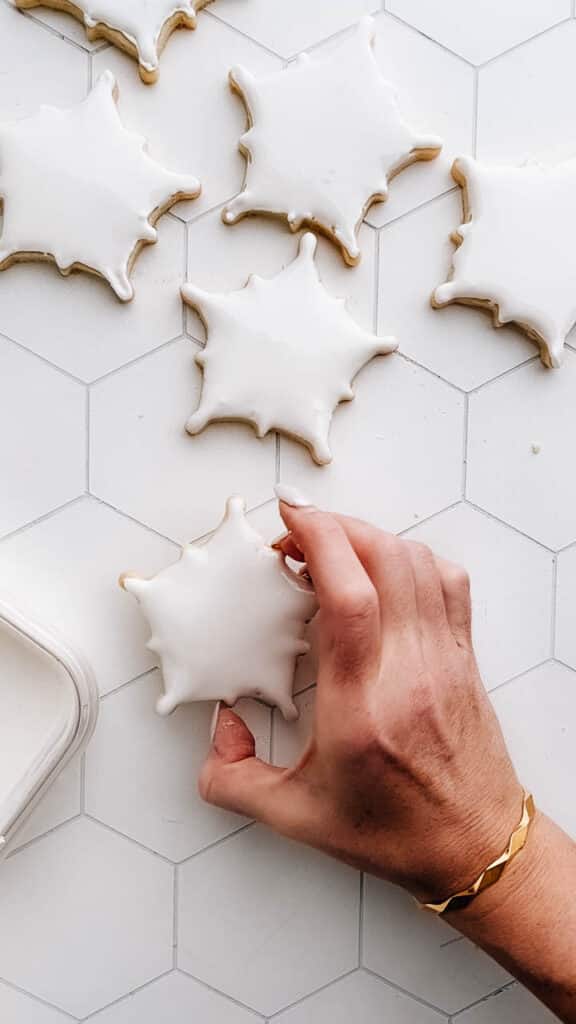
Grasp the edges of the cookie and give it a quick back-and-forth shake on the counter to level out the icing.
You can otherwise use pastry bags and a piping tip to draw designs onto your snowflake cookies.
Just keep in mind that on a 1-10 skill level of baking, piping beautifully with royal icing is a difficulty 10. (Yet Instagram makes it look so easy.)
Pro Tips and Tricks
Here are a couple of pointers for beautiful snowflake cookies:
- Make sure your butter is lovely and soft. Here is how to get your butter to room temperature quickly.
- Bake your small cookies and large cookies separately: if using different cookie cutter sizes, the baking time will differ. You don’t want to burn the little guys in the time it takes to bake the larger ones.
- It’s often easiest to press the cookie cutter into the dough and then remove the dough scraps from around the cuts you made, leaving your shapes behind on the parchment paper (rather than trying to lift your shapes out of the dough).
- Allow your royal icing to set for eight hours before packing them into containers. You can eat them sooner than that, but you don’t want to crush your icing by loading the cookies up before they’re completely dry.
- After you’ve rolled it a couple of times, the butter may get softer. If you’re finding it tricky to easily lift the dough shapes pop the whole thing in the freezer for a few minutes.
- Slide a rimless baking sheet under your rolled-out dough and pop the whole thing in the freezer for a bit if you’re finding it hard to lift the shapes out.
Make Ahead Instructions
Here are a few things you can do ahead of time if you like:
- You can make your royal icing up to 3 days in advance of icing the cookies. You’ll need to ensure to store the icing in an airtight container and make sure it remains in the refrigerator.
- Prepare the cookie dough up to 3 days in advance. Roll it out first as indicated, then chill it till firm before wrapping it well with aluminum foil (easier) or plastic wrap.
Storage Instructions
You can store your cookies (once the icing is completely set) in an airtight container at room temperature for about a week. Freeze them for up to 3 months.
How to Freeze Snowflake Cookies
You can freeze these cookies (or any sugar cookies) with or without the icing.
If freezing them after decorating, let them dry for 8 hours beforehand so the icing doesn’t smudge.
Freeze them in airtight freezer bags or containers, just be sure to keep them somewhere they won’t get banged around (they’re delicate and prone to breaking!).
FAQs
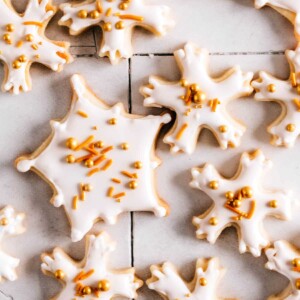
Add your sprinkles after baking and icing your cookies, while the royal icing is still wet. This way, they will stick to the cookies and won’t fly off as you pick up your cookies.
It takes at least 8 hours for royal icing to dry and set enough to pack cookies into storage containers without risk of damaging the icing.
To make a snowflake out of icing, fill a plastic bag with royal icing and snip one the corner. Squeeze icing out of the hole to pipe a snowflake design on top of your base royal icing layer. First pipe a “plus” symbol (+), then make an x shape that crosses the center of the + to form a starburst design. From there, you can add small dots or v shapes to the tips of the lines (like an arrow). You must use a thicker consistency (15-20 seconds on the time-to-settle test) for the designs to stay intact.
To get sugar crystals to stick to your cookies, sprinkle them on while the icing is still wet. Let it dry completely before moving the cookies.
The sugar cookie snowflake cookies can be frozen after baking, before or after icing them. Store frozen cookies in airtight containers for up to 3 months.
Other Festive Recipes You Won’t Want To Miss
Start with all my best Christmas Cookies then try some of these other holiday goodies!
- Easy No-Bake Christmas Treats
- Chocolate Christmas Desserts (decadent recipes you’ll swoon for!)
- Traditional Italian Christmas Desserts
For another favorite to add to your holiday cookie tray, try my Chewy Snickerdoodle Cookies.
Easy Snowflake Cookies (1 Bowl, 5 Ingredient, No Chill Recipe!)
Video
Ingredients
- 2 ¾ cups all-purpose flour (12.5 oz per batch – weight method strongly recommended)
- 1 cup granulated sugar
- ⅓ tsp fine sea salt
- 1 cup salted butter softened and cut in cubes
- 1 large egg
- 1 tbsp vanilla extract
- 1 tbsp lemon zest finely grated or 1/2 tsp lemon extract (optional)
- 1 batch royal icing
For royal icing
- 3 cups confectioners' sugar
- 2 egg whites
- 1-2 tbsp water (plus more as needed)
- ½ tsp vanilla extract
Instructions
- Preheat oven to 350ºF. Line baking sheets with parchment paper.
- Add flour, sugar and salt to bowl of stand mixer fitted with the paddle attachment. Beat on low speed for about 30 seconds to combine and aerate the ingredients.
- Add the butter and beat on low speed to incorporate. Gradually increase speed to medium-high as the butter breaks up, then beat until mixture resembles coarse crumbs.
- Add egg, vanilla and lemon zest (if using). Beat on medium-high until fully incorporated, about 30 seconds. If you have a strong mixer, the dough may come together on its own. If not, dump the crumb-like mixture onto a sheet of parchment paper and gently press and knead it together into a disc.
- Roll dough out between sheets of parchment paper to 1/4” thickness.
- Dip cookie cutters in flour, then cut shapes out of dough. Use a floured offset spatula to lift the dough cut-outs and transfer to prepared baking sheets.
- Bake in center of oven. For 3” cookie shapes, bake 10-12 minutes or until very edges start to turn golden and middles look less shiny. Add 1 minute more for every 1” larger cookie size (or the cookie will have a raw flour taste in the middle).
For royal icing
- Combine sugar, egg whites, 1 tbsp of the water and the vanilla in bowl of stand mixer and beat on low speed until the sugar is all moistened.Increase speed and beat for 1-2 minutes on medium-high speed until soft peaks form.
- Add more water 1/2 tsp at a time until you can run a spatula through the icing and it settles back to flat in about 10-15 seconds
- Dip cookies one at a time in the frosting by holding onto the edges and dipping just the surface. Let excess icing drip back into the bowl before quickly flipping the cookie and placing it on the counter.
- Gently hold the edges of the cookie and give it a quick back-and-forth shake on the countertop until the surface is smooth. You can go in with a toothpick or the tip of a paring knife to pull the frosting into any gaps and details of the outline.
- Add sprinkles if using, then let icing dry for at least 8 hours before packing the cookies into containers.
Notes
- To use meringue powder instead of egg whites, use 4 tsp meringue powder and 5 tbsp water from the start.
- This recipe yields about 20 snowflake cookies with a 3” cutter. You may double or triple this recipe as you like.
- Double the salt in the mixture if you wish to substitute unsalted butter.
- It’s often easiest to press the cookie cutter into the dough and then remove the dough scraps from around the cuts you made, leaving your shapes behind on the parchment paper (rather than trying to lift your shapes out of the dough).
- Allow your royal icing to set for eight hours before packing them into containers. You can eat them sooner than that, but you don’t want to crush your icing by loading the cookies up before they’re completely dry.
- After you’ve rolled it a couple of times, the butter may get softer. If you’re finding it tricky to easily lift the dough shapes pop the whole thing in the freezer for a few minutes.
- Slide a rimless baking sheet under your rolled-out dough and pop the whole thing in the freezer for a bit if you’re finding it hard to lift the shapes out.
Nutrition
Nutrition information is automatically calculated, so should only be used as an approximation.


The recipe says a large egg, but the video says yolk. Will either work?
It is a whole egg that you need. I made a note in the post about it. The video was shot but then I did several more recipe batches after and found whole egg was perfect.
Loved this icing technique so much that I tried it with my students- such a hit! Thank you!
I love this recipe and the method for icing the cookies work amazingly well. I will never ice cookies another way again! Thank you
This was an absolutely game changer for icing my Xmas cookies!! 10/10 🥇