5 Totally Avoidable Mistakes You Might Be Making in Food Photography
Jul 08, 2019
I was scrambling to take a few quick Instagram snapshots of cinnamon rolls this morning while my stomach rumbled impatiently. In my attempt to be hasty, I made so many mistakes (well, 5 specifically) that I know better than to make. They’re common mistakes that are easy to fix so I thought I’d share.
Note: The below examples are all bad photos. That’s on purpose so you can see where I went wrong. I thought I should point that out because my husband commented: “I like the post, Jenn, but these aren’t very good pictures”. Good thing he’s cute.
Also, please accept these tips as a learning together adventure, as I certainly don’t claim to be an expert and I’m noticing new things that I do wrong. But here they are, the 5 totally avoidable mistakes in food photography (that I managed to make before breakfast).
#1. Using the viewfinder to compose a shot.
That tiny half-inch square hole is simply not big enough to paint your picture.
The live-view display on the back of your camera will give you a minimally better idea of how the contents of the frame will translate to an image, but shooting tethered to your computer is the best option (either using Lightroom or I use Canon’s own software).
If you’re not ready or able to tether your camera, still use a tripod. If you’re just casually freehand shooting, it’s really hard to fine-tune and get things just right. This is because as soon as you pause to move a prop or the food around, your camera angle and framing inevitably changes too. You end up taking 250 photos instead of 3 to get the one you want and still might not get the best you could have gotten.
#2. Missing focus.
Whoops. It’s just way to easy to miss the focus, especially when you’re shooting without a tripod. Not to mention, if the light isn’t optimal especially, the tiniest shake (even from just clicking the shutter) is enough to cause blur.
My key for dead-on focus is to use a tripod, use the liveview mode to zoom in on the exact spot you want in focus, then manually set the focus by turning the lens itself rather than using the electronic autofocus (which can be pretty good, but isn’t smart enough to know EXACTLY which spot you’re trying to nail).
Furthermore, I generally keep the aperture at F/3.5-5.6 for straight on and much higher for overhead. That offers you some leeway. The focus area is super narrow if you are shooting at F/1.8, so if you miss focus by a hair, your image won’t be sharp.
#3. Not paying attention to unintended lights and reflections.
Most bloggers at least start out shooting exclusively by natural light. Even if you’re shooting by a giant window, a light on in the hall can cast an unsightly orangey glow on your scene that you don’t notice until it’s too late (that’s what happened in the above).
Similarly, unintended reflections are something I incur by accident all too frequently. I have an orange apron I should really just throw the heck out. A pink shirt is my nemesis. I even have a grey wall in my house that makes everything green-tinged. A bright blue plastic table outside my window was bouncing blue light onto my scene.
All objects the light strikes become reflectors, whether you want them to or not.
#4. Not doing a test edit.
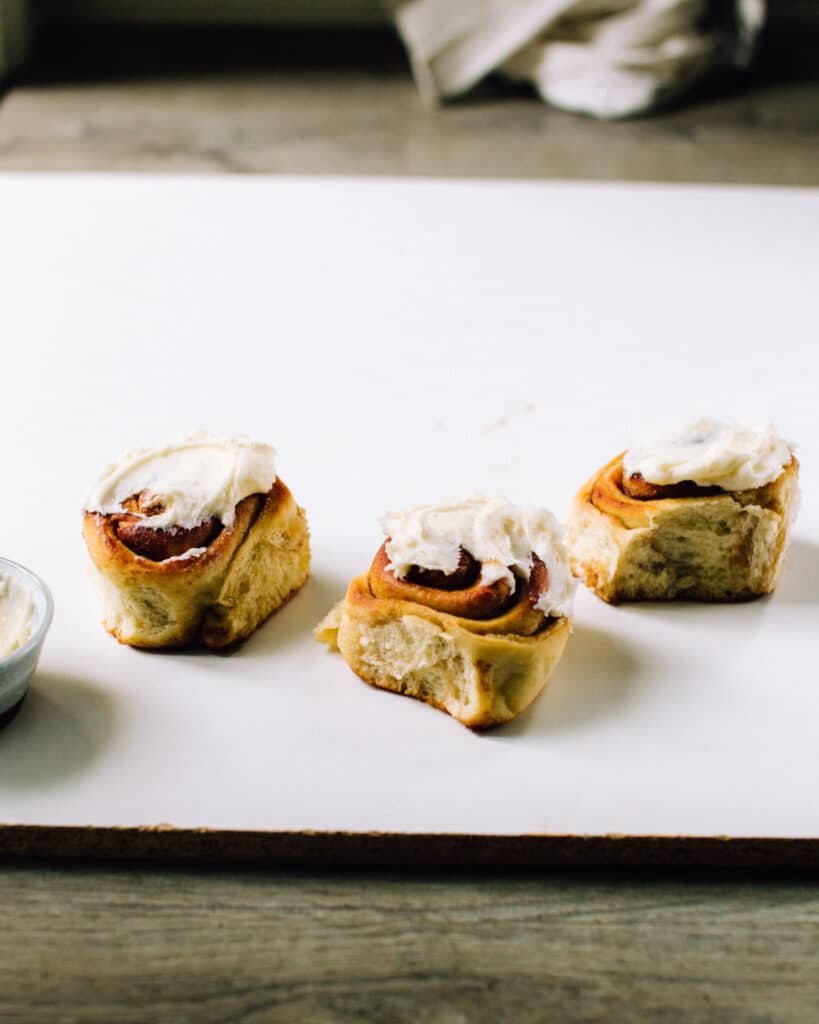
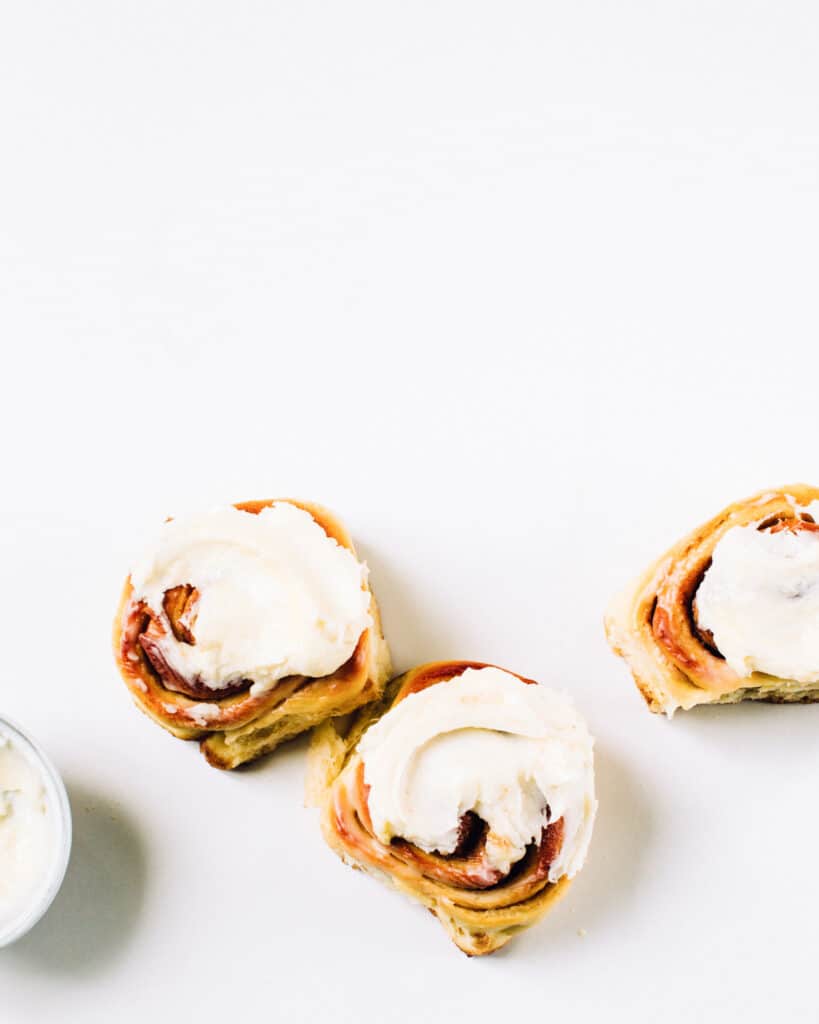
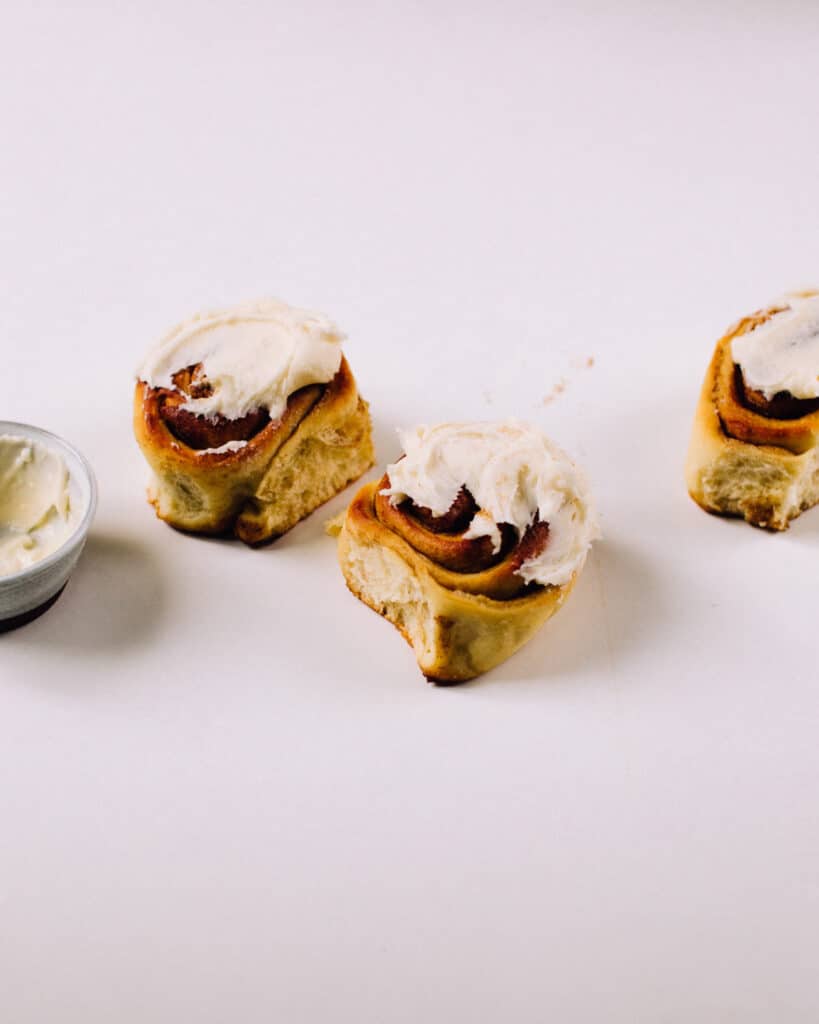
I always, always, always import a shot into Lightroom as soon as I think I’ve gotten the lighting and composition right. Chances are, something needs adjusting before I continue. One accident that drives me crazy is the above. I was paying so much attention to the subject that I didn’t realize the angle I used didn’t leave enough visible backdrop space.
In this example, in order to cut out the floor and background mess I don’t want in my 8×10 (ahem, Instagram-friendly) crop ratio, I’d have to crop out parts of the composition that I do want, like the little bowl and the right-hand cinnamon bun. It’s the WORST when you only realize this after you’ve torn your set down.
Do test edits.
Ninety percent of the time, I find something I can improve: slight over-exposure, a slight adjustment of the food to create an appealing highlight, a spoon I can move a quarter-inch to the right, an accidental garish reflection. If I wait to edit the whole batch until the next day, I almost always regret something.
#5. Too much attention to PHOTO styling, not enough attention to FOOD styling.
It’s easy to get so caught up in all the technical minutiae of camera and lighting, plus the composition of props in the scene, that you forget to pay attention to the actual star of the shot – the food itself. How does the light hit the actual food? Is there anything you can do to make it look tastier?
When I switched my focus from a prop obsession and stying plates in the scene to styling and lighting the actual food as my first priority, my Instagram engagement went way up and something clicked for me.
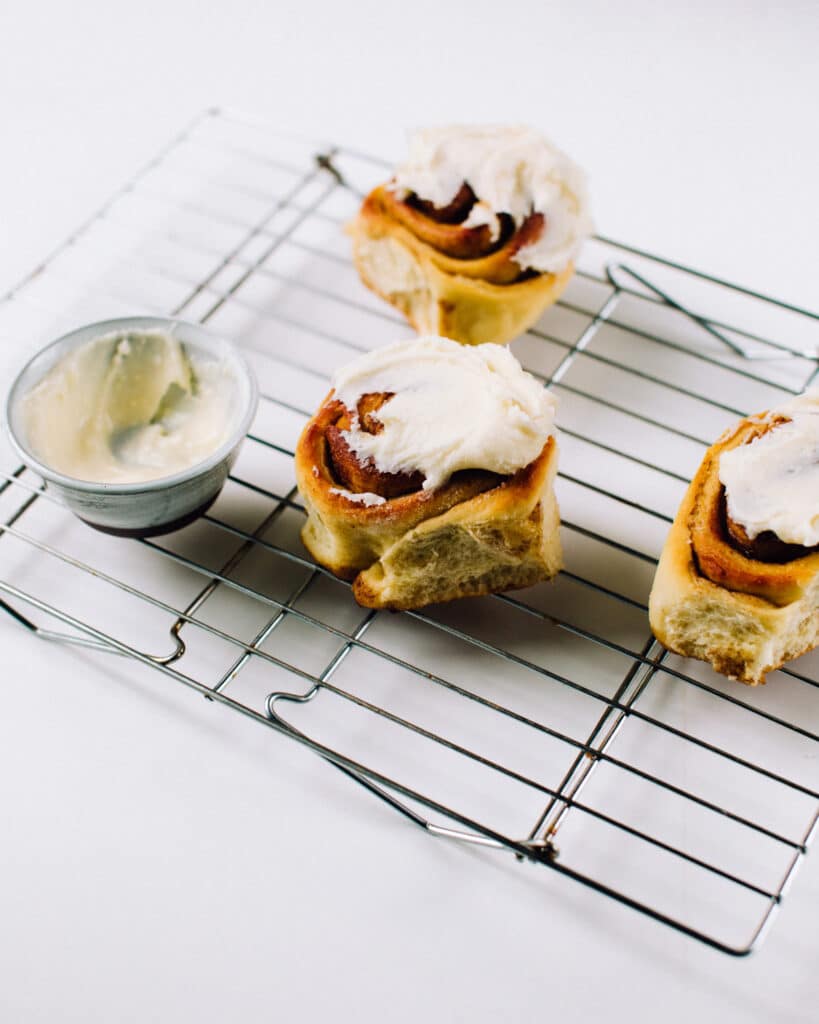
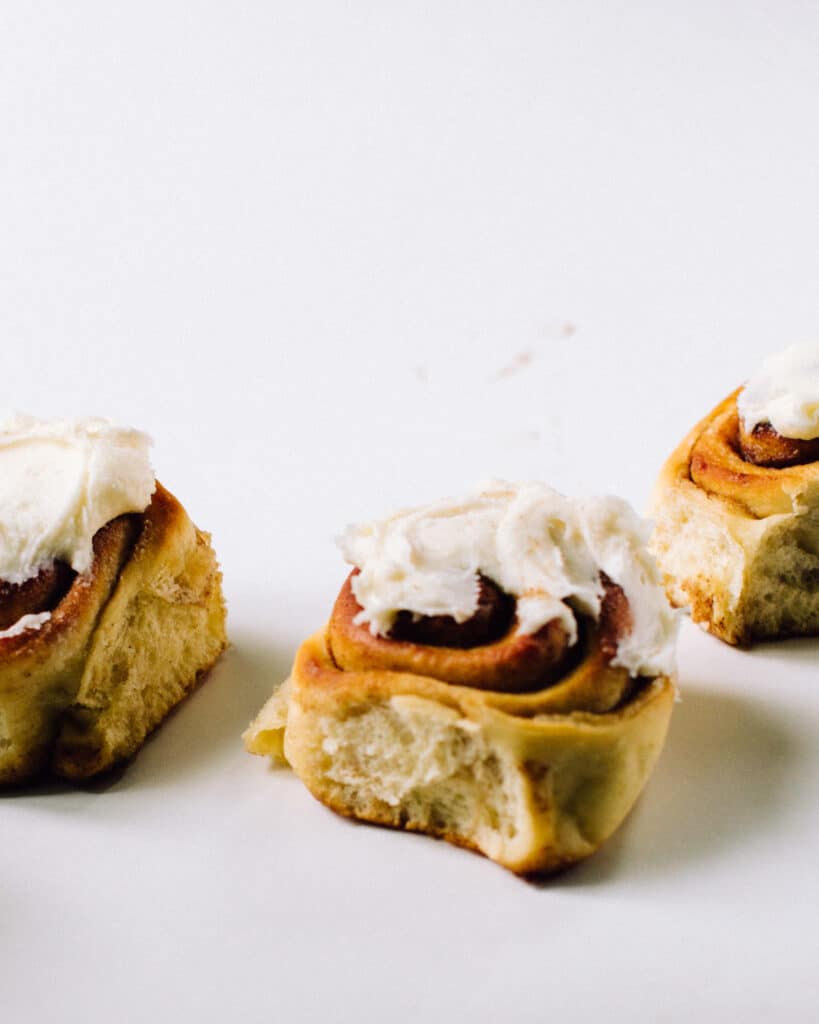
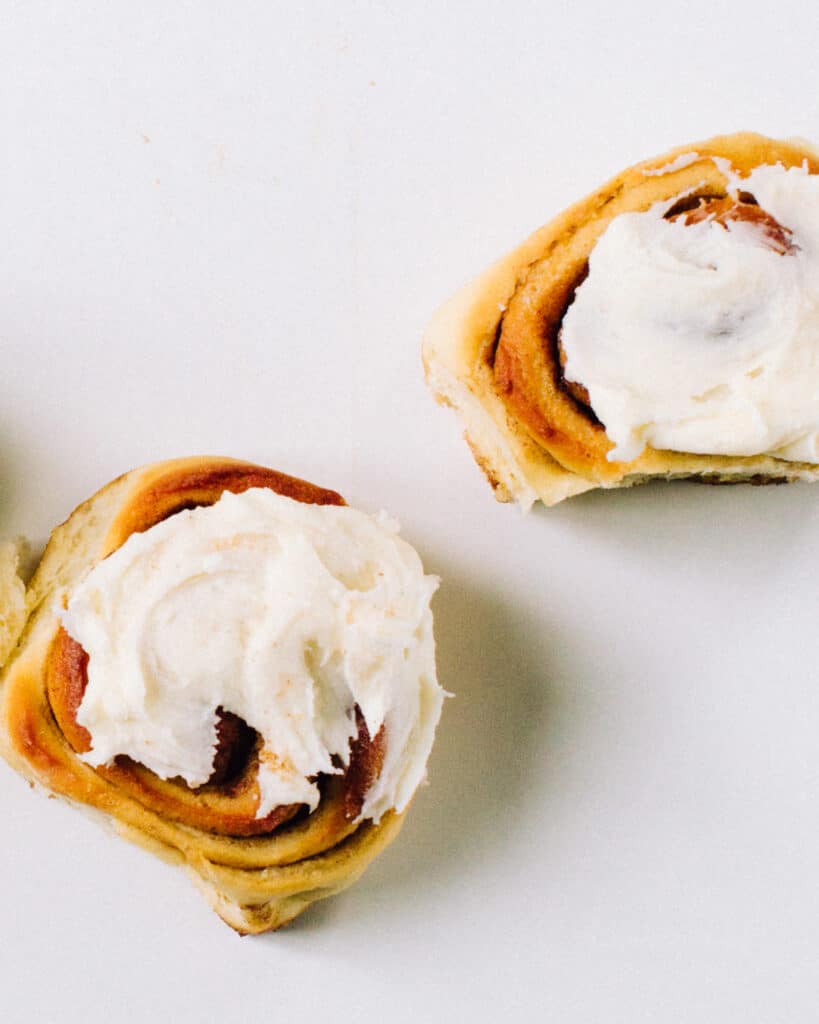
In the photo above, I was only focused on making a pleasing composition in the frame. Just before I wrapped up so I could EAT my subject, I realized that the buns looked a bit dry (they were a day old) and the frosting wasn’t catching any light.
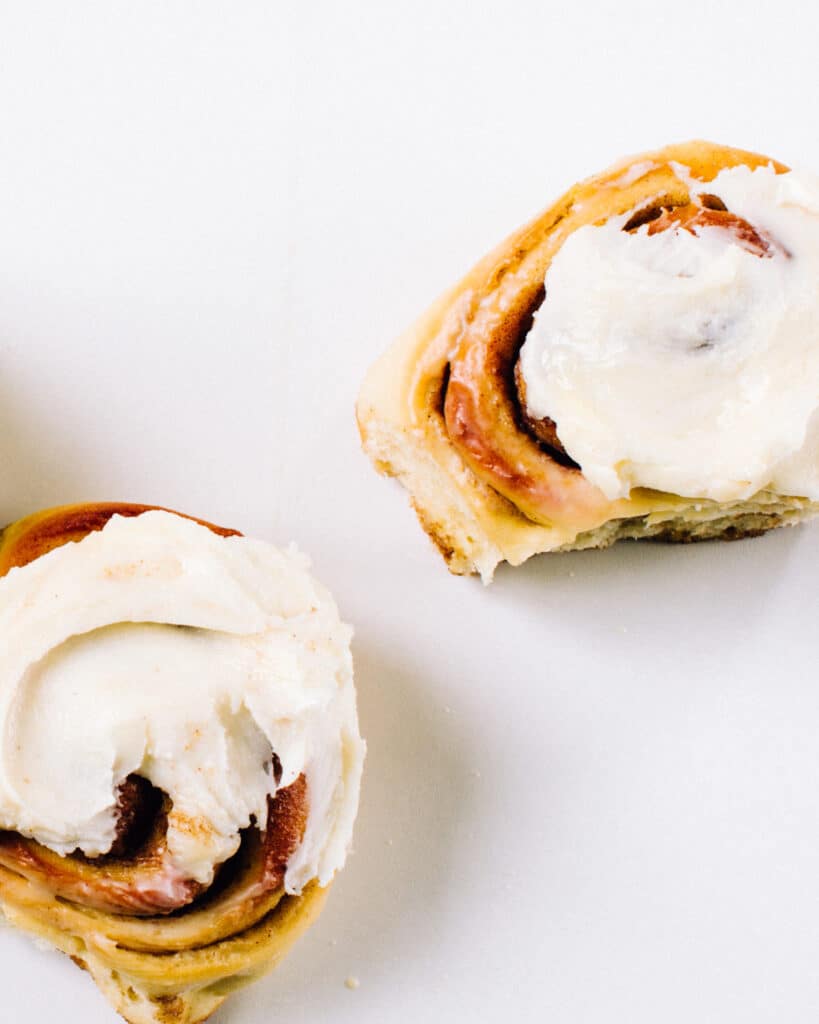
In the image below, I went in and used a pastry brush to paint melted butter on the cinnamon buns to make them look fresh and glistening, then used a small spoon dipped in hot water to make swoops in the frosting that look a bit meltier and catch the light in a more appealing way. You might not notice a big change, but it is these tiny differences that can hold a person’s gaze for those extra few seconds on your photo (read: improved ranking in social media algorithms, ugh, they’re the worst).
That’s all from me! I hope in reading this someone can avoid making an easily-fixed mistake that took me years to figure out. Let me know if you have any questions in the comments below.
Hungry for more on food photography? Check out my other tips and tutorials:
Artificial Light for Food Photography: An Easy, Inexpensive Set-Up for Beautiful Images
Food Photography Gear: The Best-Value High-Quality Equipment Essentials
Pin me!


Great points! Food photography is a whole new world to me… love that you got the melted butter out especially!