Microwave Hard Boiled Eggs (Quick, Foolproof Method)
Updated Jun 10, 2026
Microwave hard boiled eggs cook in about 8 minutes. You pierce the egg, submerge it in water in a microwave-safe cup, and microwave at 50% power. The water shields the shell so it cooks gently, no pot required.
Quick Microwave Boiled Egg Instructions:
- Pierce the wide end of 1 cold egg with a sewing needle. Push it in deep to reach the yolk.
- Set it in a 2-cup glass measuring cup. Cover with cold water by 1 inch.
- Microwave at 50% power for 4 minutes.
- Let it rest in the hot water for 2 minutes.
- Microwave at 50% power for 2 more minutes.
- Move it to an ice bath, then peel.
That is it. You get a firm, moist yolk and a tender white in less than half the stovetop time. Cook eggs one at a time for the most even results. New to eggs? See my guide to microwave poached eggs, too.
KEEP READING for important safety information and key tips.
How Long to Microwave Hard Boiled Eggs
- 1 egg: 4 minutes, rest 2 minutes, then 2 minutes more (50% power).
- 2 eggs: 5 minutes, rest 2 minutes, flip, then 2 minutes more (50% power).
Always cook at 50% power. Higher power cooks unevenly and raises the explosion risk. Two eggs is the limit. More cook too unevenly.
Why Boil Eggs in the Microwave?
In the microwave? Your microwave boiled egg is done in 8 minutes. That’s less than half of the time. And the result is perfectly-boiled eggs with firm, moist egg yolks and tender whites.
(P.s. I also love a perfect poached egg in microwave and a fluffy baked potato in microwave!)
How to Boil Eggs in the Microwave: Easy, Step-by-Step Instructions
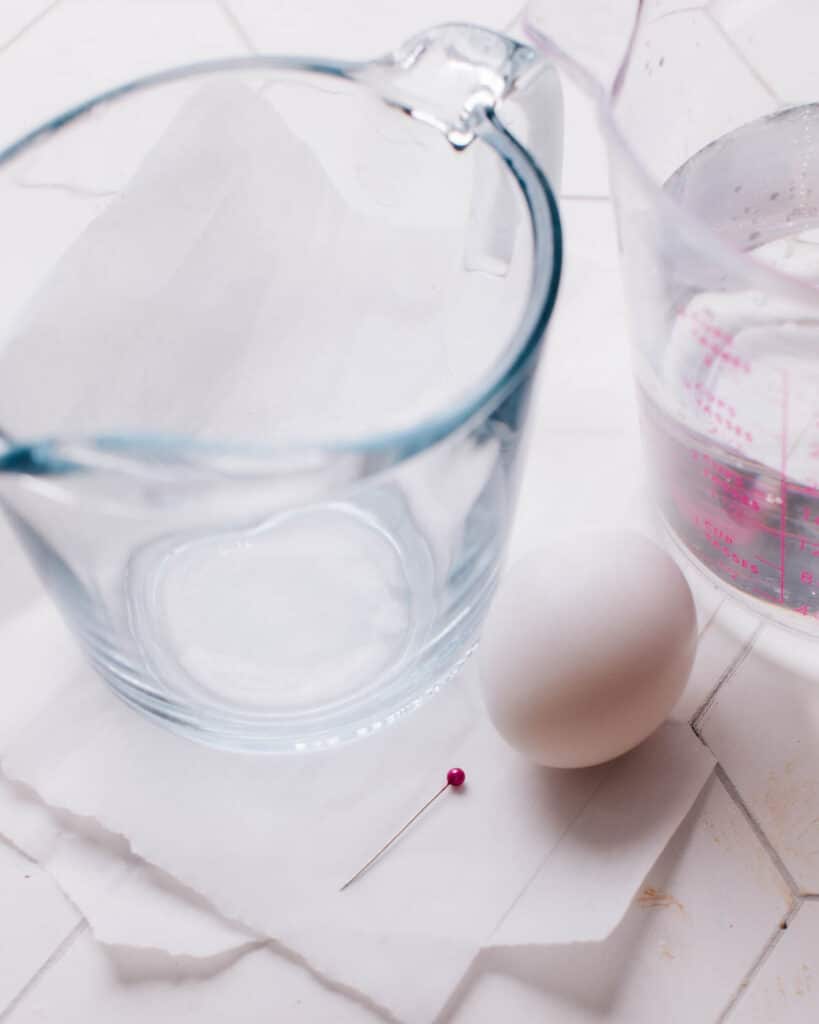
All you need is a glass measuring cup, something sharp to pierce the shell, and cold water.
Safety First
Before we delve into the technique, it’s essential to understand that eggs can explode in the microwave due to the rapid build-up of steam inside the shell. As the internal pressure increases, it can cause the egg to burst, creating quite a mess in your microwave.
Always use caution, remember the risks, and follow the steps closely.
Here’s what to do:


1. Choose the Right Container
Select a microwave-safe bowl or container that’s large enough to fully submerge the eggs in water. Glass or ceramic bowls are typically the best choices.
I tested this recipe using a glass 2-cup measuring cup. A large mug works well, too.
2. Prep the Eggs for Microwave Boiling
I used cold, large eggs straight from the fridge.
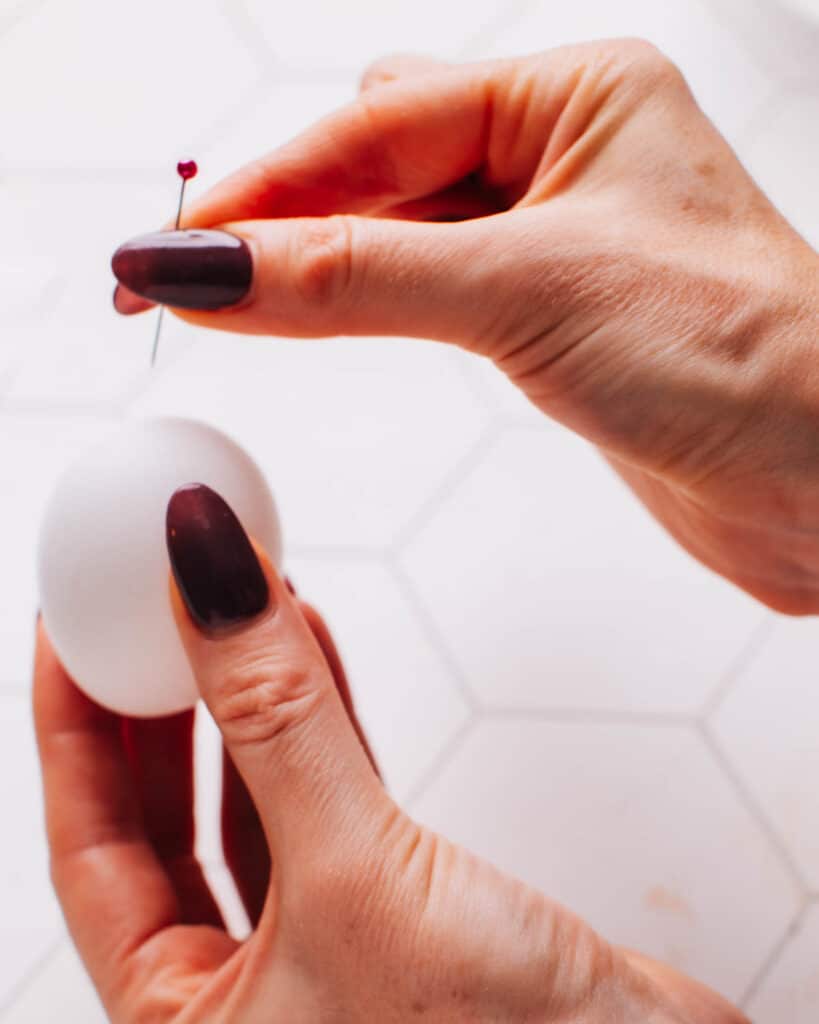
- Pierce through the Bottom of the eggs: To prevent the eggs from exploding, use a safety pin, sewing needle, or clean thumbtack to make a small hole in the bottom (wider end) of each egg. Poke it in deep to pierce the yolk. This step is to allow the steam to escape safely.
- I find the sewing needle easiest. Sewing pins – like the one pictured above – are sometimes not strong enough to poke through.
- Place in Bowl: Lay the egg in your chosen bowl or container. You’ll need to cook them one at a time for proper and even heating.
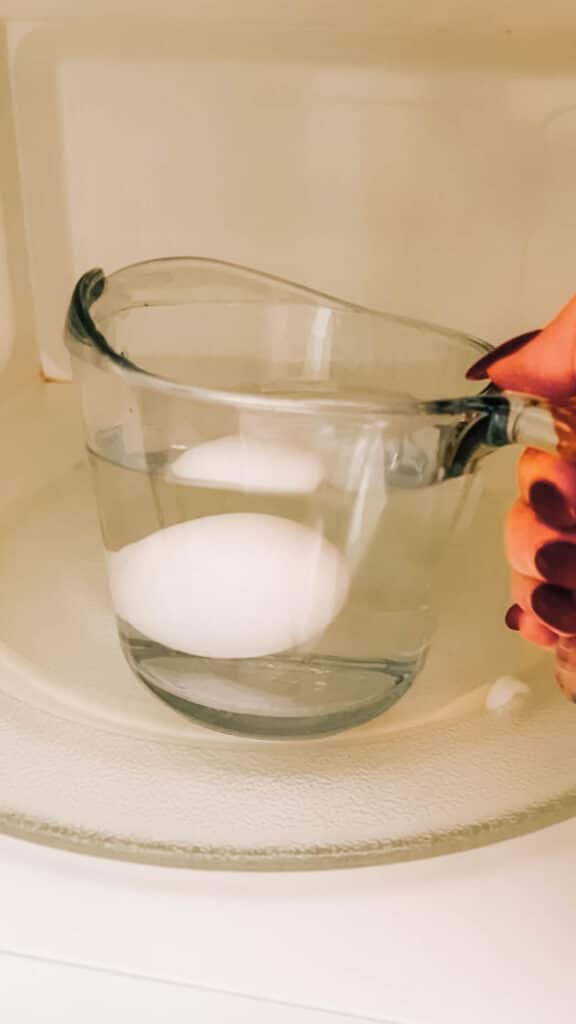
3. Add Enough Water
Fill the bowl with enough cold water to cover the egg by one inch.
Eggs are less likely to explode in the microwave if they are fully submerged in water during the entire cooking process. This is because the water distributes the heat more evenly and prevents the buildup of steam inside the egg itself, which is a common reason why eggs might burst.
I tested this recipe using a glass 2-cup measuring cup, filled up with 1 1/2 cups of water before adding the eggs. This covered my eggs by 1 inch of water.
The timing may be a bit different if you use a different-sized container, which may require more water to cover them by 1 inch with water. More water takes longer to heat up.
4. Boil Eggs in the Microwave
This is a two-step cooking process with a resting time in between for perfect microwave boiled eggs. Note that they must be cooked on 50% power (more than that will cook unevenly and increase risk of the egg exploding).
- First Round: Set your microwave to 50% power. Heat the egg for 4 minutes.
- Pause and Check: After the initial 4 minutes, let the egg sit in the hot water for another 2 minutes to allow continued cooking.
- Second Round: Microwave again on 50% power for another 2 minutes.
Why the Resting Time and Cooking in Two Rounds?
Microwaving eggs is not like traditional boiling. The reason for sitting time and cooking in two rounds when microwaving eggs is to promote even cooking and prevent the risk of overcooking or “egg-splosions”.
- Even Cooking: Microwaving generates heat that cooks food from the outside in, so the outermost layers can become overcooked while the interior remains undercooked. By cooking the eggs in intervals and allowing sitting time in between, you’re giving the heat a chance to disperse more evenly. This method essentially lets the residual heat continue to cook the interior without direct exposure to the microwave radiation, reducing the risk of overcooking the outer layers.
- Preventing Overheating: Eggs have moisture inside. When this moisture is heated rapidly in the microwave, it turns to steam. If this steam builds up too quickly (from continuous, unchecked microwaving), it can cause the egg to explode. By microwaving in rounds and allowing the eggs to sit, you’re giving some of that steam a chance to escape and reduce the risk of the egg exploding.
- Safety: The sitting time allows any built-up pressure inside the egg to dissipate safely. As noted, an egg can burst in the microwave if it’s heated too quickly or continuously without a break.
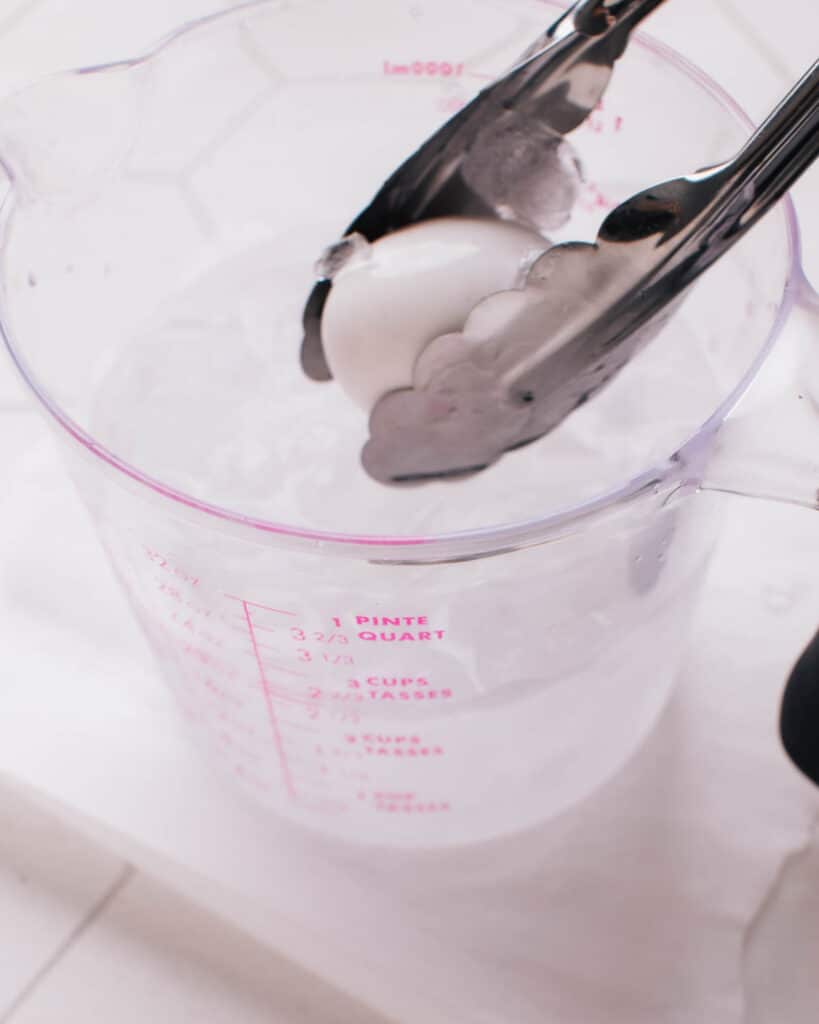
5. Prep an Ice Bath
To make ice water bath, fill a bowl with ice and cold water.
Once the eggs have finished in the microwave, use tongs or a slotted spoon to transfer them immediately into the bowl of ice water. This step halts the cooking process and makes the eggs easier to peel.
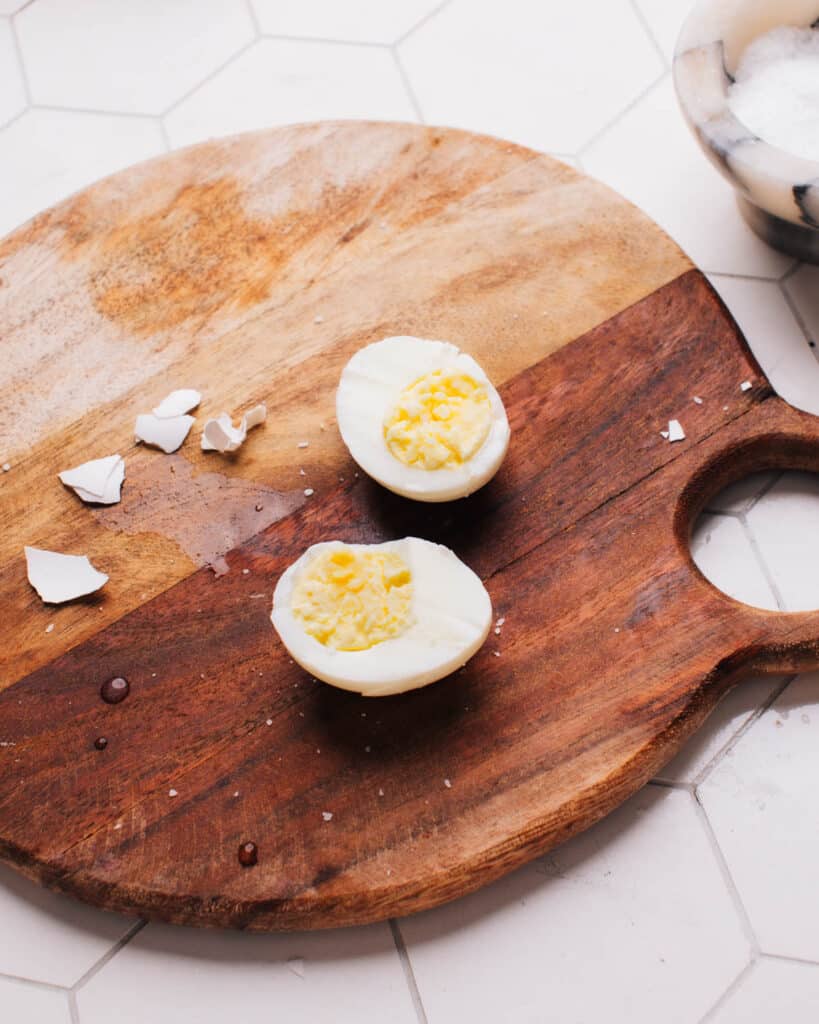
6. Peel the Eggs
After a couple minutes in the ice bath, or as soon as they’re cool enough to handle, take each egg out and tap it gently on a hard surface to crack the shell. Begin peeling, and you should find that the shell comes off easily.
Can I Make a Soft-Boiled Egg in the Microwave?
The short answer is no. If you want a runny egg, use my method for How to Poach Eggs in the Microwave.
I tested and tested and was unable to successfully cook a nice soft-boiled egg in the microwave. The problem is that the yolk cooks faster than the white when the egg is whole in its shell. This happens for a couple of reasons:
- Density and Fat Content: The yolk is denser and has a higher fat content compared to the white. Microwaves heat fat more quickly than water, and since the yolk is rich in fats, it tends to heat up faster.
- Size and Position: In a whole egg, the yolk is surrounded thickly by the white, which can act as an insulator. The microwaves heat the outer layers first, and because the yolk is shielded by the white, it can initially heat more slowly. However, once it starts to heat up, the higher fat content can cause it to retain heat and continue to cook even after the microwave is turned off.
So, initially, the white may start to set around the edges where the microwaves hit first, but the yolk can quickly catch up and surpass the white in terms of cooking because of its composition. This is why it’s tough to get a soft-boiled egg with a fully cooked white and runny yolk using a microwave.
Using the microwave egg poaching method instead, the white is spread out. With the larger surface area and boiling water start, the egg doesn’t take as much time to cook. You don’t reach the stage where the yolk starts cooking more quickly than the white.
See also: Perfect Eggs Over Medium
Can I Microwave Boil Multiple Eggs at Once?
- Uneven Cooking: Microwaves can sometimes cook unevenly, especially if you’re heating multiple items at once. The waves may not penetrate all parts of the eggs uniformly, leading to spots where one egg may cook faster than the other.
- Increased Cooking Time: Because you’re cooking more mass, the microwave has to work harder to heat everything. This usually means you need to increase the cooking time compared to cooking just one egg.
- Interference: The eggs can interfere with each other’s cooking process. Microwaves work by causing water molecules to vibrate, producing heat. If two eggs are close together, the waves that would normally hit one egg might be absorbed or deflected by the other, affecting the cooking process.

You Can Microwave TWO Eggs at a Time, But Not More
It’ll take an extra minute to cook 2 eggs at once, and they cook less evenly. You’ll need to flip them part-way through cooking.
For the best results when microwaving two eggs:
- Follow the directions outlined above, placing 2 eggs instead of 1 in the same measuring cup with the same amount of water.
- Microwave for 5 minutes on 50% power, let stand 2 minutes, FLIP the eggs over using tongs (for even cooking), then continue cooking for 2 minutes more on 50% power.
Note that when boiling two eggs at once in the microwave, the yolk will have a hot spot where it gets brown and darker. It’s inevitable to avoid a tiny over-cooked spot by the time the egg white is cooked through. It’s safe to eat and barely noticeable, but it’ll look like a little brown patch on the yolk’s edge.
Microwave Hard Boiled Eggs FAQ
About 8 minutes total for one egg. Microwave at 50% power for 4 minutes. Let it rest in the hot water for 2 minutes. Then microwave for 2 minutes more. Add 1 minute for two eggs.
You can cook a raw egg into a hard boiled egg in the microwave. The real danger is reheating an already-cooked egg. Steam trapped in the firm white and yolk can burst without warning. Slice cooked eggs before reheating, or eat them cold.
It is risky. A whole cooked egg can explode as steam builds inside. If you must reheat one, cut it in half first. Then heat in short 10-second bursts. Warming it in hot water off the heat is safer.
Pierce the yolk through the wide end with a sewing needle. Fully submerge the egg in water by 1 inch. Cook at 50% power in two rounds with a rest in between. The water and lower power stop steam from building too fast.
Not in the shell. The yolk cooks faster than the white, so you end up with a firm yolk. For a runny yolk, use my microwave poached eggs method instead.
Yes, up to two. Use the same cup and water. Microwave for 5 minutes, rest 2 minutes, flip the eggs, then cook 2 minutes more. More than two eggs cook too unevenly to recommend.
Peel after a few minutes in an ice bath. The cold water shrinks the egg away from the shell. Tap the egg on a hard surface, then peel under running water for the cleanest result.
No. Microwave hard boiled eggs taste the same as stovetop ones. The texture stays firm and moist at 50% power. Use them in egg salad, potato salad with egg, or spicy ramen.

How to Boil Eggs in the Microwave
Video
Ingredients
- 1 large egg cold from the fridge
- Water
- Ice
Instructions
- Pierce the wider end of a cold large egg with something sharp (like a sewing needle). Push it in deeply to pierce the yolk. Place the egg in a 2-cup glass measuring cup. Cover with cold water by one inch.
- Microwave on 50% power for 4 minutes.
- Let the egg rest in in the hot water for 2 minutes (it continues gently cooking and prevents too much pressure from building up).
- Microwave again on 50% power for 2 more minutes.
- Transfer the egg to an ice bath to cool and stop the cooking. Tap egg on hard surface and peel.
Notes
- Egg will be less likely to explode if the yolk is pierced and the egg is fully covered by water for the whole time it is cooking. It is not a guarantee, however, and sometimes one will still go boom. Use caution and try this method at your own risk.
- Cover the Dish with Plastic Wrap: for extra insurance against messy egg explosions in the microwave.
- Microwave Variances: All microwaves are different. Adjust cooking times based on the wattage of your microwave and the number of eggs you’re cooking.
- Container Choice: Use a microwave-safe container like a glass measuring cup and ensure the egg is completely submerged in water.
- I tested this method using a 2-cup glass measuring cup and 1 1/2 cups of water, which covered my egg(s) by an inch, as directed.
- See notes in post on how to adjust the method to microwave boil 2 eggs at once.
Nutrition
Nutrition information is automatically calculated, so should only be used as an approximation.


Very few people cook just one or two hard boiled eggs at a time? This would take forever. Better to just spend the time waiting for the water to boil and cook 10 or 12 at a time. Then keep them in the fridge for an easy snack or a batch of egg salad or whatever. Sorry, but this makes no sense to me.
You do have the option to… not… make the recipe! Haha
thats great if you only need 1 egg, but if you are cooking up 10 eggs it would take you more than 90 minutes.
This advice was terrible. Half power is not going to boil an egg and pin pricking can cause the shell to crack.
If you think that half power won’t boil it then I suspect you didn’t try the recipe 😉
Easy and worked well for me.
Super easy to follow and turned out great. Will be making again.
Perfect shortcut for making one boiled egg.
too hard! Just use an airfryer.
No preparation necessary, no constraints. Throw however many eggs fit into the airfryer basket, cook at 135c for 13 minutes if you want very cooked eggs!
This is a handy little trick, especially at work. However, do be careful – I’ve had one explode in my face before, what a mess and could have been burned. I did not know about piercing it.
Will do that next time, or just keep it covered with food shield during cooking and resting.
Would putting the measuring cup way off center on the carousel tend to reduce the hot spots on the egg?
That’s a good idea! Placing the cup off-center could help because it moves through more zones as the carousel turns, which might reduce hot spots.
my 2 eggs kinda exploded