Perfect Ham and Cheese Sliders (with Buttery Honey Glaze)
Updated May 15, 2026
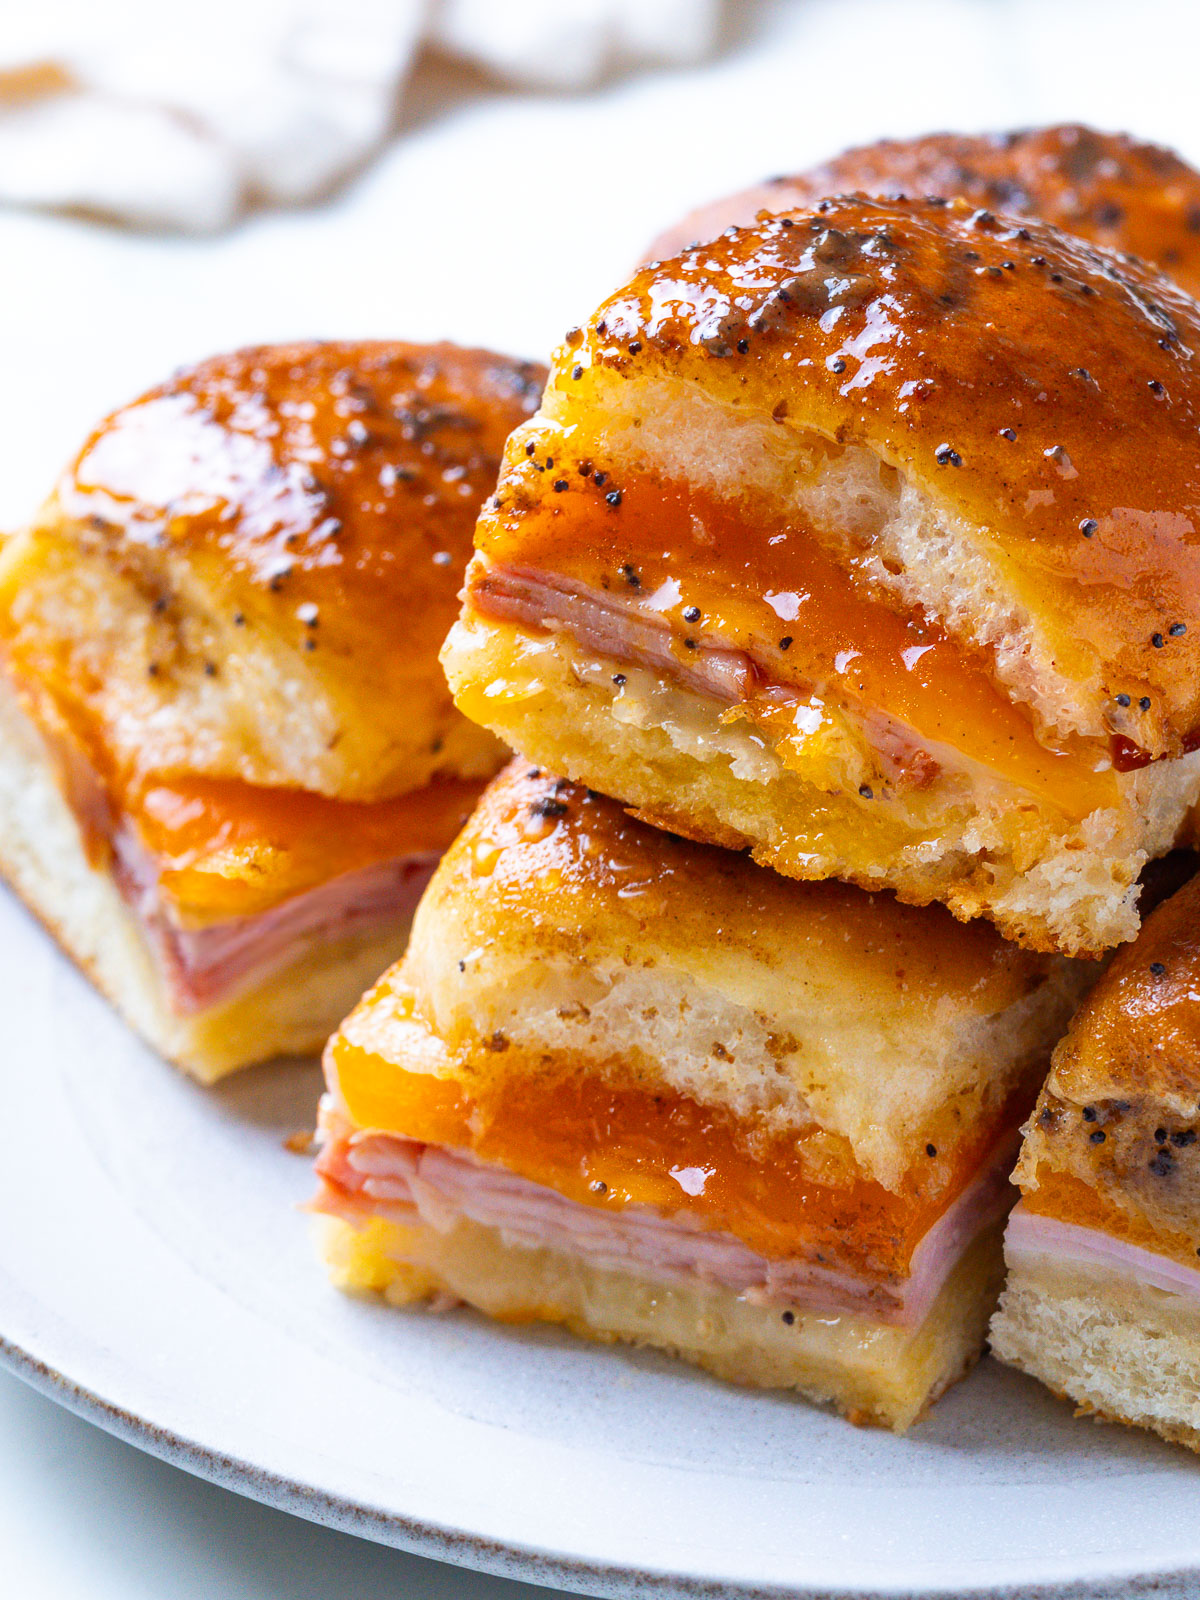
These Ham and Cheese Sliders are classic and so deliciously caramelized under a lush buttery glaze. As a food scientist, I get nerdy about the small things that make easy recipes better. Here, I used 3 tricks most slider recipes skip: pre-baking the bottom buns, layering the cheese around the ham, and Worcestershire in the butter mixture.

This easy recipe is my favorite for potlucks, game days, and weeknight dinners with the kids. It’s a genuine crowd-pleaser and budget-friendly too. If you’ve got leftover ham from a holiday roast, this is the recipe to make. Try it after my Crockpot Ham or Pressure Cooker Ham.
Ham and Cheese Sliders Ingredients
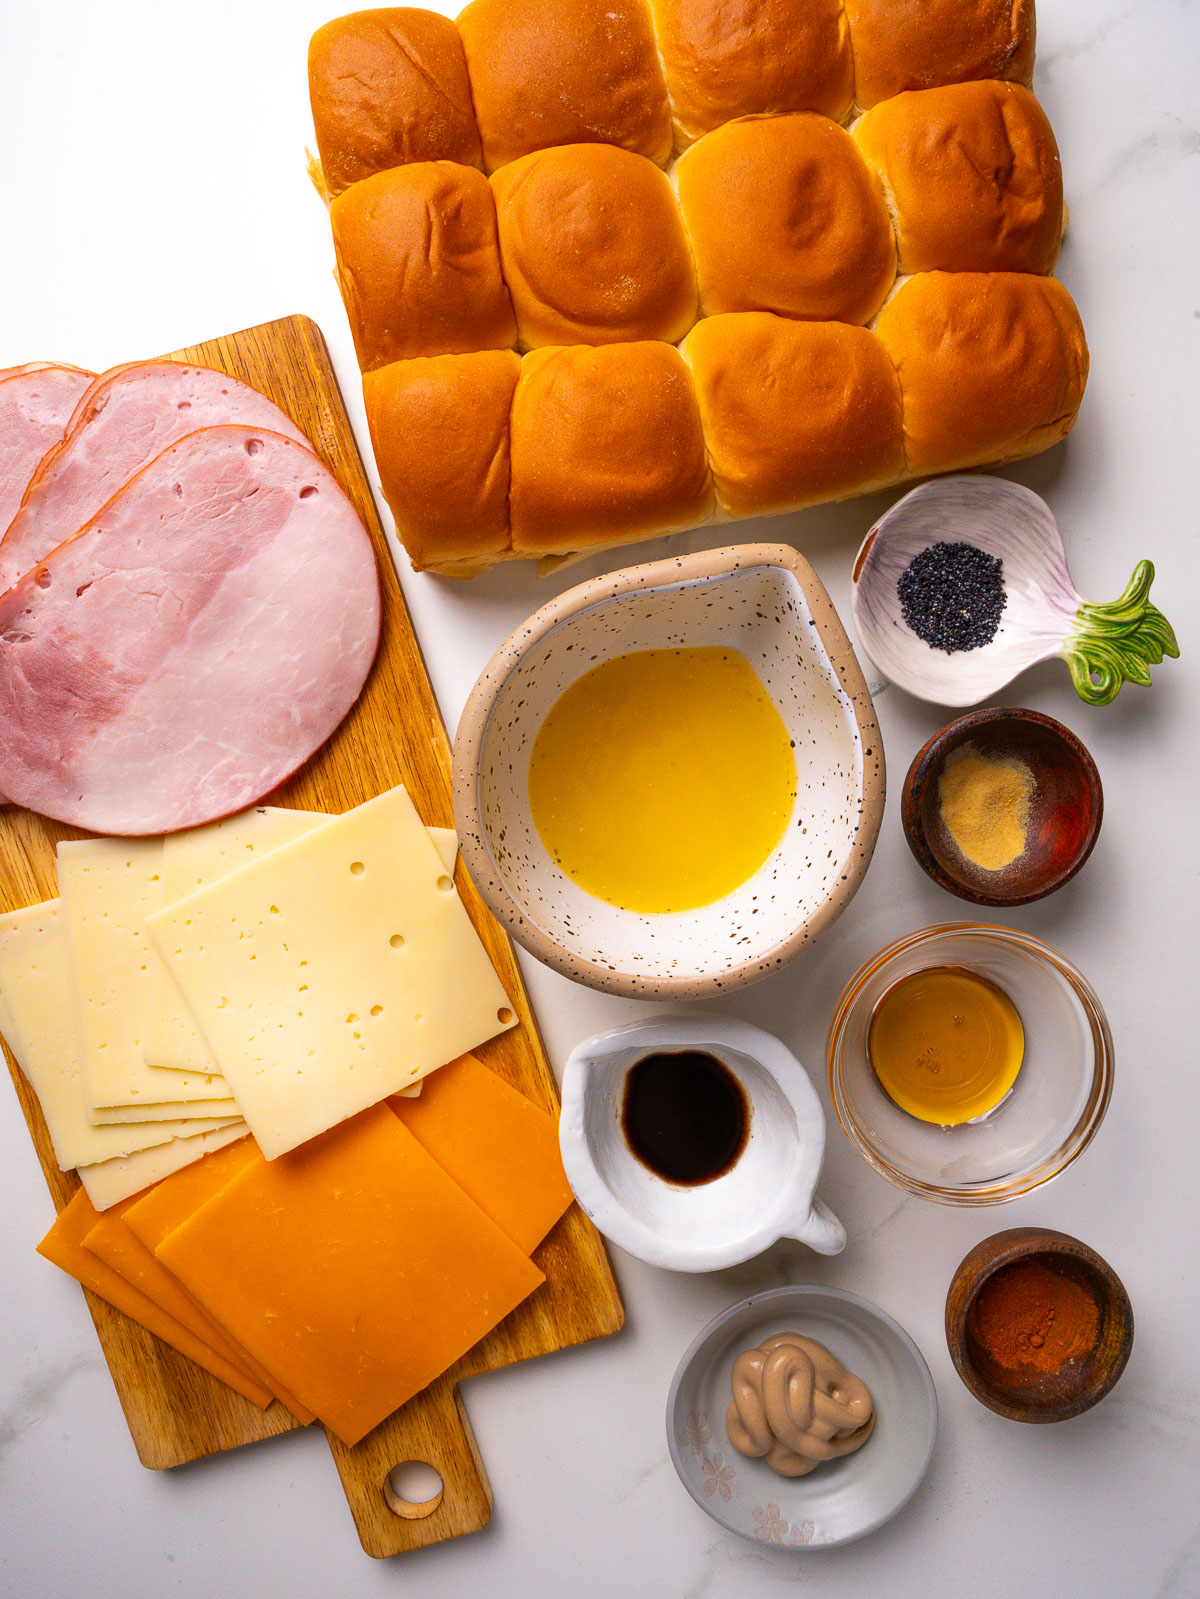
You’ll need just a few pantry staples and quality deli ham to build these sliders.
Sliders
- Sweet Hawaiian rolls: a 12-pack slab of soft, slightly sweet Hawaiian sweet rolls is the classic base. Dinner rolls or brioche slider buns also work.
- Savory ham: thinly sliced deli ham (like Black Forest or honey ham) works well; leftover baked ham (try my crockpot ham and instant pot ham recipes), sliced thin, is even better.
- Swiss cheese: mild, nutty taste, and melts smoothly. The classic ham and Swiss sandwich pairing is a popular choice for a reason.
- Sharp cheddar cheese: I have no issue buying pre-cut slices of cheese as a shortcut.
Butter Glaze
- Unsalted melted butter: the base of the butter mixture. Unsalted lets you control the seasoning.
- Dijon mustard: brings tang and depth. The single most important flavor in my ham glaze recipe, too!
- Worcestershire sauce: adds umami most people can’t quite identify but would miss if it was gone.
- Honey: a hint of sweetness that balances the mustard and salt.
- Onion powder: savory background flavor without raw chunks.
- Poppy seeds: they toast as the sliders bake and add nutty flavor and texture.
- Cayenne pepper: optional, for a gentle background heat.
- Kosher salt: brings everything together.
Full recipe quantities listed in the recipe card at the bottom of the article.
Variations and Substitutions
Easy ways to make this cheese sliders recipe your own:
- Use leftover ham: sliced leftover holiday ham is even better than deli ham. A great way to use up glazed ham the day after Easter or Christmas.
- Different cheeses: provolone, smoked gouda, pepper jack, or mozzarella all melt beautifully. Stick to two layers of cheese around the ham.
- Other meats: swap ham for roast beef, smoked turkey, or crispy bacon.
- Hawaiian ham version: add a thin pineapple ring under each ham slice for a sweet-savory twist.
- Spice level: skip the cayenne for kid-friendly, or add a teaspoon of hot sauce to the butter mixture for more heat.
- Mustard swap: grainy or whole-grain mustard adds texture. Yellow mustard is milder.
- Roll substitutions: dinner rolls, brioche buns, or pretzel rolls all work. Adjust bake time slightly if buns are bigger.
Grab These Tools
Just a few basics make assembly fast and easy.
- 9×13 baking dish: the perfect size for one 12-pack slab of Hawaiian rolls.
- Parchment paper: prevents sticking and makes cleanup easy.
- Long serrated knife: needed to slice the slab of rolls horizontally without crushing.
- Small whisk: blends the butter mixture smoothly.
- Pastry brush: for painting the glaze evenly over the tops.
- Aluminum foil: covers the dish for the first ten minutes of baking.
How to Make Ham and Cheese Sliders: An Easy Guide
This easy recipe comes together in about 30 minutes from start to finish. The order of operations is what makes the difference.
Slice the Sweet Hawaiian Rolls
Preheat the oven to 350°F and line a 9×13 baking dish with parchment paper. Keep the rolls connected as one slab. Use a long serrated knife to slice horizontally through the middle in one smooth motion.
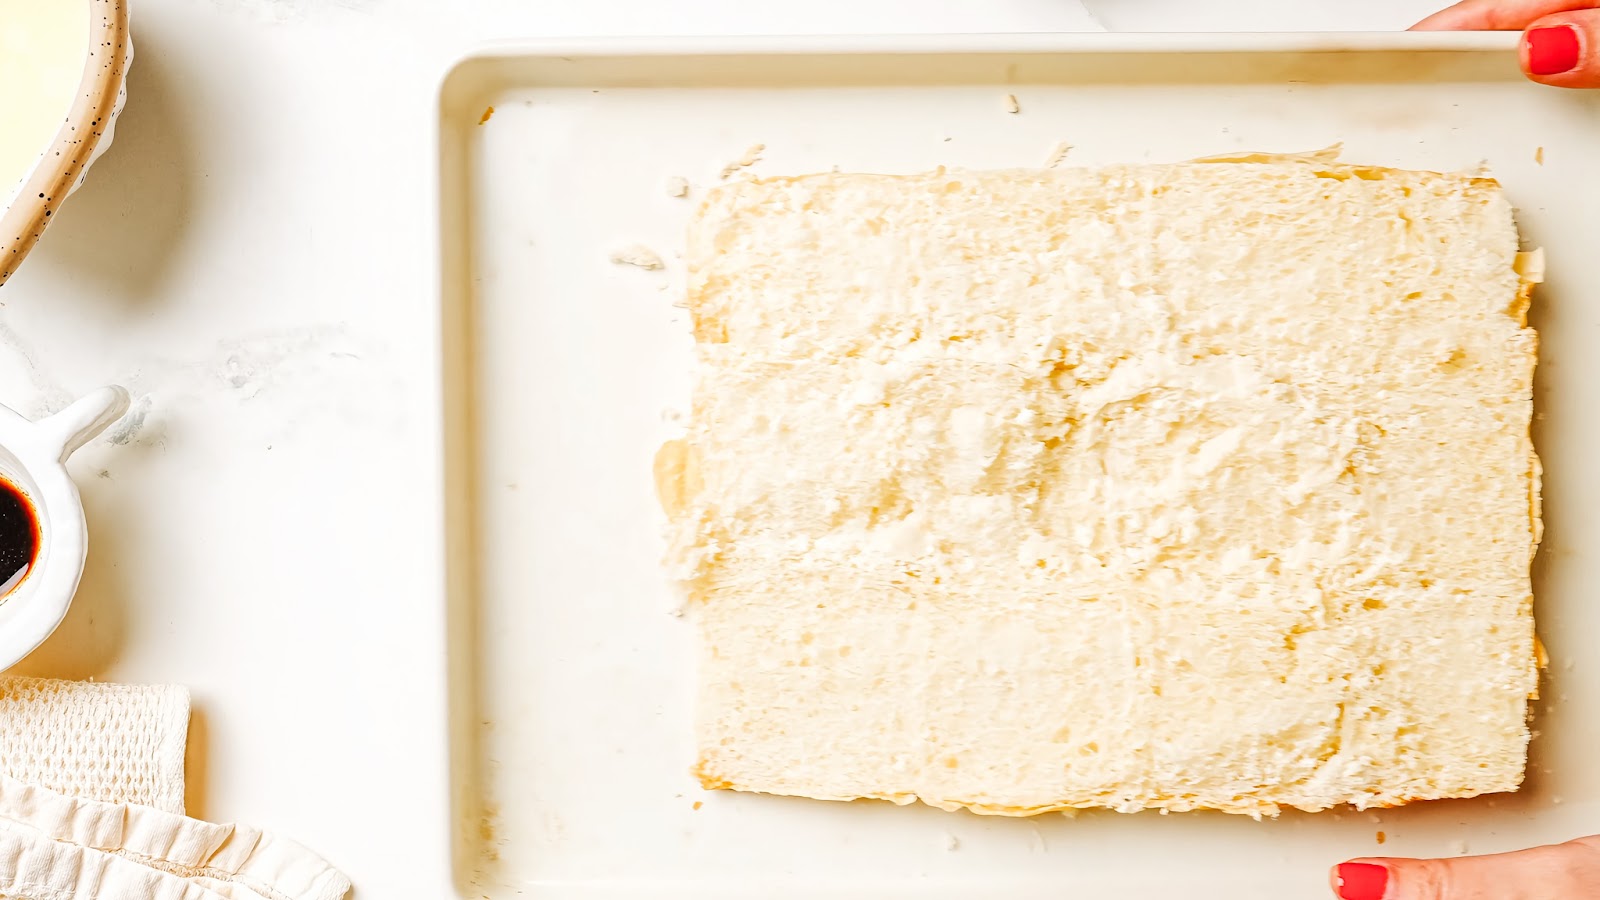
Pre-Bake the Bottom Buns
Place the bottom buns in the parchment-lined baking dish. Bake for five minutes at 350°F until lightly golden. This crisps and dries the surface so the buns don’t go soggy under the cheese and ham.
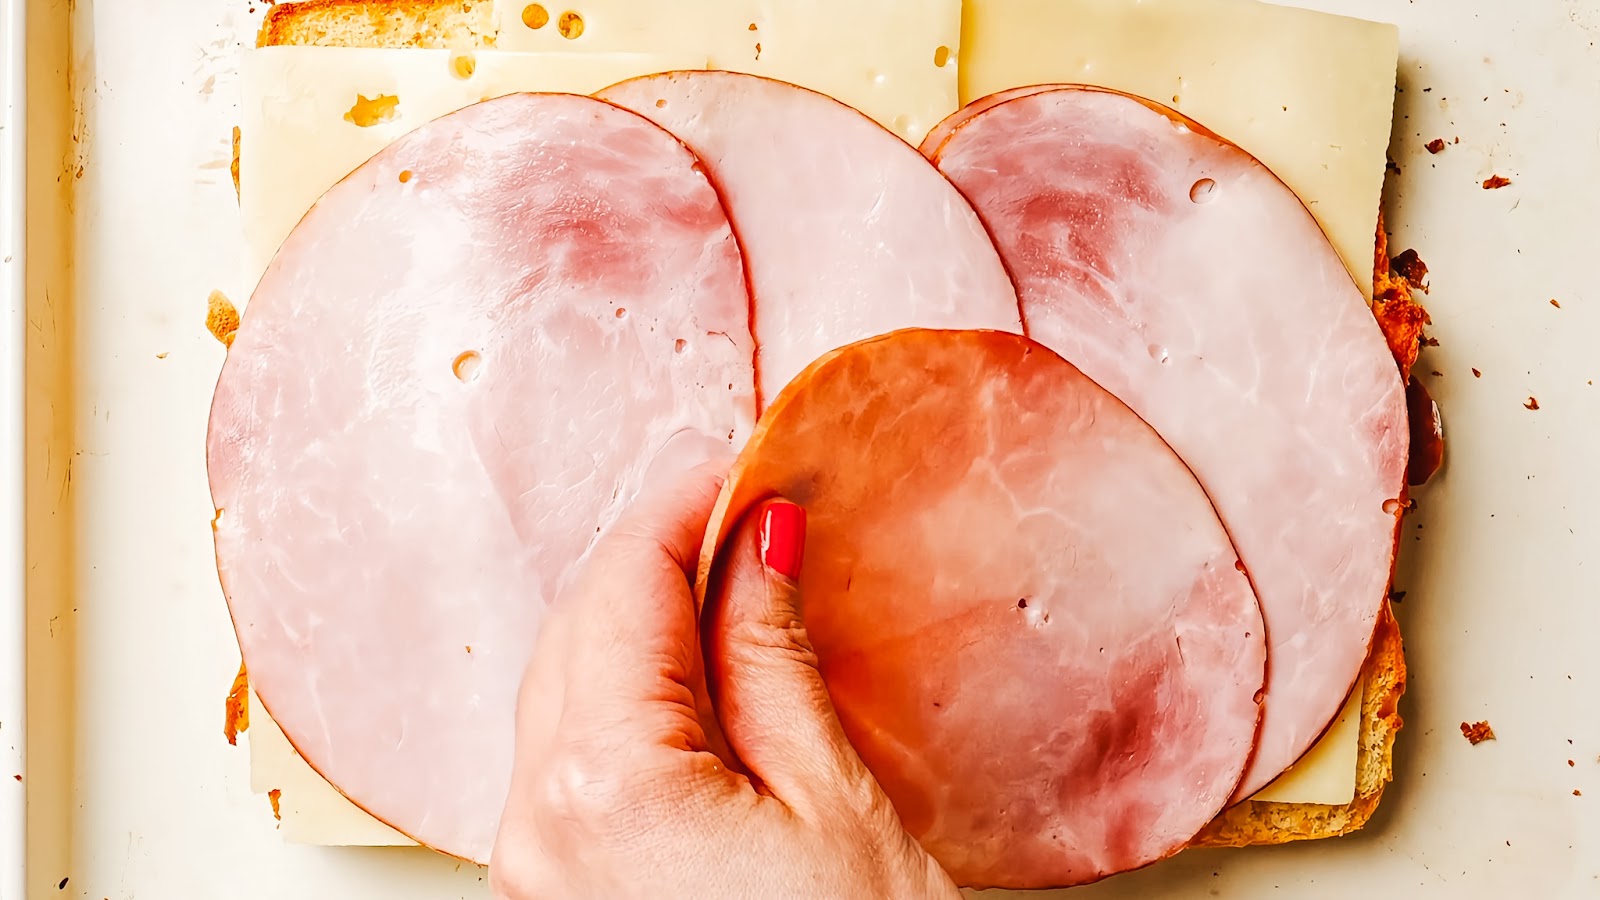
Layer the Cheese and Ham
Pull the bottom buns out of the oven. Lay slices of Swiss cheese over the warm bread first. Layer the deli ham on top, slightly folded for height. Finish with a layer of sharp cheddar slices, then place the top half of the rolls back over.
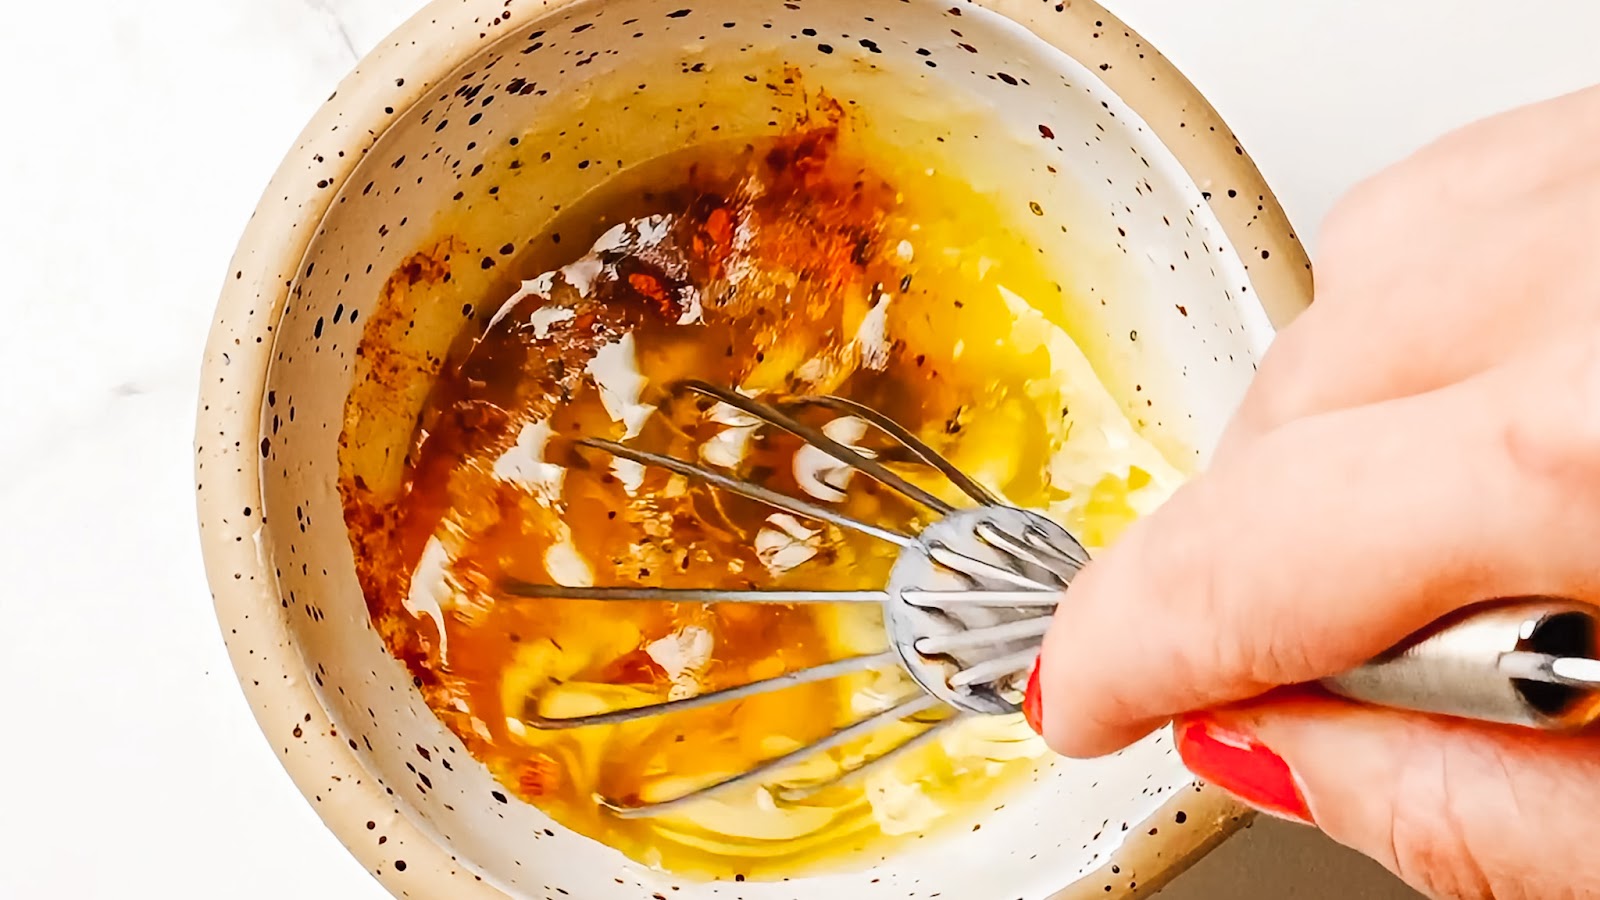
Whisk the Butter Mixture
In a small bowl, whisk together the melted butter, Dijon mustard, Worcestershire sauce, honey, onion powder, poppy seeds, kosher salt, and cayenne. Whisk until everything is fully combined and glossy.
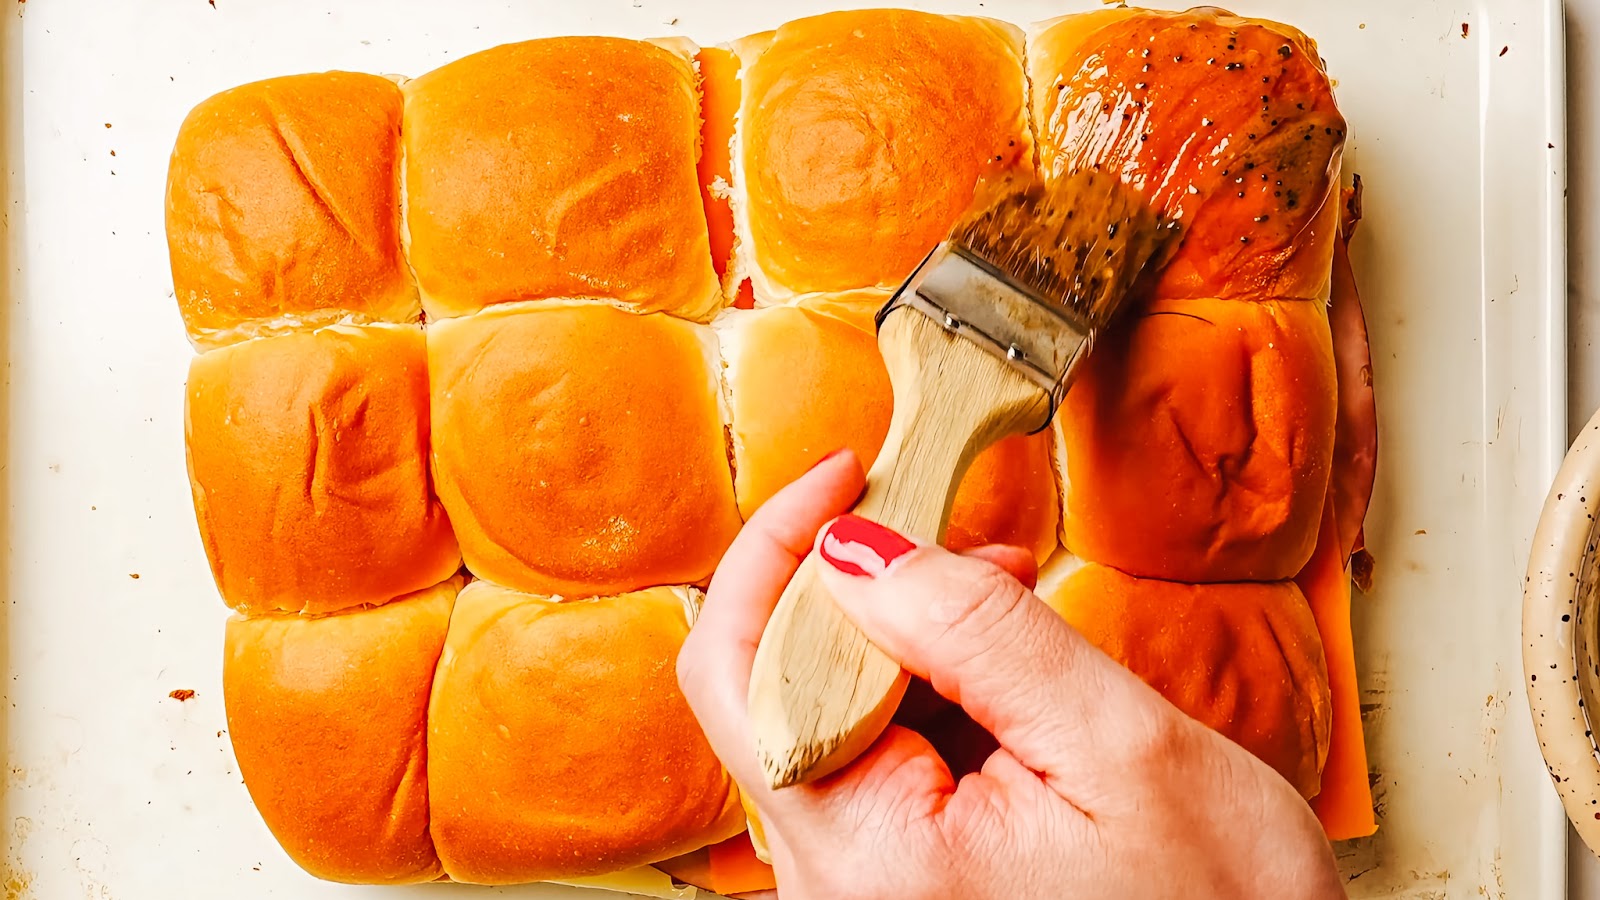
Brush and Bake
Brush the butter mixture generously over the tops of the rolls. Get every surface, including the sides where the rolls separate. Cover the baking dish tightly with foil.
Bake covered for 10 minutes so the cheese melts evenly. Uncover and bake another 3 to 5 minutes until the tops are deep golden brown. Watch closely so the poppy seeds don’t burn. Let the sliders rest 5 minutes before slicing between the rolls.
5 Common Mistakes When Making Ham and Cheese Sliders
Here are the most frequent mix-ups to avoid when making ham and cheese sliders:
- Skipping the bottom bun pre-bake: this single step is what separates great sliders from mushy ones. Five minutes of dry oven heat builds a moisture barrier the melty goodness can’t soak through.
- Slicing the rolls apart: the rolls need to stay connected as one slab so they bake evenly and hold the layers together. Slice horizontally only, in one smooth motion.
- Putting cheese only on one side of the ham: two layers of cheese around the ham is what creates the gooey pull when you bite in. Layers of swiss cheese on the bottom of the ham, sharp cheddar slices on top.
- Skimping on the butter mixture: brush it generously, including down the sides where the rolls separate. This is where the flavor lives.
- Baking uncovered the whole time: the tops will burn before the cheese melts. Cover the pan with foil for the first 10 minutes, then uncover for color.
Make Ahead and Storage
These ham cheese sliders are made for prep-ahead party food.
Make Ahead
- Assemble unbaked: build the sliders fully (including pre-baking the bottom buns), wrap tightly in plastic wrap, and refrigerate up to 24 hours.
- Glaze right before baking: hold off on the butter mixture until you’re ready to bake so the tops don’t go soggy.
- Add 5 extra minutes: if baking from the fridge, tack on 5 minutes to the covered bake time.
Storing Leftovers
- Best fresh: sliders are at their peak within 2 hours of baking.
- Refrigerator: wrap leftovers loosely in plastic wrap or foil. Keep in the fridge up to 3 days.
- Don’t seal tightly: a little airflow keeps them from steaming and going soggy.
Freezer
- Assembled, unbaked: wrap tightly in plastic wrap and foil, then freeze up to 1 month.
- Bake from frozen: add 10 to 15 minutes to the covered bake time and check that the cheese is fully melted.
- Glaze fresh: wait to brush on the butter mixture until just before baking.
Reheating Ham and Cheese Sliders
- Oven (best method): wrap loosely in foil and reheat at 300°F for 8 to 10 minutes.
- Air fryer: 300°F for 4 to 5 minutes brings back the crisp top without drying the cheese.
- Skip the microwave: high heat turns the cheese rubbery and the rolls leathery.
How to Serve This Ham and Cheese Sliders Recipe
Hot from the oven is the only way. Serve with a few simple sides that complement the rich, melty filling.
Toppings and Dipping Sauces
- Pickles: dill spears or bread-and-butter pickles cut the richness.
- Extra Dijon or grainy mustard: for dipping on the side.
- Hot sauce: a few dashes for anyone who wants more kick.
- Honey mustard: a quick mix of Dijon and honey for dunking.
Dishes to Serve with Ham and Cheese Sliders
- Best Ever Homemade Tomato Soup for dunking sliders right into the bowl.
- Broccoli Cheddar Soup for a heartier soup-and-sliders combo.
- World’s Best Macaroni Salad for the classic potluck pairing.
- Crispy Baked Buffalo Wings to round out a game day menu.
- Game Day Menu to turn this into a full party platter for a crowd.
How to Make the Best Ham and Cheese Sliders: Final Notes + Secrets
Here are the small choices that make these ham and cheese sliders better than the version on every other site.
- Worcestershire is the secret weapon: it’s the umami booster nobody can name when they ask what’s in the glaze. Don’t skip it.
- Poppy seeds toast as they bake: they go from raw and gritty to nutty and aromatic in the oven. They’re not just decorative.
- Foil first, then color: covered baking traps steam to melt the cheese evenly and keep the buns soft. The last few minutes uncovered build that golden, glossy top.
- Rest before slicing: 5 minutes off-heat lets the cheese set just enough. Cut too soon and everything slides apart.
FAQs About Ham and Cheese Sliders
Just skimming through? Here are some quick answers to the commonly-asked questions.
Soggy sliders happen when moisture from the ham and cheese soaks into the sweet rolls. The fix is pre-baking the bottom buns for five minutes before adding any filling. That dry, lightly golden surface acts as a moisture barrier.
Yes. Assemble the sliders fully (including the pre-bake) and refrigerate in an airtight container (or in the pan, covered with plastic wrap) up to 24 hours. Brush on the butter mixture right before baking to keep the tops from going soggy. Add 5 extra minutes to the covered bake time.
Swiss cheese is the classic for ham and Swiss sliders because it’s mild, nutty, and melts smoothly. Sharp cheddar on top adds tang and browns under the glaze. Provolone, smoked gouda, and pepper jack also work well.
Absolutely. Leftover baked ham, sliced thin, is even better than deli ham because it’s more flavorful. This is one of my favorite ways to use up holiday ham the day after Easter or Christmas. Slice it as thinly as you can.
Yes. Assemble fully without the butter mixture, wrap tightly in plastic wrap and foil, and freeze up to 1 month. Bake from frozen, adding 10 to 15 minutes to the covered bake time. Brush on the glaze just before baking.
Soy sauce or tamari are the closest substitutes for Worcestershire because they bring the same savory umami depth. Use the same amount called for in the recipe. Avoid leaving it out entirely because the flavor falls flat without it.
Use a long serrated knife and slice horizontally through the middle of the slab in one smooth motion. Keep the rolls connected like a hinge so the layers stay aligned. Avoid sawing back and forth, which crushes the soft bread.
The oven and air fryer both work well. Wrap loosely in foil and reheat in a 300°F oven for 8 to 10 minutes, or air fry at 300°F for 4 to 5 minutes. Skip the microwave because it makes the cheese rubbery.
Yes. Double the recipe and bake in two 9×13 baking dishes side by side. Keep the same temperature and time. If your oven is full, you may need to add a minute or two to the covered bake time. Sliders are perfect for game days and potlucks.
Other Easy Party Recipes You’ll Love
- Crispy Baked Buffalo Wings
- Mango Habanero Wings
- Sticky-Spicy Korean Chicken Wings
- Game Day Menu
- Honey BBQ Baked Chicken Drumsticks
- World’s Best Macaroni Salad

Perfect Ham and Cheese Sliders (with Buttery Honey Dijon Glaze)
Video
Ingredients
- 1 package sweet Hawaiian rolls 12 count
- ¾ lb thinly sliced deli ham
- 6 slices Swiss cheese
- 6 slices sharp cheddar cheese
Butter Glaze
- 6 tbsp unsalted butter melted
- 1 tbsp Dijon mustard
- 1 tsp Worcestershire sauce
- 1 tsp honey
- ½ tsp onion powder
- ½ tsp poppy seeds
- ¼ tsp cayenne pepper optional
- 1 pinch kosher salt
Instructions
- Preheat oven to 350°F. Line a 9 x 13 inch baking dish with parchment.
Prep the Rolls
- Slice the entire slab of rolls in half horizontally (keeping them connected).
- Place the bottom half in the dish and bake for 5 minutes. This crisps the surface slightly to prevent a soggy middle.
Make the Glaze
- While bottoms are toasting, make the glaze. Whisk together melted butter, Dijon, Worcestershire, honey, onion powder, poppy seeds, cayenne (if using) and salt.
Assemble the Sliders
- Layer the Swiss cheese, all the ham, then the cheddar cheese, overlapping the slices. Cover with the top slab of rolls.
- Pour over the tops and use a pastry brush to spread it evenly. If any pools to the sides, that’s fine.
Bake
- Cover tightly with foil and bake for 15-20 minutes. Check if cheese is melted. If not, cover again and bake for another 5-10 minutes, checking occasionally. *See notes.
- Once cheese is melted, remove foil and bake another 3 to 5 minutes until golden, watching closely because the tops get dark fast.
- Use a sharp knife to slice between the buns. For an epic cheese pull, let them cool for 5 minutes without separating them so the cheese melts together again. Serve warm.
Notes
Nutrition
Nutrition information is automatically calculated, so should only be used as an approximation.


The honey butter glaze is genius — that’s what takes these from regular sliders to addictive. Made a batch for movie night and my husband ate four. Will be on repeat for sure.